
This is something I have been trying to pluck up the courage to try for some time, a little pot of photo-emulsion came with a screen-printing kit I bought at least a year ago but until last week I kept putting it back in the cupboard not quite sure what to do with it. The emulsion allows you to turn a black and white photo (printed on acetate) or drawing into a screen ready for printing.
After some internet research I made an “exposure unit” – a 400W light suspended from a frame of push-fit plastic pipes, all strung together with lengths of ribbon liberated from the cat’s toy box (sorry Pickle). All very Blue Peter* 🙂
Several tests later, I discovered that with my light set up, the emulsion only needed 60 seconds to harden, just a few seconds longer and the screen was ruined and I had to start again. Needless to say I spent a lot of last week cleaning my screens!
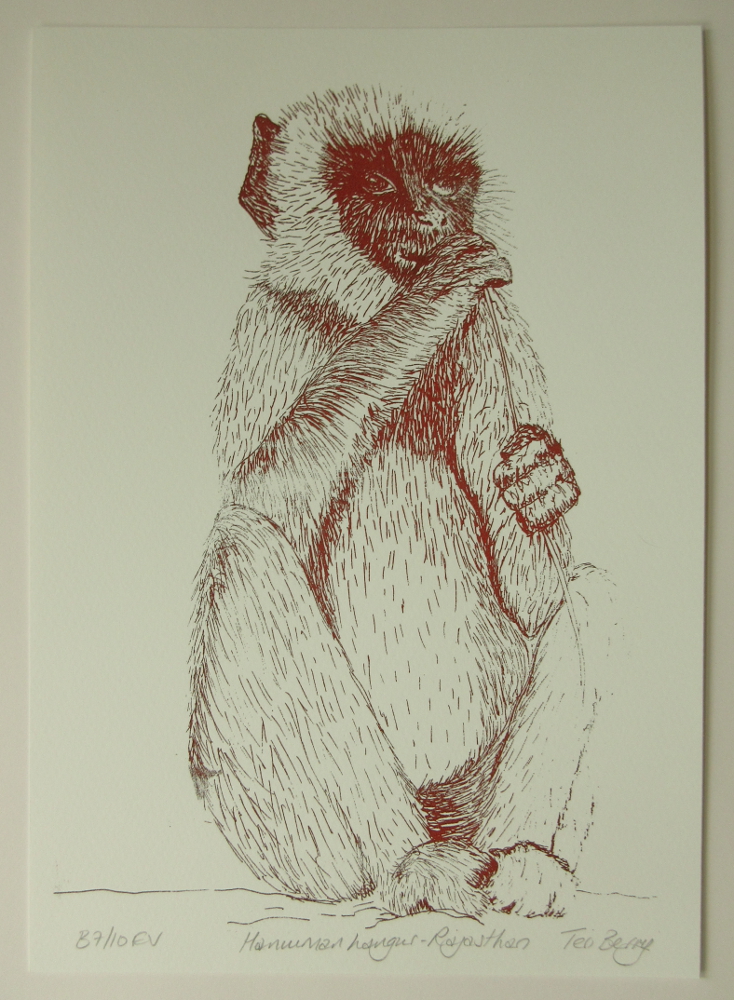
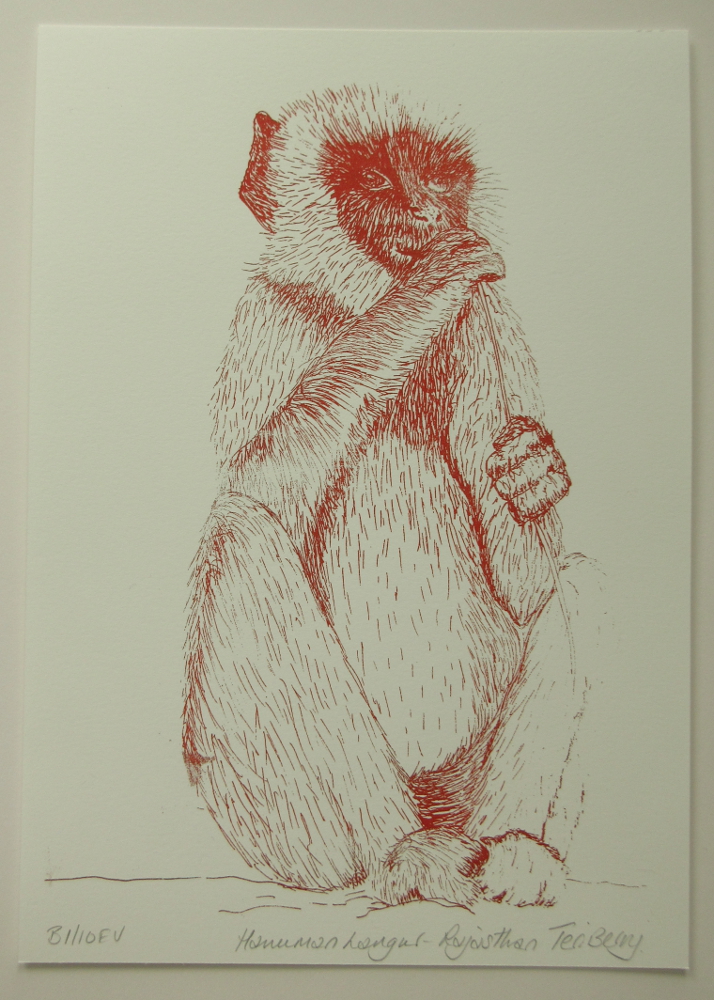
I hope you think the results were worth the effort? These prints are quite monochromatic and not my usual style at all, I wonder if my colour choices were being influenced by the snowy landscape outside?
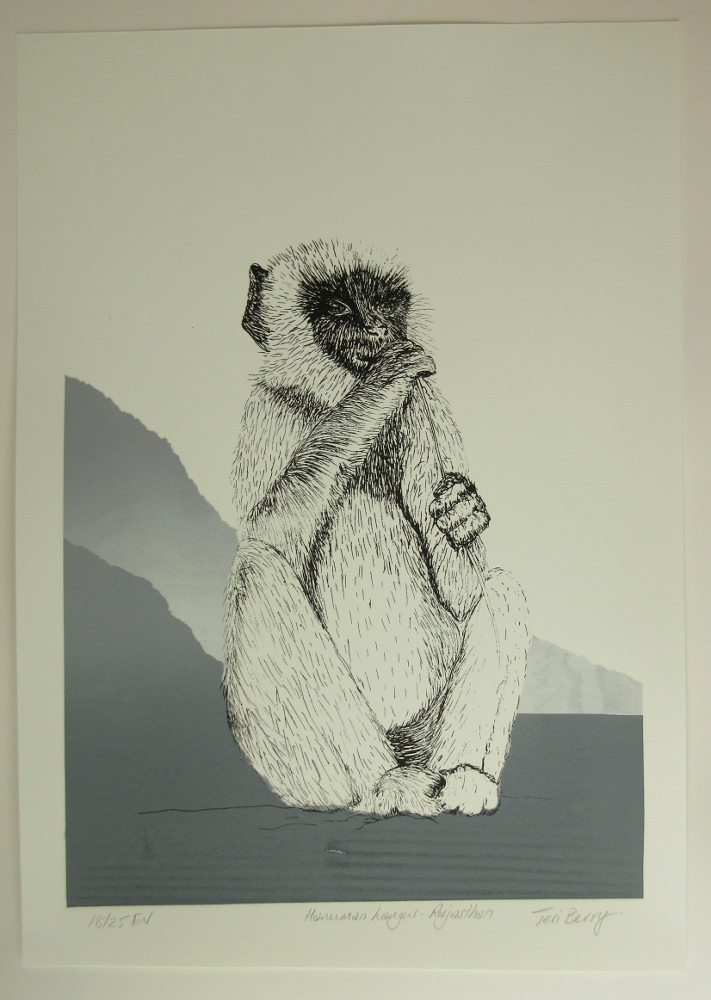
The backgrounds are different on each print.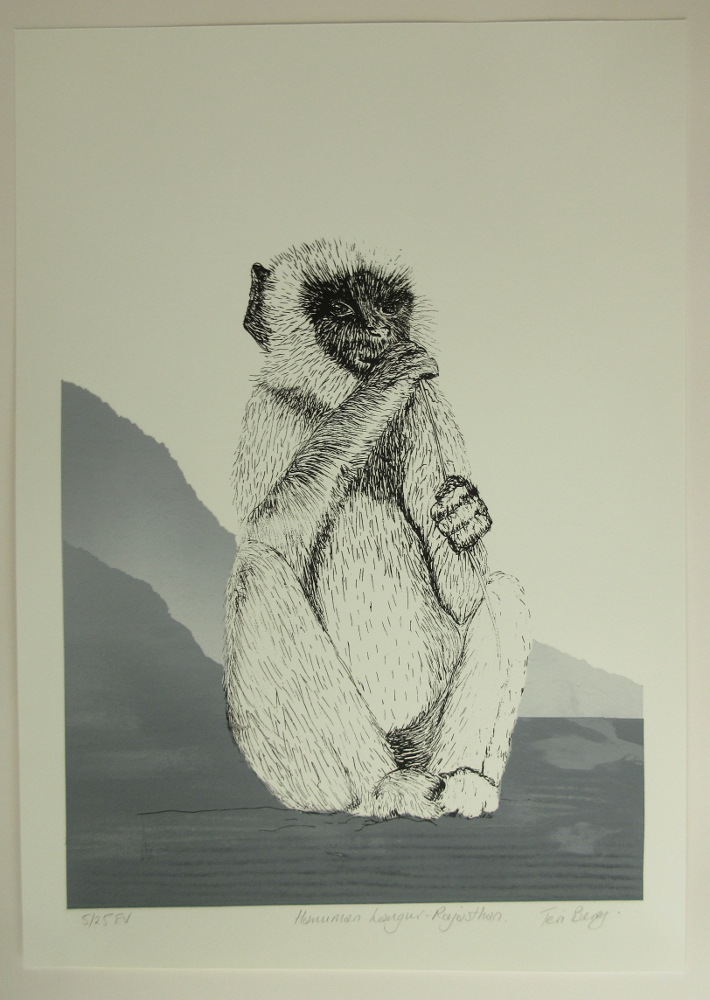
Unable to resist adding some colour, I added some red ink to the last few pulls so these prints migrate through black and sepia to red.

Now I am just waiting for an order of mount (mat) boards to arrive so I can get them ready for sale, if the boards arrive in time I might be able to include a few of them in the Oxmarket Gallery exhibition.
I hope you have been having a great week and the weather in your part of the world isn’t causing too much disruption.
*Blue Peter is a UK children’s TV show famous for having segments where they demonstrated how you could turn empty bottles, cereal boxes and other everyday items into the most desirable, home-made toys and gifts.
I’m glad you had the courage to give this a try and persist. A very interesting experiment. I’ve seen this but never quite understood the process. Kudos to you! Good luck at the exhibition.
Thank you Marilyn, there are lots of blogs suggesting how to find the exposure time for your set up and although they are simple enough to do I have to say I think there is a better way. Will have a think about writing a post explaining but removing the emulsion from your screen afterwards is such a pain I’m not sure I can face it!
Wonderful results! Yes, do exhibit him – he’s very cute.
Thank you ladies, fingers crossed the mount board arrives today 🙂
What a great print Teri. I have only done the photo emulsion one time when I was 18 or 19. Can’t remember now how I did it. I usually use the prepared EZ screens that already have the photo emulsion stuff in them and you don’t have to clean them, you just cure them and keep them. They last for a while. I am sure cleaning the screens is a big pain for sure.
Good luck with your sale and exhibition.
Thanks Ruth, I remember discussing those with you in your printing on wool class, I still haven’t found a UK/EU supplier and to be honest coating the screen is the easy bit, working out the exposure timing is a pain but I think you have the same situation for the EZ screens, but not needing to reclaim the screens after your print run is appealing! 🙂