Category Archives: tutorials

Free Video Tutorials!

Covid has had a negative impact on so many areas of our lives but the joy of human ingenuity means that the solutions we find to these unwelcome problems can lead to some unanticipated benefits.

Normally the International Feltmakers Association (IFA) holds their AGM as an “in person” meeting in the second quarter of the year. This year I was very much looking forward to spending a few days with lovely, like-minded fibre enthusiasts at Felletin in France, the workshops organised by the IFA are always excellent and you are guaranteed to make new friends at the social events.

Then Covid raised its ugly head and a plan B was needed….

This year, for the first time, the IFA has commissioned a series of free videos, for their members’ exclusive viewing, from four internationally renowned feltmakers. We will have opportunity to “meet” them live during the AGM weekend in advance of the video launch on YouTube.  

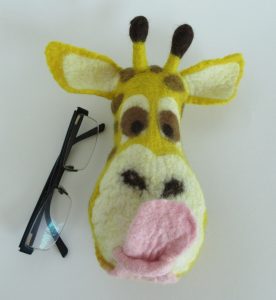
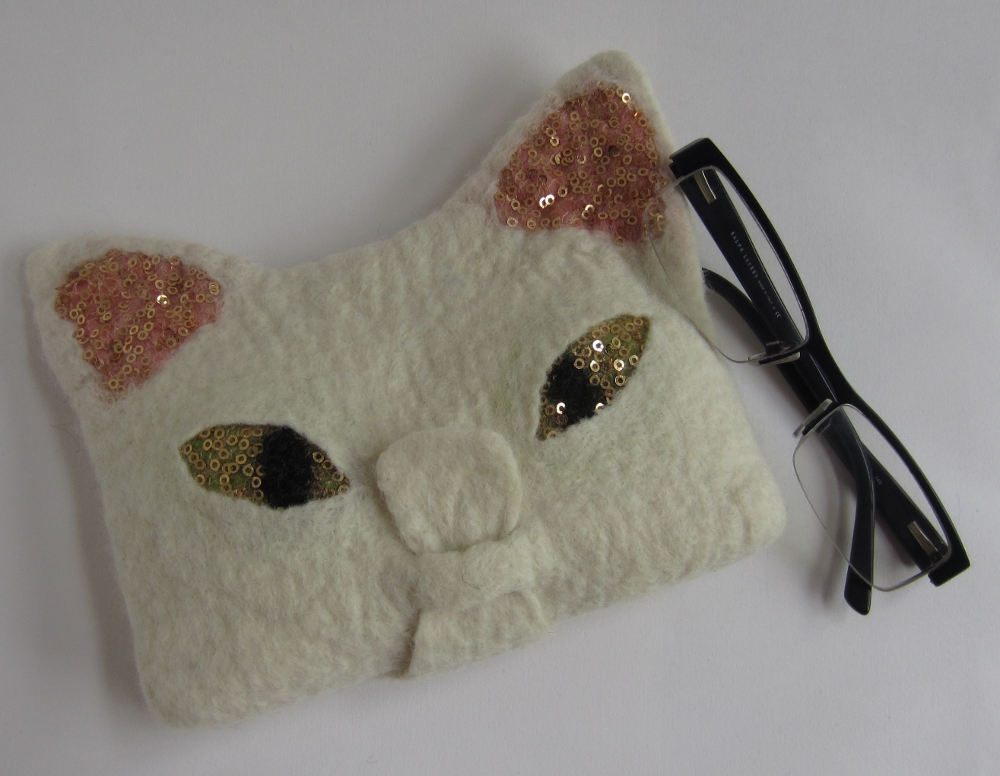
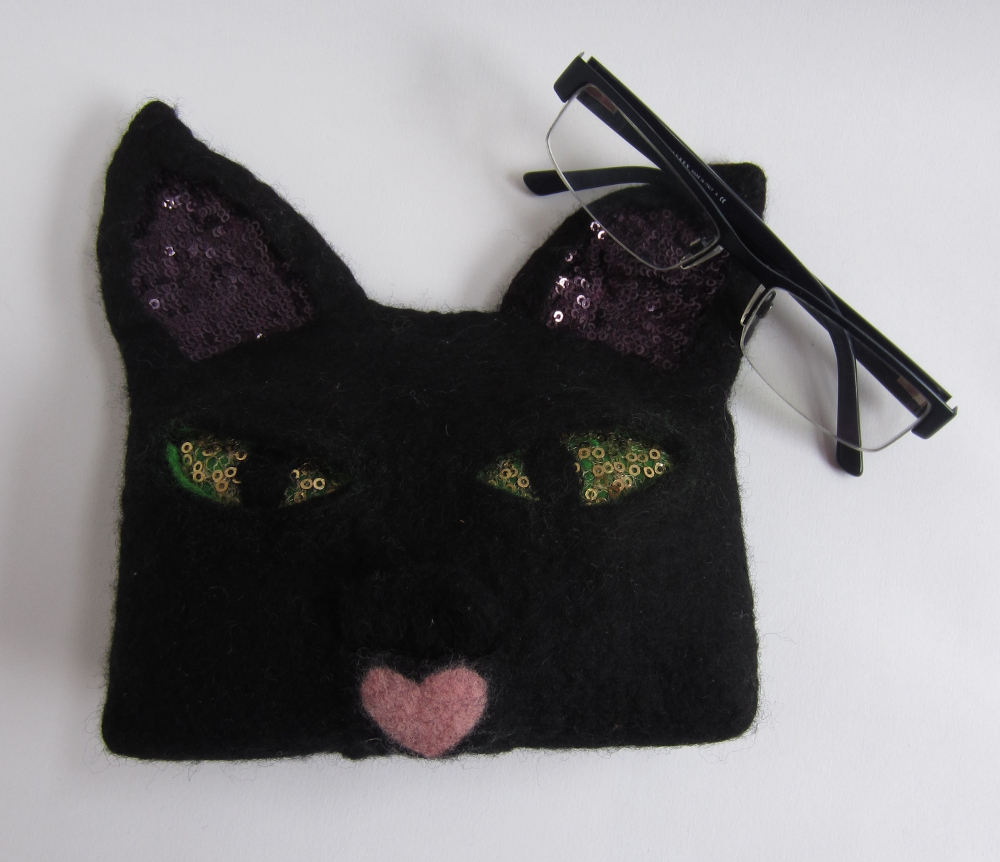
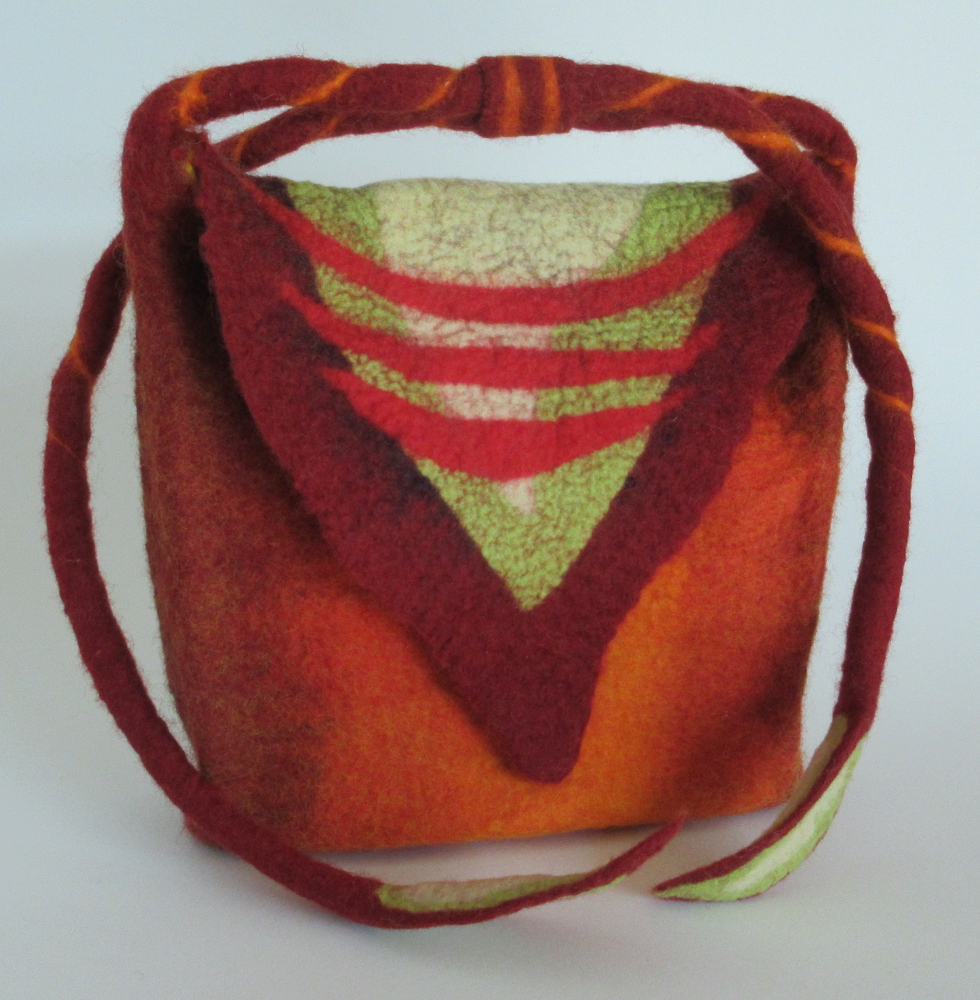
If you are not already a member I can thoroughly recommend taking out membership, especially if you are based in the UK, as membership includes free Public Liability Insurance among other benefits. This link will take you a page detailing more of the benefits of membership and at the bottom is a button where you can sign up.

Below is an outline of the 4 tutors taking part, their bios and what they plan to share. The AGM will be over the weekend of 27/28th March 2021.

Nancy Ballesteros 

Nancy lives in Australia and is artistic director and founder of Treetops Colour Harmonies. For over thirty years she has immersed herself in the science and study of wool, felting and colour theory. As an international tutor, she specialises in Nuno felt techniques and her recent focus is applying Fibonacci’s Design principles to feltmaking. 

How Fibonaccis Design Principals can help Reconnect your Creativity

There is a Natural Rhythm in things we consider beautiful. Leonardo Fibonacci, a 13th century Mathematician wrote about it, Leonardo Da Vinci used it when he painted Mona Lisa.  The Golden Ratio, Fibonacci’s numbers… how could this help your creativity? 

Nancy’s video will explore simple, practical ways to apply this powerful design principle to your felting and no maths is required! 

www.treetopscolours.com.au 

Nicola Brown 

Three words describe my textile practice: simple, natural, crafted. 

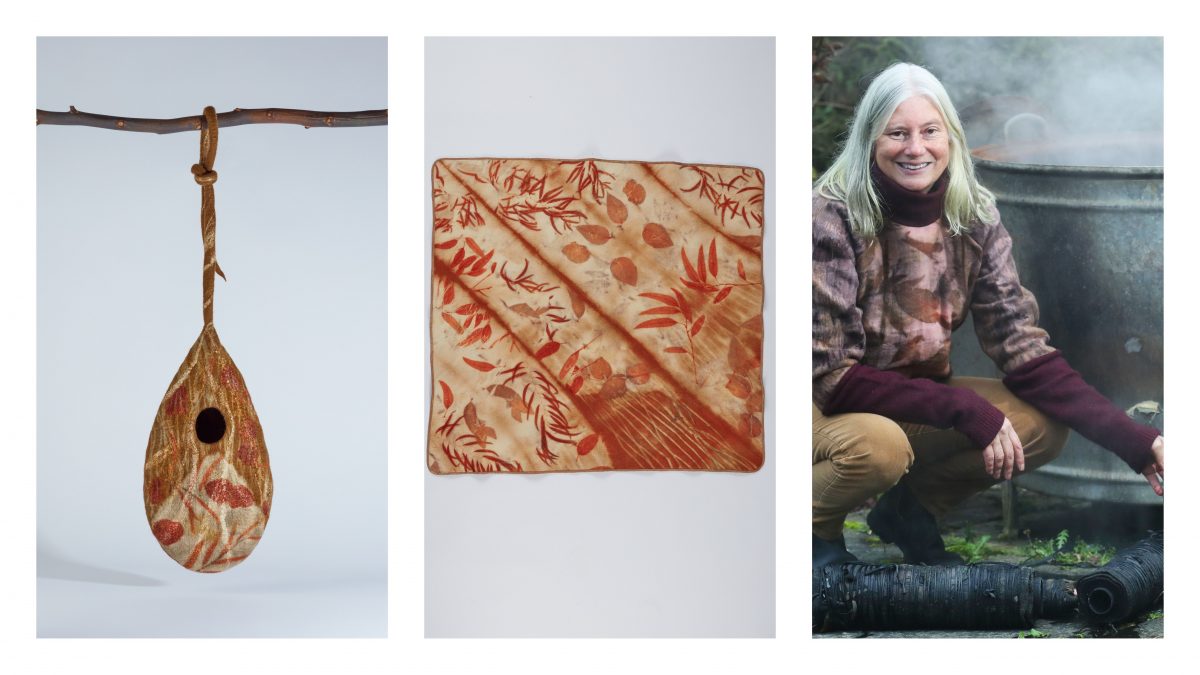
Since my introduction to felt and eco printing I’ve been on an exciting journey of discovery. Over time the sustainability of my work and teaching has deepened leading to new connections online and in person with like-minded individuals. The advent of Covid-19 means that keeping safe, staying local and living in harmony with the environment has never been more important. 

For ReConnect I will share a series of 3 videos: where this journey began, an introduction to eco printing and an eco print/natural dye tutorial using locally sourced vegetation. 

Fiona Duthie  

Fiona Duthie is a Canadian feltmaker recognised for her dynamic, sculptural clothing and artwork. Fiona strives for excellence in design and technique, while furthering the medium of felt through the use of new material combinations. 

Creative Sparks looks at reconnecting with simple techniques and familiar materials in a playful and exploratory way. Perfect for uplifting us out of a creative slump, or to refresh our existing design process. We explore sixteen creative prompts while making a beautiful, harmonious set of felt tiles. Each prompt can be taken beyond this project and used to add creative sparks to any felt project. 

www.fionaduthie.com 

Judit Pócs 

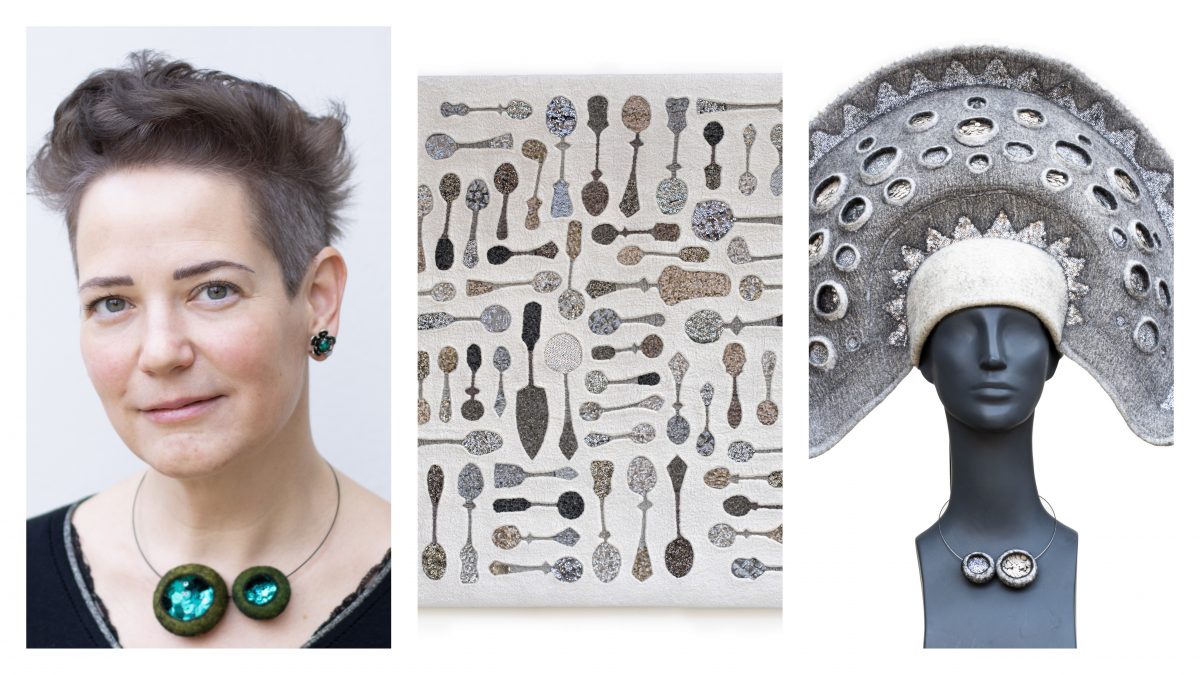
Spatiality, Material Use, Recycling 

I’m a Hungarian felt artist, who experiments a lot to develop felt in 3D and to achieve new, interesting surfaces. 

It has always been a challenge for me to see how felt can be transcendent, whether stone-like or metallic. I find it very exciting when a particular substance goes beyond itself. When designing a surface, I usually push these boundaries. 

Recycling is also a feature of my work, I often cut old, used clothes and incorporate the pieces into my wall hangings and other creations and more recently I also recycle coffee capsules into my works.  

www.pocsjuditstudio.hu 

Bags Galore!

Over the past year I have been working on a series of bag tutorials for the Felting and FIber Studio online bag class that will begin on May 24th. I am so excited this long-awaited class is almost here! ?

The first week will cover the techniques to make a spectacles/phone/pencil case that uses only felt for the closure (no buttons or magnetic snaps), to date most of my pouches have been cats with bling, so this weekend I have been making a giraffe to illustrate that you can choose any animal you wish, it could be beloved pet, a friend’s pet (they make very personal gifts), a wild animal, or even an imaginary monster, the choice is yours! 🙂

In each case below, the tongue of the animal forms the tab that closes the flap over the pouch opening.


The second week will be about making a bag with adjustable straps and internal pockets, adding a magnetic closure and how to shape the bag so it has a flat base that will sit on the ground without falling over.


Finally in week 3 we will look at how make a backback with large internal compartments and multiple pockets, choosing the hardware and making adjustable straps from either canvas webbing or wool. Consideration will be given on how to make large bags durable enough to carry a heavy weight without being heavy themselves.

The red backpack is my bag, it gets daily abuse from me and this is what it looks like after 6 months, they are pretty sturdy bags!

The pale green/yellow slit you can see on the back of the green backpack is a large pocket, I will add a zip when I get a spare hour 🙂

The great benefit of online classes is that you can work at your own pace and at times that fit in around you and your other commitments. Although the class nominally runs for 3 weeks, the forum will be open and I will be there to offer support  and answer questions for an additional 2 weeks in case you are unable to make a bag one week or would like to make more than 3 bags and share photos of your wonderful creations with the rest of the class. 🙂

The PDF tutorials from each week will be yours to keep after the class has finished.

For more information and to register your interest in the bag class please follow this link and complete the contact form at the bottom of the page. I will be in touch by email just before registration opens at the beginning of May.

Book Resist Tutorial

Following on from the Q1 Challenge posted by Ruth from the Felting and Fiber Studio, there was some discussion on the forum about what a “book resist” is, I’m sure these resists go by a variety of names but I think “book resist” is a pretty apt description as the “pages” of the resist do look a lot like a strangely shaped book. This post is a description of how I like to work with this style of resist but if you have any tips or alternative ways of working please leave a comment below, I’d love to hear from you.

Getting Started

You will need some flexible plastic sheeting, stiff enough that it will stand up on its own if you hold it by the edge but flexible enough that it will fold in half without breaking.

IMG_5786

I like the plastic that carpets come wrapped in but this isn’t very easy to come by, an alternative are the plasticised (wipe clean) table cloths. As much as I love foam underlay for resists, I find it a little bit thick for this technique, especially if you want to use more than 2 layers, but it will do if you have nothing else.

IMG_5785

Take a sheet of plastic and draw a line down the middle (this is where you will join your layers) then let your imagination go wild and draw out the template on one side of your line. I have added some photos of the resists and corresponding felt structures at the end of the post if you need some ideas to get you started.

IMG_5791

IMG_5792

Tip – make sure any pointy tips are rounded, if you don’t, they will poke through the felt and create a hole.

Tip – try to avoid putting wide sections on the end of narrow stalks, its not impossible, but it will make it harder to get your resist out.

Tip – remember the felt around the middle of your resist will open out to form a space. This can be needle-felted together at the firm prefelt stage if desired.

If you want a radial sculpture where all the arms are the same, fold your plastic in half along the straight line and trace your design onto the other side.

IMG_5793

IMG_5794

Stack additional sheets of plastic under your design, if you want your sculpture to have 7 or 8 arms you will need 4 sheets of plastic, if you want 9 or 10 arms you will need 5 sheets.  Pin them altogether then sew along the line down the middle. You can use a sewing machine if you wish, but set your straight stitch to long so as not to perforate the plastic too much, as this could make it easy to tear when you come to remove the resist.

IMG_5795

IMG_5796

Tip – if you find it hard to push the needle through the plastic, gripping the needle with a pair of pliers might help.

Tip – if you want an odd number of arms in your sculpture keep two of the felt leaves together while you felt over them. Similarly, if you think you would like to use the same resist shape for making several sculptures but with different numbers of arms, use enough sheets for the largest sculpture and then reuse the same resist but encase 2 or more pages of the resist in wool to reduce the number of arms in your final sculpture.

Cut around your design, through all the layers of plastic.

IMG_5798

IMG_5797

Getting Wet and Woolly!

Start laying out your wool, at least 2 fine layers will be needed, more if you want don’t want your structure to shrink very much or if you want it to be sturdy / functional. I typically use 2 layers for lampshades and 4 -6 layers for more structural sculptures. I like Blue Faced Leicester wool for this type of work but wrote a post on how several different wools behave for small sculptural pieces here if you are interested.

Once you have laid out at least 2 layers (in opposite directions) wet it out.

IMG_5807

IMG_5809

IMG_5810

Then lay a piece of painters plastic (or a strip of plastic bin liner) over at least half the wool then flip over one of your pages.

IMG_5814

IMG_5815

Fold the wool over the edges as you would when working with any resist, being careful to smooth out any folds of wool where you are working on the outside of a curve.

If you need to cut the wool to fold it around an indentation in the resist, avoid cutting the last 1cm / 0.5″, to avoid creating a hole in your wool.

IMG_5816

Then continue laying out your wool over the next 2 “pages” open in front of you (one page will be partially covered by the wool folded over from the previous page). Cover with some decorator’s plastic but before you flip to the next page, go back a page and fold the wool ends over so it is all nice and neat.

IMG_5817 IMG_5818 IMG_5819

Continue laying out wool and flipping pages as you work your way around the resist.

Note: where you have folded the wool over from the previous page of the resist, if the wool is already quite thick, there is no need to add more on the reverse of the page, this usually happens where you have a narrow projection, as on the top of this resist.

Tip – if you are finding your resist is becoming a little lop-sided with a big pile of wool covered pages on one side, flip the first 2 or 3 pages (on the bottom of the pile) over to the other side from underneath. That should even it up and make it easier to lay wool on the remaining pages.

Tip: laying a few strands of wool across the top and bottom joints (where the pages are stitched together) will help prevent holes like this one from opening up when the resist is removed:

IMG_5831

You are now ready to start felting…

Use  a piece of painters plastic to gently rub the surface of each page in small circles, paying particular attention to the edges of the resist. I find going over the entire surface of each page 50 times is enough. The plastic should glide easily over the surface, if it doesn’t add some more soapy water.

Tip – If you are working with lots of pages you might find it helpful to remove the painter’s plastic as you complete each page so you know when you have reached where you started.

Tip – don’t forget to felt the pages at the back, the ones lying face down on the table.

Tip – work your circular motions from the edge of the resist towards the centre, this will help prevent wings / ridges of felt forming on the edge of the template (unless of course that is what you are trying to do!).

Do the “pinch test”, your fibres should be holding together well by now but if not, go through another cycle of rubbing (it may help to add some hot water too).

IMG_5826


Removing the Resist

Now we have to decide where to make a hole to remove the resist. For most templates, a hole near the line of stitching makes it easiest to remove the template but anything is possible! I make my hole just big enough for 2 fingers, the hole will stretch some more as you pull the resist out so don’t make it too big…

IMG_5827

Depending on the shape of your template, ones with long, spidery arms are the most fiddly, you may need to gently gather and work the felt over the resist in order to get it out without stretching or tearing the felt.

Once the resist has been removed hold the felt up to a light and look inside, through the hole where the resist came out, you are looking for any thin spots in the felt. Any holes should be repaired now , before fulling begins, by laying extra fibre over the wool and gently rubbing through some thin plastic until it is well attached. Now you are ready to knead and throw it, stopping every 30 seconds to check the arms of your sculpture aren’t felting together on the inside. This is also the time to start rubbing it in any directions where you want it to shrink and to start shaping it.

Once you are happy with the shape, folds etc. it can be stuffed while it dries.

Variations:

Try adding wings by laying wool off the edge of the resist.

What would happen if you stitch different shaped pages of resist together or stitched them at different positions (not just down the middle)?

How can you fold / shape / manipulate felt pods made from the same resist so that the final sculptures look very different?

Some example resists and their results:

IMG_5843

IMG_2826


IMG_5837

IMG_2895 IMG_3622 IMG_3612 IMG_3643


IMG_5842


IMG_5841

IMG_2872


IMG_5839

IMG_2847


IMG_5838IMG_4030

Stained Glass Felt Hanging

The lovely Ruth Lane from the Felting and Fiber Studio Forum is creating a book of contemporary designs and posted a request for interpretations of a couple of designs in different art forms, this is my interpretation of the Nature design in nuno felt.

I started by increasing the size of Ruth’s pdf on a photocopier to make it more manageable for felt and traced that design onto the dull side of some freezer paper. This was ironed onto a piece of black prefelt.
IMG_5599
Then cut out the internal sections to leave a black felt frame. I wetted out the prefelt to help the silk pieces stay in place.

IMG_5600
Then I started laying out pieces of hand dyed silk chiffon, trimmed so that they overlapped the black prefelt.
IMG_5601
Once all the cut-out areas had been covered with silk, I laid a piece of white prefelt over the back, if you want to hang your piece in a window so that it will be seen from both sides you can carefully place black wool over the chiffon edges to cover them.

IMG_5602
When I flipped it over the freezer paper was still attached to the front, this was very carefully removed so as not to pull the black prefelt out of position.IMG_5603
Then I gently rubbed the surface through some decorator’s plastic to fix the silk and wool into position before rolling it.

IMG_5604
Take care to check the prefelt has not moved off the silks after every 100 rolls.

The finished wall hanging:

IMG_5606
I think it looks a lot like looking through a window into a garden full of vines. I’m toying with the idea of adding some embroidery and squaring up the frame but I also quite like it as it is and don’t want to ruin it! What would you do?

Blending dyes on wool

This week I have been doing quite a lot of dyeing so thought I would share one of my favourite techniques with you. I use this technique to blend colours on wool when I want a gradual change of colour or to mix colours on the felt itself. It involves finger painting so is a lot of fun too 🙂

For this technique you will need:
Pieces of prefelt or finished felt (the method below was for 100g of felt)
washing up liquid
acid fast dyes
white vinegar or citric acid
measuring jug and scales
cling film
latex or rubber gloves
pots for mixing dyes in (old jam / chutney jars are good)
disposable pipettes or syringes
steamer (or microwave)

Method:

  • Soak your prefelt in a sink / bucket of 2L water, 0.5 cup of vinegar or 5g citric acid and, a generous splash of washing up liquid, making sure it is well saturated. If you live in a hard water area you can also add 1g of calgon to this soak.
  • Lay out some cling film, overlapping the pieces if necessary to make it big enough to lay out your felt.
  • Squeeze about half the water out of your felt (it should still feel heavy with water and be dripping but water should not be running out the bottom of the felt)
  • Lay your felt flat on the clingfilm.
  • I mix 1g of dye to 10 ml of water but you could easily use half as much dye if want paler colours. I apply my dyes with those 3 ml disposable pipettes but syringes work well too or you could just pour the dye on in the pattern you desire.
  • You can add a second or third colour now to make colour blending easier but I have applied 1 colour at a time to show how they spread.
  • After applying the first colour use your gloved fingers to spread the dye around (the washing up liquid in your bath will really help with this). If it is difficult to move the dye your felt is probably not wet enough, carefully pour some water from your soaking bath onto the felt and try again.
  • Then add your second colour (I used yellow but it looks very orange in this photo).
  • And blend with your fingers again. Continue adding colours and blending until you are happy with the design.

  • Carefully roll the felt up in the cling film
  •  And twist the ends shut or wrap in another piece of cling film to stop steam getting into your parcel.
  • I like to put mine in a zip lock bag too (very “belts and braces”!)
  • Then steam for 45 min to an hour before rinsing under running water.

Sun Dyeing

I was reading a blog a couple of weeks ago with some scepticism. With the benefit of hindsight I concede my scepticism was a little unfair. The blogger in question had posted about sun dyeing and said that you don’t need to buy those expensive photo-sensitive fabric dyes / paints, any old fabric paint will do. My initial reaction was, if any old fabric paint will do why is there a market for those expensive photo-sensitive paints? Too good to be true right?

The scientist in me made me set my scepticism to one side long enough to perform a little experiment. We all want to save our pennies to spend on more textile toys don’t we??

Materials:

  • Light coloured cotton based fabric (I expect silk will work too but synthetics possibly not – those are experiments for another day 🙂 )
  • A pad of newspaper or a large box (I used a plastic under-bed storage box)
  • Masking tape
  • A spray bottle filled with water
  • Fabric paints (I used Setasilk (iron-fix) silk paint and acrylic paint mixed 50:50 with textile medium). If you don’t plan to wash your fabric you can replace the textile medium with water.
  • Large brushes (I used the foam type)
  • Resists – I used leaves but anything that will lie flat on the fabric and block the light all work well. Paper cut outs and opaque stencils work well.

This is what I did:

  • Stretch your fabric over a box or a pad of newspaper with masking tape
  • Spray with water until evenly wet, allow the water to disperse while you gather some leaves or other objects to create a resist.
  • Working quickly, cover your fabric with fabric paint and lay out your resists, ensure they are as flat as possible to the surface of the fabric.
  • Leave in a sunny spot for 2 hours (beware of breezes blowing all your resists away if you put your box outside – I left mine in front of a south facing window).
  • The hardest part is resisting the urge to lift the leaves to see what is happening underneath 😉
  • Remove the leaves / resists and iron for several minutes to heat fix.

Sitting in the sun catching some rays, the pink and blue on the left is the Setasilk paint and on the right is red acrylic paint mixed with textile medium.

I think I applied the acrylic paint (on the right) too thickly, hence the effect is not so noticeable. In the areas where the paint is a little thinner the leaves are paler.

A second attempt with a lighter coating of acrylic paint. I also sprinkled a few grains of rock salt in the bottom right to see what effect that would have:

After 2 hours on a sunny windowsill:

Close up of the salt effect, it appears to have concentrated the paint under the grain and drawn the paint from the surrounding area:

A close up of an acer leaf outline.

Have you done any sun dyeing? What paints / fabrics did you use?
Linking up to nina-marieoff the wall Friday

Kumihimo Braiding Tutorial

I recently discovered Kumihimo (pronounced koo-me-he-mo) braiding and thought I would share some of the techniques with you.

It’s a fascinating technique with a mind-boggling array of different pattern possibilities, a small selection of which I have shown at the bottom of this post.

You will need a Kumihimo disc and some yarn or thick threads, embroidery thread works well, the discs are not expensive but you can also make your own. All you need is a disc off dense (stiff) foam (the sort garden kneeling mats are made from is good) or some thick cardboard, a craft knife, pencil and tape measure or ruler.

Making a Kumihimo Disc

  1. Use a compass, saucer, small bowl or pint glass to trace a circle on your foam / cardboard and cut out the circle. 
  2. Mark the rim with 32 evenly spaced pencil lines, this does not need to be exact but I find it easiest to mark the 12, 3, 6 and 9 positions of the clock first. 
  3. Then measure the distance around the edge between 2 of your marks, this is easiest with a tape measure but can be done by rolling the disc along a ruler too.
  4. Divide this figure by 9. 
  5. Use the result to mark out 8 equally spaced lines between each of your clock quarters, you should now have 36 equally spaced pencil marks.
  6. Using a craft knife cut notches at each of the marks and a 2 cm wide hole in the middle of your disc.
This is what your finished disc should look like:
I have a commercial foam board that I like to use but the technique is exactly the same:

Setting Up Your Disc for Braiding
There are dozens of different braiding patterns available and these are largely determined by where the different coloured threads are placed on the disc at the start.

Once you have chosen your pattern (see below), cut 8 or 16 lengths of yarn (as dictated by your pattern). They need to be 3 times the length of your finished braid plus a few inches for knotting the ends. Tie them together with a single knot at one end and drop the knot through the hole in the middle of your disc.

Place the threads in the groves according to your pattern, making sure each pair is at least 2 notches from their neighbours (unlike the image below), they should be fairly taught with the knot just below the surface of the disc:

Holding the disc in your left hand (it doesn’t matter where you start) *take the left hand thread at the 6 o’clock position and place it in the grove to the left of the 12 o’clock position.

Then take the right hand thread from the 12 o’clock position and place it to the right of the thread at the 6 o’clock position.

Rotate the disc anti-clockwise 1 position so the next pair of threads are at the 6 o’clock position and repeat from *. Keep going until your cord is the desired length then remove all the treads from their notches and tie them all together with an overhand knot to finish.

If you have to put it down and come back to it, simply look for the uppermost threads and start with the next pair to the lower left (at the 8 o’clock position).

A Neater Way to Finish
If your ends will be seen or you want to tuck them into jewellery findings this video describes a better method for finishing the ends.

Pattern Choice
There are countless patterns available on the internet and in books but there is also a lot to be said for exploring and finding your own patterns too, just start with lengths of wool approx 20 cm (5 inches) long and make a note of the starting position of each colour on the wheel.

Here are a few examples to get you started:

How do you use your braids? Please feel free to post a link to photos of your work below.

Happy Braiding!

Paper Making

Last Sunday the sun was shining and lifting my spirits, almost perfect weather for drying hand-made papers, something I haven’t done for a few months now but it was so much fun I can’t think why I have left it so long.

I thought I would share my method with you as I think it is much easier than the mould and deckle method most people / books teach. For my method you will need:

  • a paper-making mould (this can be an old picture frame with some fine mesh stapled across the opening)
  • some shredded paper (I use photocopier paper with printing on it but any paper that’s not too shiny should work fine)
  • some inclusions (optional), I have used flowers and tea bags but the world is your oyster here. Acrylic paint or food dye can be used to give a more uniform colour but I like how the colour from many flowers “bleeds” through the paper.
  • a blender or food processor
  • boiling water and a sink or tub large enough for your mould / frame
  • a sponge
  • some old towels

This is a selection of my dried inclusions. I keep a saucer in the kitchen and add things that I think might make interesting inclusions, here I have some used tea bags, a variety of seed heads and some dried flowers rescued from dying flower arrangements destined for the compost bin.

I used some fresh flowers too:

For an A4 frame (US letter size), put approx. 300 ml of shredded paper into a blender or food processor and cover with boiling water. 300 ml of paper will give quite a thick sheet of paper, try using less for thinner paper (but this requires a little more skill to make sure you don’t end up with holes).

Let it soak for a minute or two while you part fill a sink with cold water and lay the paper-making mould in it, mesh side down. The mesh of the frame should sit just beneath the surface.

Whiz the paper at a moderate to high speed for 5 seconds to get a smooth pulp. Add your inclusions and whiz briefly to mix.

Pour the pulp across the mesh surface of the frame, rinse out the blender pouring the solution over any thick areas of pulp in the frame to thin them out. Give the frame a little jiggle while it is still the water to even out the pulp.

Carefully lift the frame out of the water keeping it level, wipe a sponge across the base several times to remove excess water, lay the frame on an old towel (this will help remove so more water).

Place piece of blotting paper over the wet pulp.

Gently tap the blotting paper all over with your finger tips until it is evenly wet:

Note: using coloured blotting paper will transfer some of that colour to one side of your paper, if you can get white blotting paper this is better.

Turn the frame the other way up over a dry towel and tap the mesh until the pulp starts to detach (as it has in the bottom of this photo):

Keep tapping the mesh util the pulp has completely detached from the mesh and leave your paper to dry.

These are my papers drying in the spring sunshine:

When completely dry, the blotting paper is carefully peeled off, and your new paper can be ironed to flatten it.

My finished papers:

Do you make your own paper? I would love to hear your tips and favourite inclusions in the comments below. Likewise, if this tutorial has inspired you to have a go, I’d love to see your results 🙂

Rainbow / Space Dyeing Fabric

I love creating my own dyed fabrics for nuno felting, it is so easy. The results can be amazing and truly individual. If you haven’t tried it yet you really should!

What you will need:

  • Some plant based fabric or silk, my favourites are cotton scrim, cotton muslin and ponge (pronounced “parj”) silk. Don’t bother with synthetic fabrics, the results will be very pale if the dyes take at all.
  • Cold water dyes (I like the Procion MX range) – if you can only afford a limited number I suggest you start with the primary colours (magenta, turquoise and yellow) as almost all other colours can be made from these.
  • Some old buckets or washing up bowls and a measuring jug (please don’t use anything you plan to use for preparing food as the chemicals used in dyeing are toxic and/or carcinogenic).
  • Rubber gloves (I use latex examination gloves but a pair of old marigolds will be just fine).
  • At least 3 small water-tight pots (old chutney / jam (jelly) jars are good) for mixing.
  • Weighing scales that will accurately measure down to 0.5g or less (or you can just use an old teaspoon).
  • Soda ash and some ordinary table salt (both are needed for the fibres to take up and fix the dye).
  • Newspapers / plastic sheets or old towels to protect your work surface from spillages.
  • If you live in a hard water area, dyer’s calgon is a worthwhile investment, it costs pennies and will make your colours more vibrant.

Getting started:

  1. Protect your work area with newspaper / plastic
  2. Make a note of  how much your fabric weighs (while it is still dry)
  3. Most people will recommend you wash your fabrics to remove any residues or chemicals that might impede the dye from penetrating the fibre. I confess I have never done this and never had a problem but if you are working on something important or cannot afford to buy more fabric if it goes wrong, I recommend you wash it. I like to live life on the edge! ;o)
  4. For every 100g of fabric, put 10g of salt, 0.5g of calgon (if using) and 1 litre of warm water in a bucket and mix well.

    Worked example: for 130 g of fabric (I always round up so I would assume 200g fabric) you will need: 20g salt, 1g calgon and 2L of water.

    Push your fabric down into the solution and squeeze the air out of it to help it sink. Let it soak for approx. 1 hour. While your fabric is soaking you can prepare your dyes…

  5. Select your colours, I recommend starting with 3 colours that sit next to each other on the colour wheel for your first attempt, for example, red, purple and blue or blue, green and yellow will work well together, even where the colours overlap. Some lovely effects can be achieved using complementary colours but if you apply too much dye you could just end up with different shades of brown (see left side of photo above)! If you only have primary colours, select 2 and use them to create your third colour, for example 1g of red and 1g of blue will give you purple. A note of caution with yellow, I find I need more yellow than blue or red to get green and orange, typically 2/3 (2g) of yellow to 1/3 (1g) of blue or red works well.
  6. How intense do you want your finished colours to be?
    Pale – use 1g in 50ml (approx. half a tsp)
    Medium – use 2 g in 50ml (approx. 1 level tsp)
    Intense / deep colour – use 3 g in 50ml (approx. 1.5 tsp)
  7. Put your gloves on if you are not already wearing them!
  8. Measure your dye powders into separate jars and add mix with a small amount of water, make up to 50 ml with water from the bucket your fabric is soaking in. Please be careful not to inhale the powdered dyes as they are carcinogenic. Once made up, these dye solutions will keep for several weeks. Three x 50 ml pots will be enough to dye approx 200-300g of fabric completely (without white patches).
  9. Make up your soda ash solution towards the end of the hour (it only remains active for 2-3 hours). For every 100g of dry fabric mix 15g of soda ash in 300ml of warm water.
  10. Squeeze the excess water out of your fabric and arrange in the bottom of a bowl or bucket.
  11. Pour your soda ash solution as evenly as you can over the fabric, making sure you have covered all of it. Turn the fabric over and kneed it to make sure all of it has been soaked in the soda ash solution.
  12. Drain the excess soda ash water from your fabric (don’t squeeze the fabric, you want it to remain very wet). Arrange your fabric in the bottom of the bowl, if you fold it you are likely to get mirror image effects in the different layers. I like the randomness of loosely arranging the fabric without folds.
  13. Now you are ready to add your colours! I like to use disposable 3 ml pipettes but you can also carefully pour straight from your jars. The colours will spread through the wet fabric, so go gently at first until you have a feel for how far they spread for each type of fabric. There are 3 methods if you want to completely cover your fabric with colour (not white areas left):
    a) with a gloved hand, push down on the dyed fabric to try to squeeze the dye into the white areas. This approach will give a variety of pale and more intense areas of colour.
    b) turn your fabric over in the bowl and sprinkle more of your dye solutions on the larger white areas. This will give predominantly intense colours.
    c) after applying your dyes, pour small amounts of the soda ash solutions onto the coloured areas, this will help the dye to spread to the white areas. This will tend give paler and more blended colours.
  14. Leave you fabric for 1 hour before rinsing it in warm water until the water runs clear.
    TOP TIP: if you have any scraps of fabric that you would like to dye a paler colour, put them in your dye bowl now and using a jug, top up with water from your soaking bucket (the one with salt and calgon in it), for every litre of water you added, add another 30g of soda ash and mix well, leave it for an hour, stirring occasionally, before rinsing and washing.
  15. I then wash my fabrics in the washing machine on the hottest cycle the fabric will tolerate. I find red, purple and orange dyed fabrics are particularly bad for “bleeding” their colour if I don’t include this machine wash step.
  16. Leave your fabrics to dry and admire all the beautiful colours and patterns :o)
This is an example of a predominantly undyed piece with just a few splashes of colour.
    Please leave a comment if any of the instructions are unclear or you have questions or suggestions.

    Ice Dyeing Wool Prefelts

    This post is an extension of Ruth Lane’s excellent tutorial on the Felting and Fiber Studio blog where she describes ice dyeing for plant based fibres (silk also works well in that method).

    I have been trying out a couple of different methods to dye some sheets of merino prefelt (I’m sure the same method could be used for wool top but I can’t see the point as you will loose the beautiful patterns when you come to use the fibre). This is the first (and I think the most successful and least messy) method:

    • mix 1/4 cup of vinegar into each litre of warm water needed to cover your prefelt, add a drop of washing up liquid
    • thoroughly soak your prefelt in the mix, gently squeezing the wool to ensure it is saturated, I left mine for 10 min before the next step. I know most people leave it soaking for a lot longer but I am too impatient!!
    • cover the bottom of a large jar  (canning jars are great for this) with just enough ice to cover the bottom
    • sprinkle on your choice of acid-fast dye powder, I used a total of about half a teaspoon for each layer and 3 colours – black, blue and red
    • gently squeeze most of the water from your prefelt but not all, it should still feel heavy with water, and drop into your jar
    • cover with another layer of ice
    • keep repeating steps 4 to 6 until the jar is nearly full or you have used all your felt
    • finish with a layer of ice and more dye powder
    • set aside overnight or until all the ice has melted
    • to fix the dye it needs to be heated for 40-60 about minutes, as there is quite a lot of water in the jar from the ice, I put mine in a pan of gently simmering water for 90 min to ensure everything is heated for at least 40 min.
    These are the results:

    The colours are far more intense than I expected and I think that was largely due to using the black which becomes a deep purple at lower concentrations, sounds like the perfect excuse to have another go… ;o)