
The Albany (on Auckland’s North Shore) Spinners held their annual dye day last week that they titled, “Dartmoor dyeing”. Dartmoor dyeing involves splitting your unwashed fleece into 4 equal portions, dyeing the portions red, yellow, blue and green, then dividing each colour 4 times, keeping 1 portion aside and dyeing other 3 portions from each colour in the other colours (so 3 of the 4 blue pieces would be distributed to the red, yellow and green dye vats). From what I have read, you can achieve some lovely variations within each section of fleece due to the lanolin in the fleece inhibiting dye uptake in some areas more than other.
I hadn’t heard of the term Dartmoor Dyeing before (have you?) but I have seen dye courses that describe mixing dyes in cups, I expect with very similar results, does that technique have a name? Sequential dyeing perhaps? This all got me thinking about a colour theory course I took as part of my Diploma in Art and Design and the dyed samples I made after the course.
Anyone who knows me or my work will probably have noticed I have a soft spot for bright colours, particularly complementary or split complementary combinations. If you’re not sure what complementary colours are, this link covers the basics of colour theory in a fun interactive way (the tool in the top right is great if you are looking for colour inspiration too). I think colour theory, and especially its impact on human psychology, is fascinating.
I am always sorely tempted by the dizzying array of colours on the Dharma Trading web site but you really don’t need to buy every colour. The vast majority of colours can be mixed from just the 3 primary colours.
A word of caution before you go shopping: The dyer’s colour wheel differs slightly from the red, blue and yellow primary colours of the traditional / painter’s colour wheel. For most dye brands, the primary colours are magenta, turquoise and yellow. The brands with a wider a range of colours will almost certainly also have a red and a blue but they are invariably made from a mix of the primary dye pigments, this means that when you start mixing them with other colours you will end up with muddy tones to your colours. If your brand offers a choice of yellows and it is not clear which one is the primary yellow, pick the brightest / coolest yellow i.e. a lemon yellow rather than a sunset yellow. Yellows with the warmer tones may have been mixed with a tiny amount of magenta which will make it impossible to achieve a bright green.
My go-to colours for dyeing are magenta, turquoise, yellow, black and silver grey. As you will see below it is fairly easy to make your own black by dyeing with magenta and turquoise to saturation but I find it handy to have black premixed. I find silver grey is a tricky colour to achieve by colour mixing and I like using it for space dyeing so I keep a small pot of it in my stash.
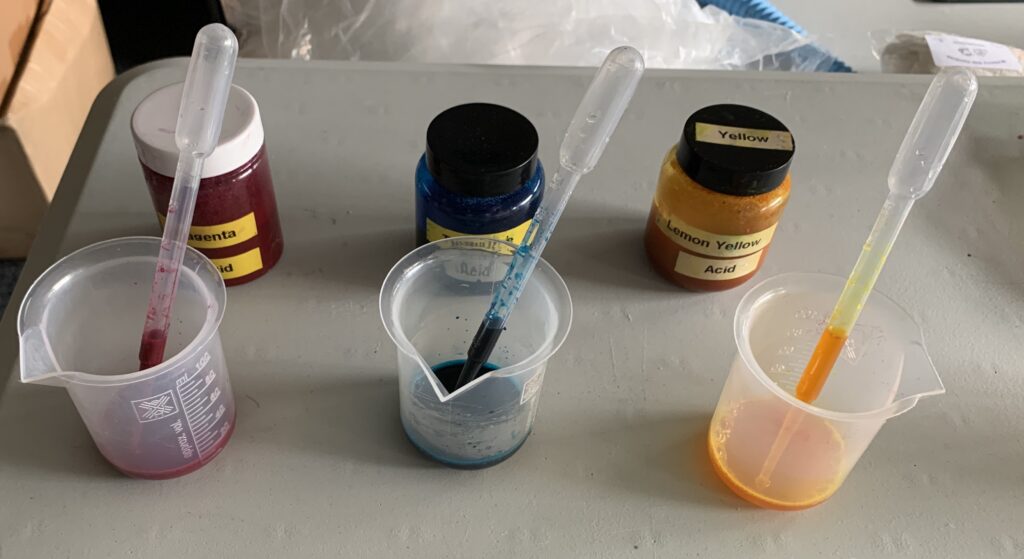
My Dye Set Up
This set up is for acid fast dying of animal fibres (wool, silk, feathers etc) but the colour mixing could easily be adapted for fibre-reactive dyes used on plant-based fibres.
Instead of the traditional vat / large pan full of dye method, I like to use zip lock bags in a steamer so I can dye multiple different colours simultaneously with just one heat source. Because this is a low immersion technique you will get more variation in the depth of colour across the contents of each bag, if you are wanting solid, even colours using the dye vat / pan method is recommended, this allows you to move your fibre through the dye pot so the fibre is more evenly exposed to the dye.
To achieve reproducible results, especially if you are dyeing small amounts (less than 100g) of dry fibre, I recommend premixing your dye powder with water. This also means you don’t need to wear a face-mask for the whole dye session (masks are only needed while the dyes are still in powder form). I keep my liquid dyes at room temperature and they all work well, even after several months on the shelf.
To make a liquid concentrate I mix 1g of dye per 10ml of water and store them in water-tight jars. The dye tends to settle out of solution while stored so the jars will need a shake before each use.
For the dye bath, I prefer to use citric acid crystals rather than vinegar to avoid that residual “fish and chip shop” smell you get with vinegar. I use citric acid at a rate of 15-20g per 5 litre bucket of warm water and add about a teaspoon of dish-soap to that to aid wetting out of the fibres.
I pre-soak my fibres in the acid / soap solution for a few minutes while I prepare the dye and dye bags.
Let the fun begin!
For this project I was working with 10 x 10 cm (4″) squares of merino prefelt and tiny skeins of super-wash merino yarn, so diluted 2 ml of dye concentrate in 10 ml of water (this made my working solutions 0.2g of dye in 12ml water).
I chose to work with just the 3 primary colours but you could add any of the secondary colours if you wish, but note you will get a range of browns and grey tones in some of your samples.
I ended up with 16 different colours from the 3 primary colours:
| Turquoise | Yellow | Magenta |
| TY | YM | MT |
| TTY | YYM | MMT |
| TYY | YMM | MTT |
| TTYM | YYMT | MMTY |
| TYM |
With so many different colour combinations it is easy to lose track, so I pre-labelled all my bags:
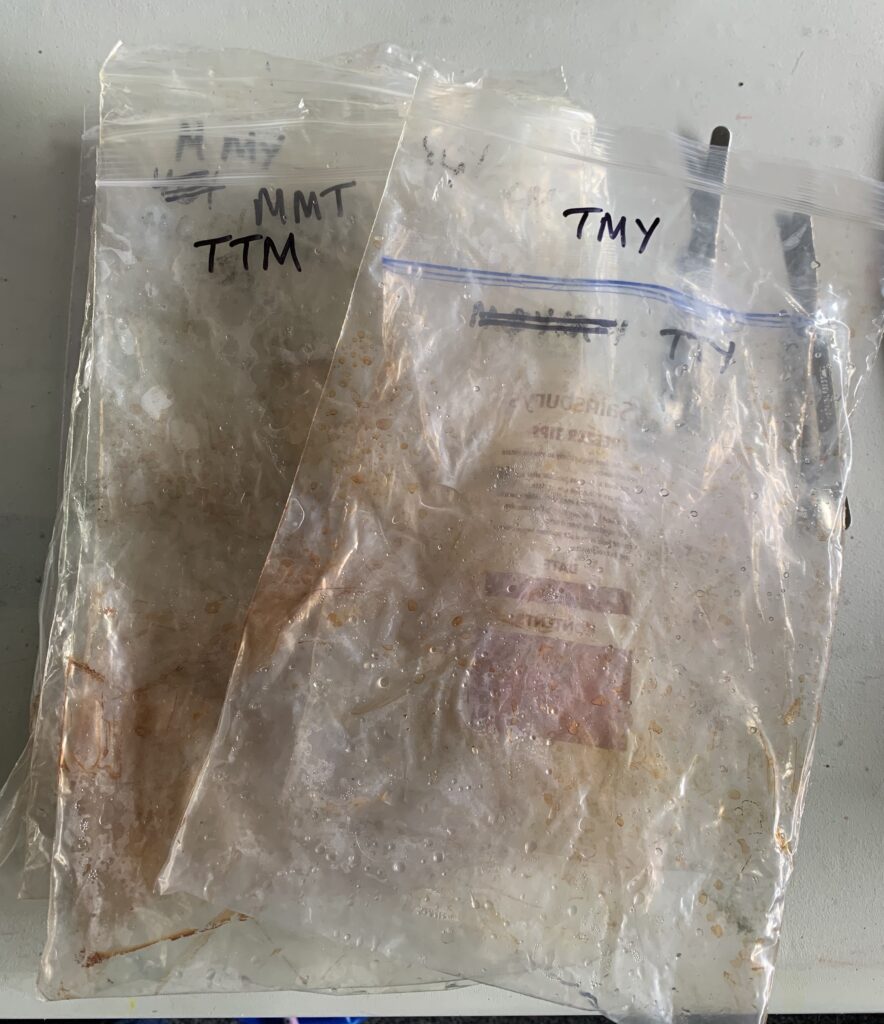
Tip: I stand each bag in a 1 litre jug before pouring some acid water (about 150ml – just enough to cover the fibre) from the bucket the fibre is soaking in. You can add extra water after adding the fibre if you find there isn’t enough to cover it.
Then I added 1.5 – 2 ml of my diluted dye. For example the MMY bag received 1 ml of Magenta and 0.5 ml of Yellow. The TMMY bag received 0.5 ml Turquoise, 1 ml Magenta and 0.5 ml Yellow.
The bag was jiggled to mix / disperse the dye before dropping in a piece of pre-soaked felt. Excess air was squeezed out of the bag, the bag sealed and stacked in the steamer with the “zip” uppermost (just in case it pops open as any trapped air inside expands) .
I steam my bags for an hour (the dye only needs about 30 min at around 80 degC to fix but they also need some time to get up to temperature). I leave the bags in the steamer to cool overnight before rinsing the next morning.
Tip: The water in the bag should be clear when you come to rinse the fibre, if it isn’t you have used more dye than you needed to but you can still use the remaining dye to dye some more fibre a paler colour – just drop in your pre-soaked fibre and steam as you did before.
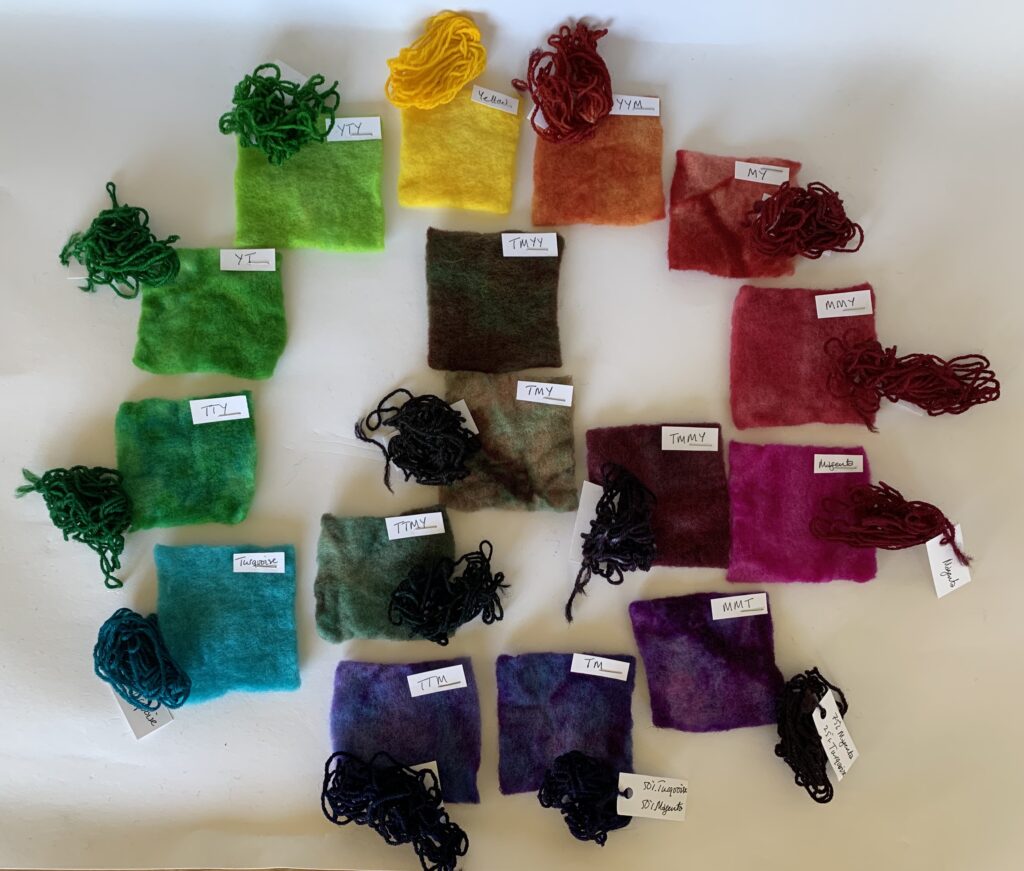
After rinsing, I left the samples on their bags to dry so I could figure out which was which!
Here are some of the samples arranged in the primary, secondary and tertiary colour wheel that most people will be familiar with:
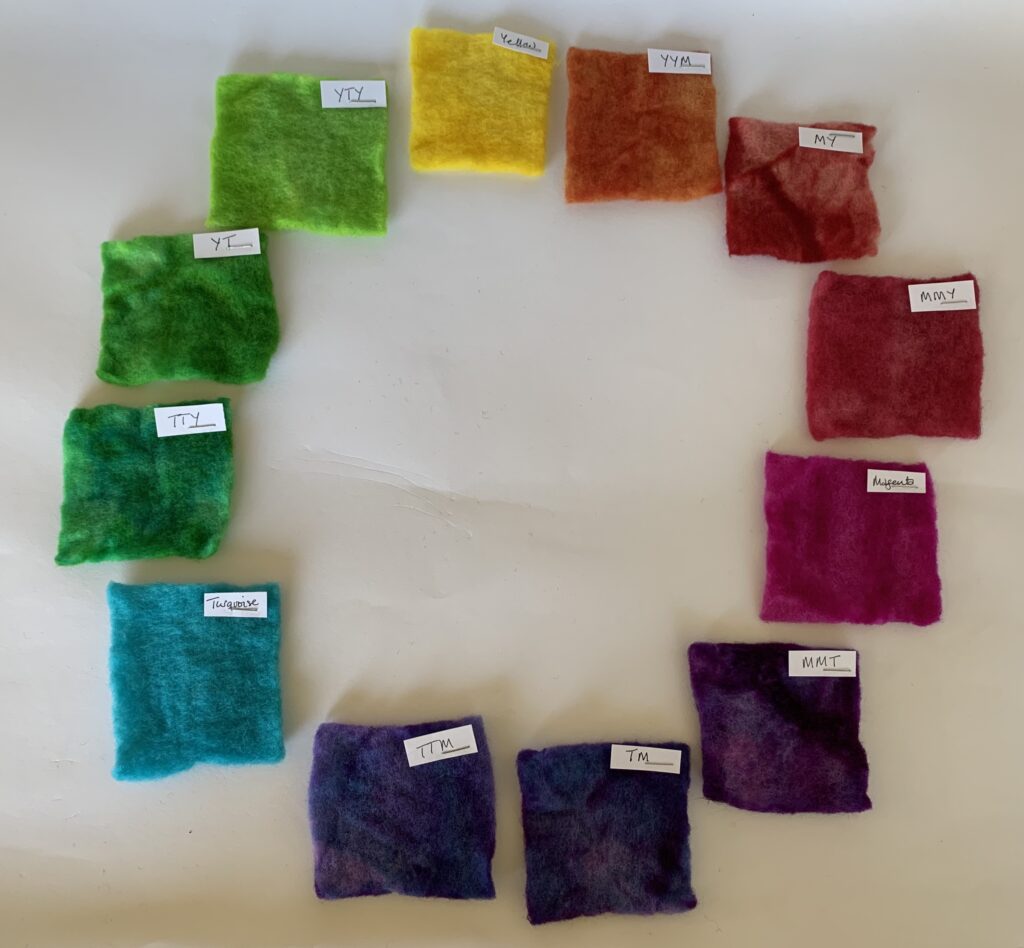
Similar to mixing paint, I have noticed the yellow dye is not as intense as the magenta and turquoise, this is most obvious in the MY (equal quantities of yellow and magenta) square, which should give an orange colour but is closer to a scarlet red and the YYM square that should be a yellowy-orange but is orange.
The same samples as above but with the complementary colour mixes (for example mixing red and green or yellow and purple) added to the centre, by including all 3 primary colours in different quantities you can get different shades of browns and greys:
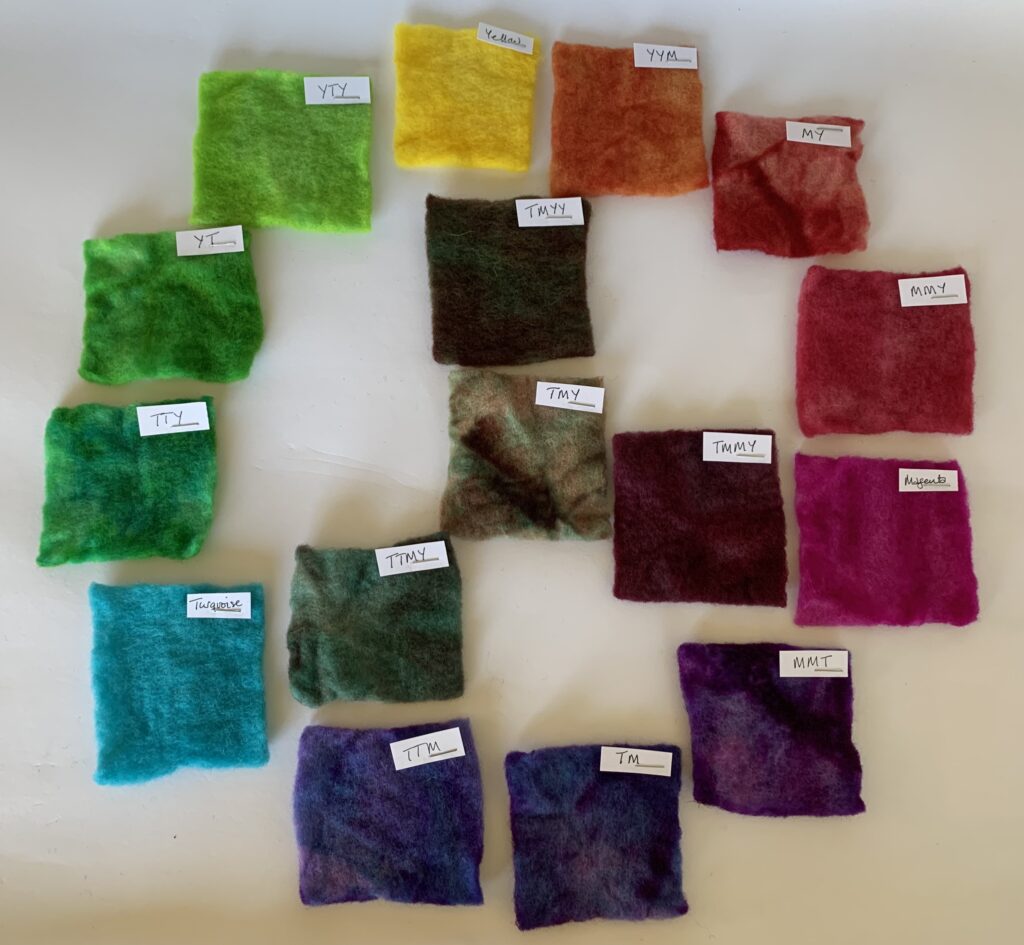
I suspect I forgot to jiggle the TMY bag before dropping the sample into it, oops!
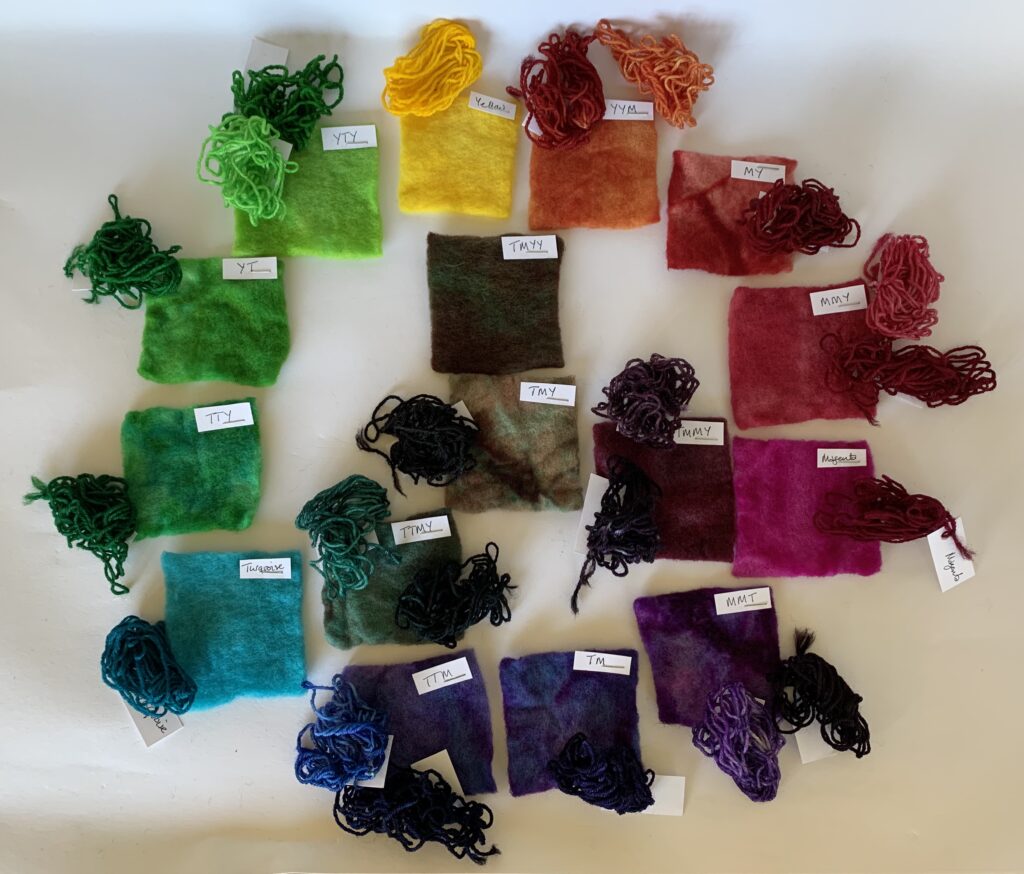
I also dyed some super-wash yarn to saturation (approx. 0.1g dye per mini-skein) – all of these bags had a tinge of colour in the water after dyeing. The samples at the violet end of the range (bottom of the photo) are very nearly black.
I had a few mini skeins left over after the saturation dyeing so dropped those in with the felt samples, just to see how they would compare to the “saturated” skeins. The blocks in the photo with 2 skeins on them are the extra skeins. Most are predictably very similar in colour to the felt block they were dyed with but the TTM skein is definitely more blue than its felt block.
If you don’t have time to dye lots of wool samples but want a record of which colours you can achieve by mixing the dyes you already have, you can use the same technique but brush the mixed dyes onto heavy weight cartridge or water colour paper. This is an example from one of my sketchbooks where I have mixed slowly increasing amounts of one dye colour into the other:
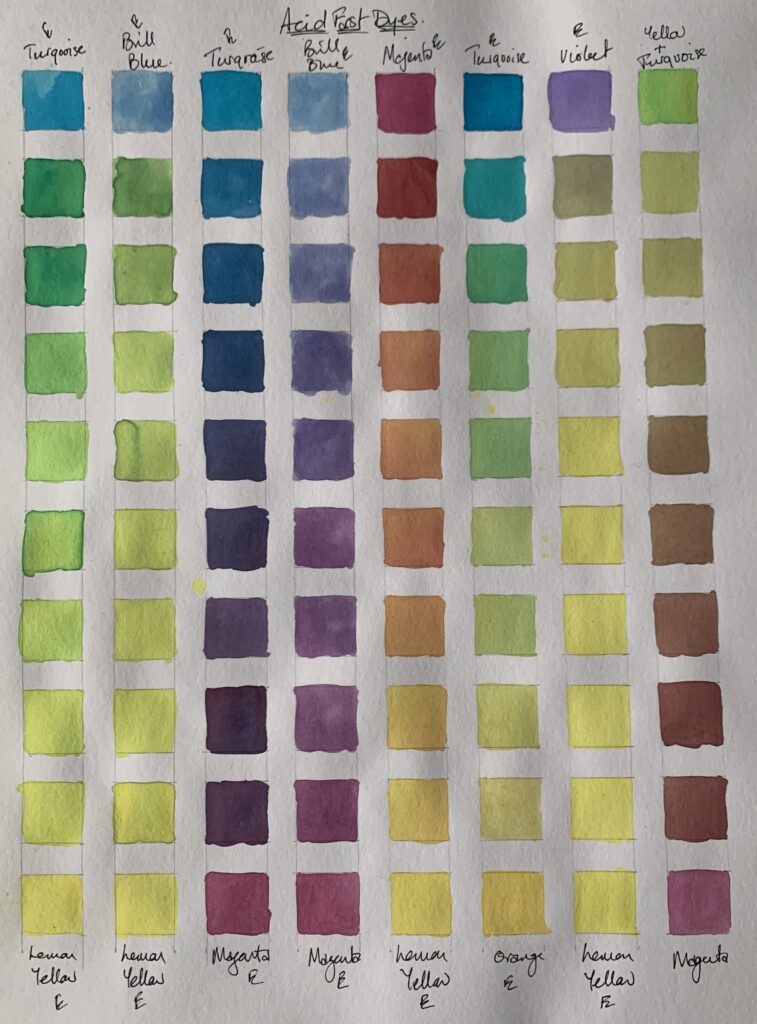
The 3 columns on the right are what you can expect to achieve it you mix complementary colours (green with magenta, violet with yellow, turquoise with orange).
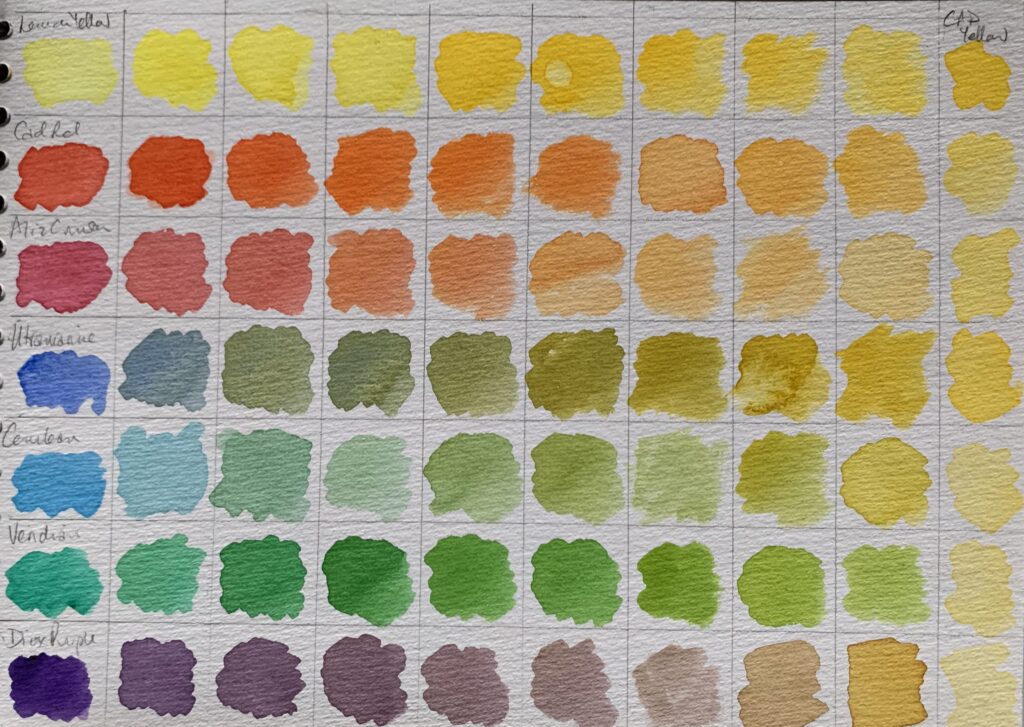
I also did something similar with my watercolour paints, this is just one page of 4 charts – I find these charts really useful reference when I am trying to mix a specific colour:
Thank you for sharing his Terri. Great
photo references and text. I learnt a lot. 😀