
A few months ago, Mr TB treated himself a new toy, a rather expensive 3D printer….
The look on my face when I discovered what he had done probably wasn’t one of overjoyed enthusiasm. He had spent thousands of dollars on a toy he would probably only use a handful of times….
I suspect he was trying to appease my disappointment when he asked if there is anything I would like him to print for me but at the time I couldn’t think of anything remotely useful he could make.
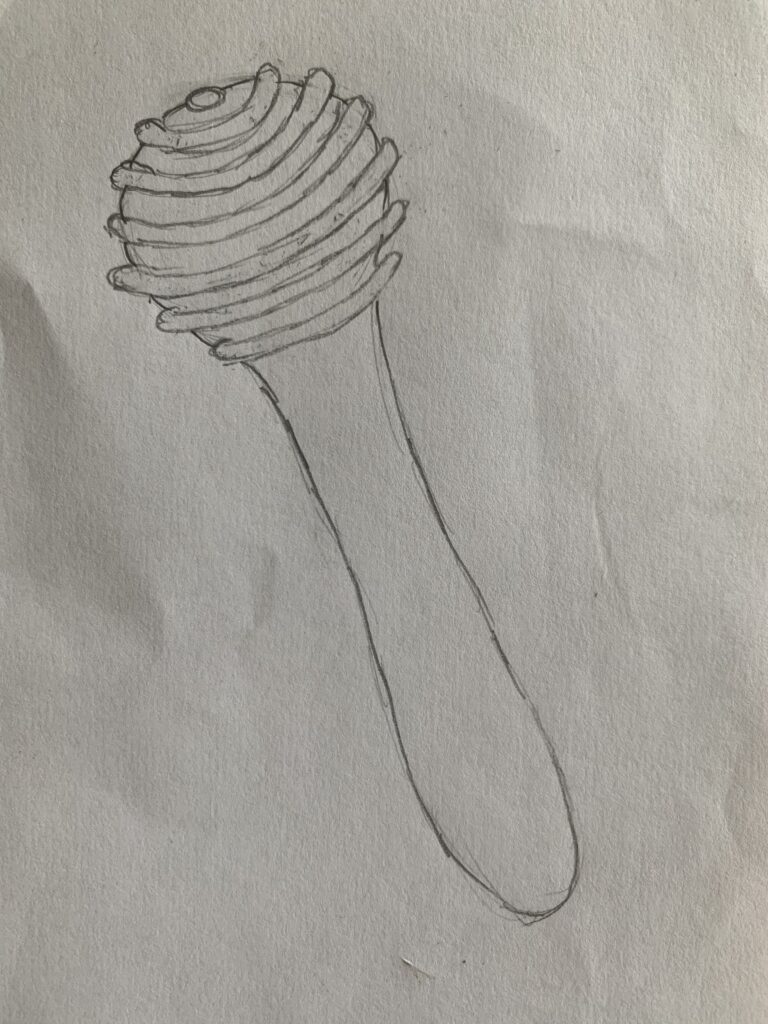
A few weeks later I was fulling and shaping a felt pod with a tiny opening, the opening was so small I could barely get one finger inside, it dawned on me that a 3D printed tool with a ridged surface at the end would be a huge help.
I sketched out what I thought it should look like and described the dimensions to Mr TB who dutifully translated it in his CAD software and sent it to the 3D printer.
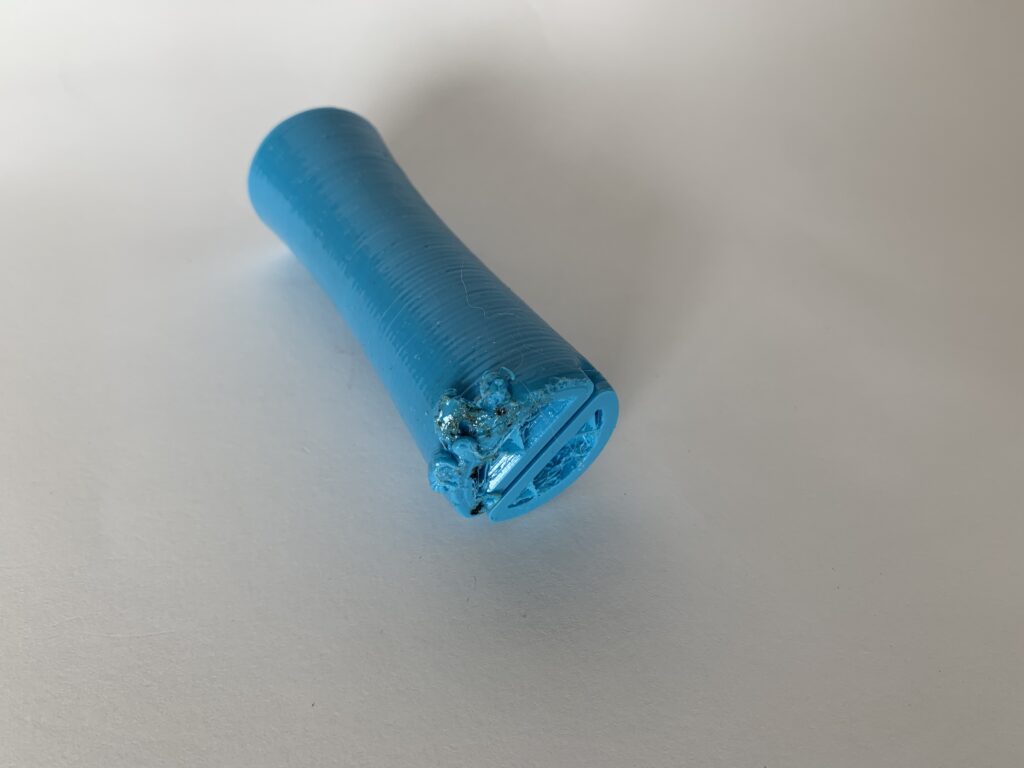
Ooops – fail! The tool detached from the print bed resulting in a scruffy bird’s nest of filament like this:
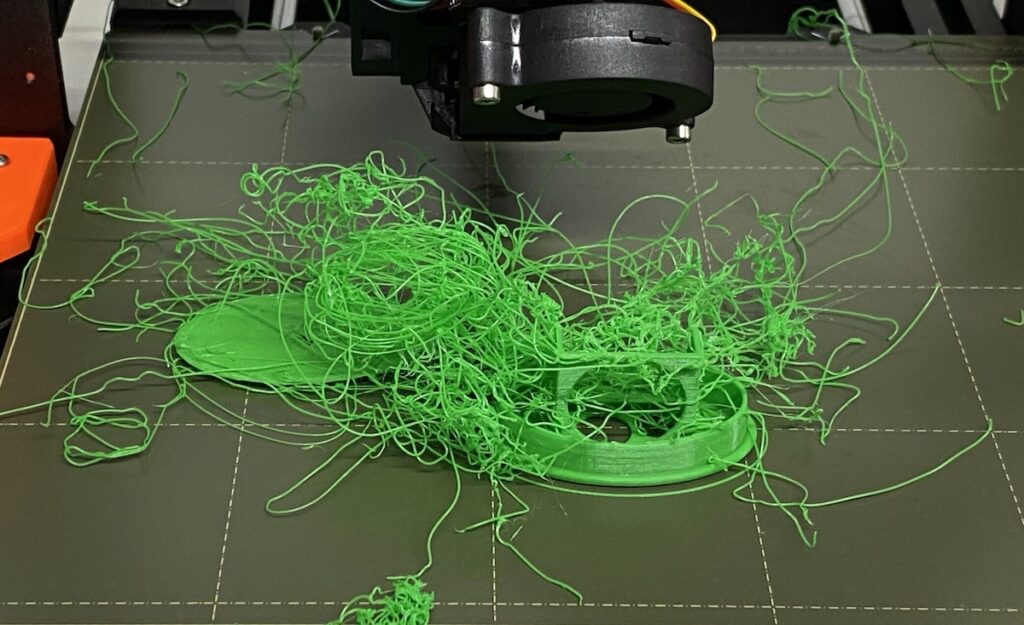
In fact there were lots of fails…. this is just a fraction of the tools that didn’t quite print as they should have.
Try as we might, we could not get this tool to print successfully.
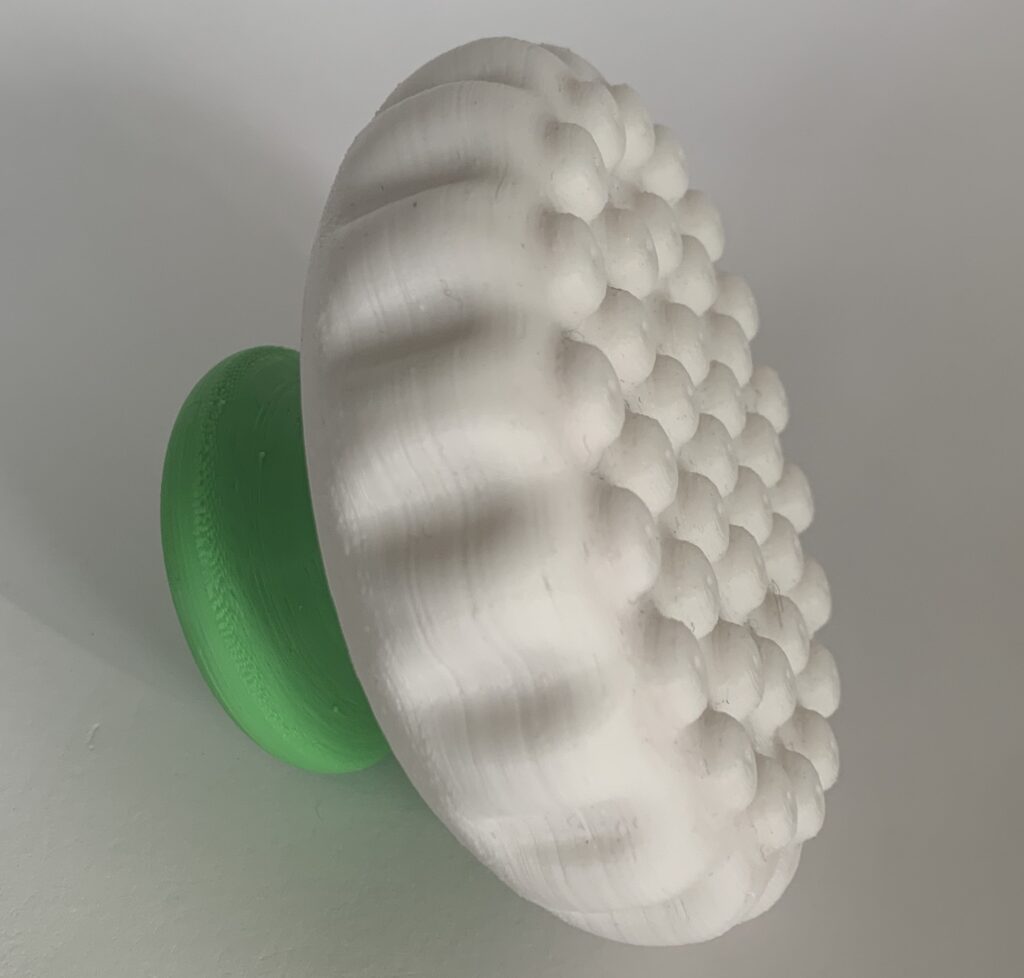
We changed tack, and tried making another design. This new shape I mostly use for shaping the bottoms of bags, but it is also really useful for fulling large, flat pieces of felt (wall hangings, rugs…) and vessels.
I also know at least one felt maker who uses a larger version for wetting out her large felt rugs. She wets out the wool, covers with plastic and uses the tool to “push” the soapy water from the centre to the edges so the water is even distributed.
For my bags, I like to scrub the inside of the bag while it sits flat on the table, this tightens the felt on the base of the bag and creates a nice flat bottom so the bag doesn’t fall over when it is set down. Tipping the bag on it side while rubbing allows you to full all sides of the bag and give you straight sides too.
In this video I am using a slightly smaller tool because the bag is too small for the scallopini tool but the principle is the same. Just a few of minutes of rubbing shapes the bottom of the bag and 5-10 minutes of rubbing with soap and hot water gives a nice, firm felt, that is hardwearing enough for a bag.
I took my new scallopini tool to a felting retreat and discovered there is a lot of interest in 3D-printed felting tools, this surprised me as I know a lot of felt-makers are faithfully wedded to their favourite Tupperware lids and massage blocks but from chatting with them, most think the handles on their re-purposed tools aren’t all that comfortable.
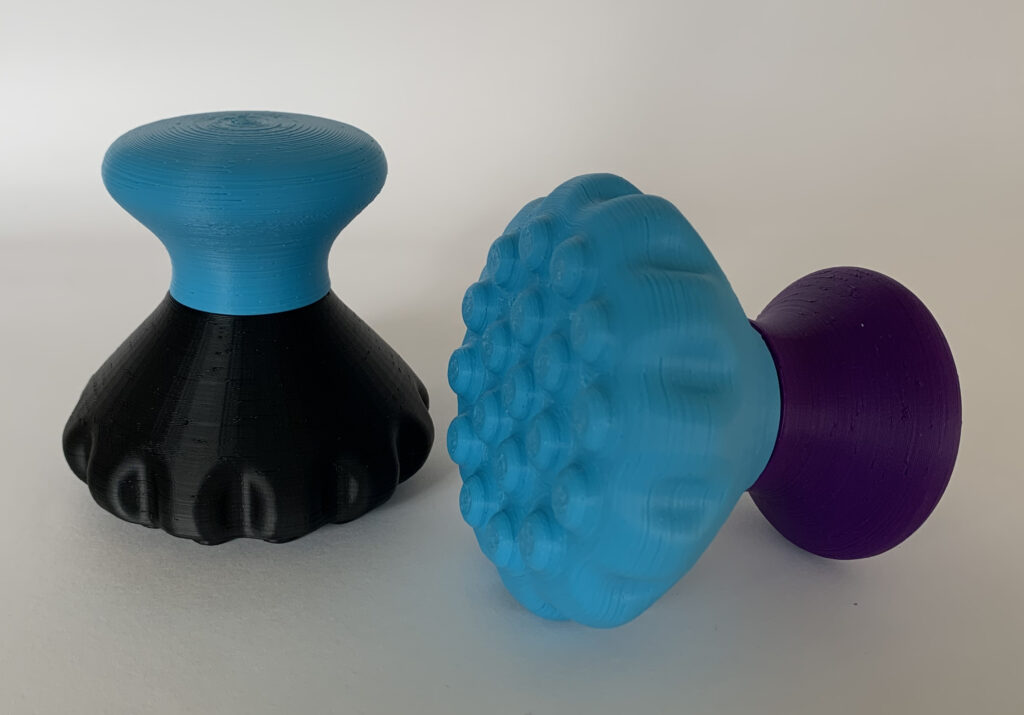
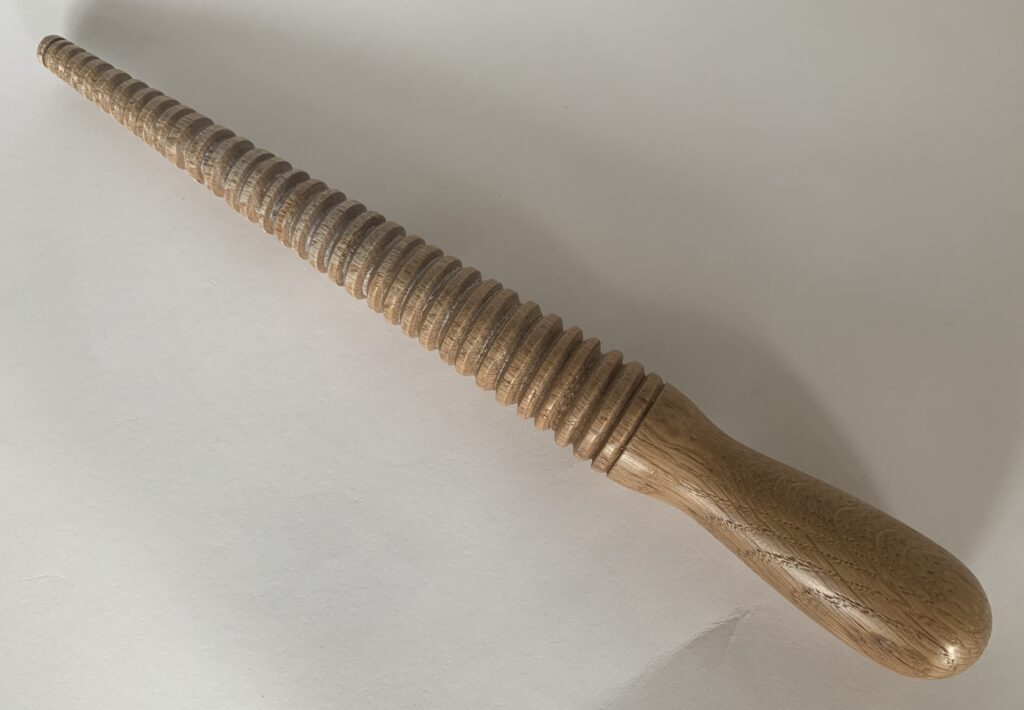
Buoyed up by the overwhelmingly positive response at the retreat, Mr TB and I set about translating this wooden tool I commissioned from a wood turner several years ago.
This design also proved problematic for the printer, the first half would print well but almost invariably, the partially printed tool would get knocked by the printing nozzle and we would end up with a big squiggly bird’s nest again.
After multiple failed attempts, trying different heat and speed settings Mr TB had the genius idea to make the tool in 2 parts. We didn’t realise it at the time, but the interchangeable felting tool had just been born!
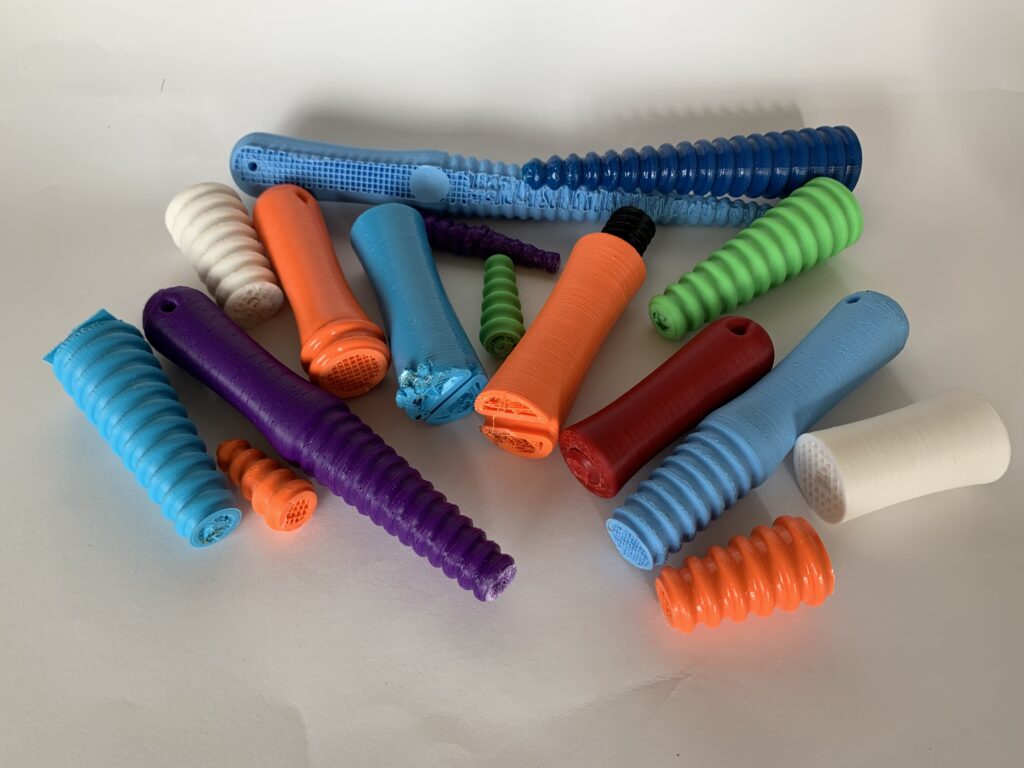
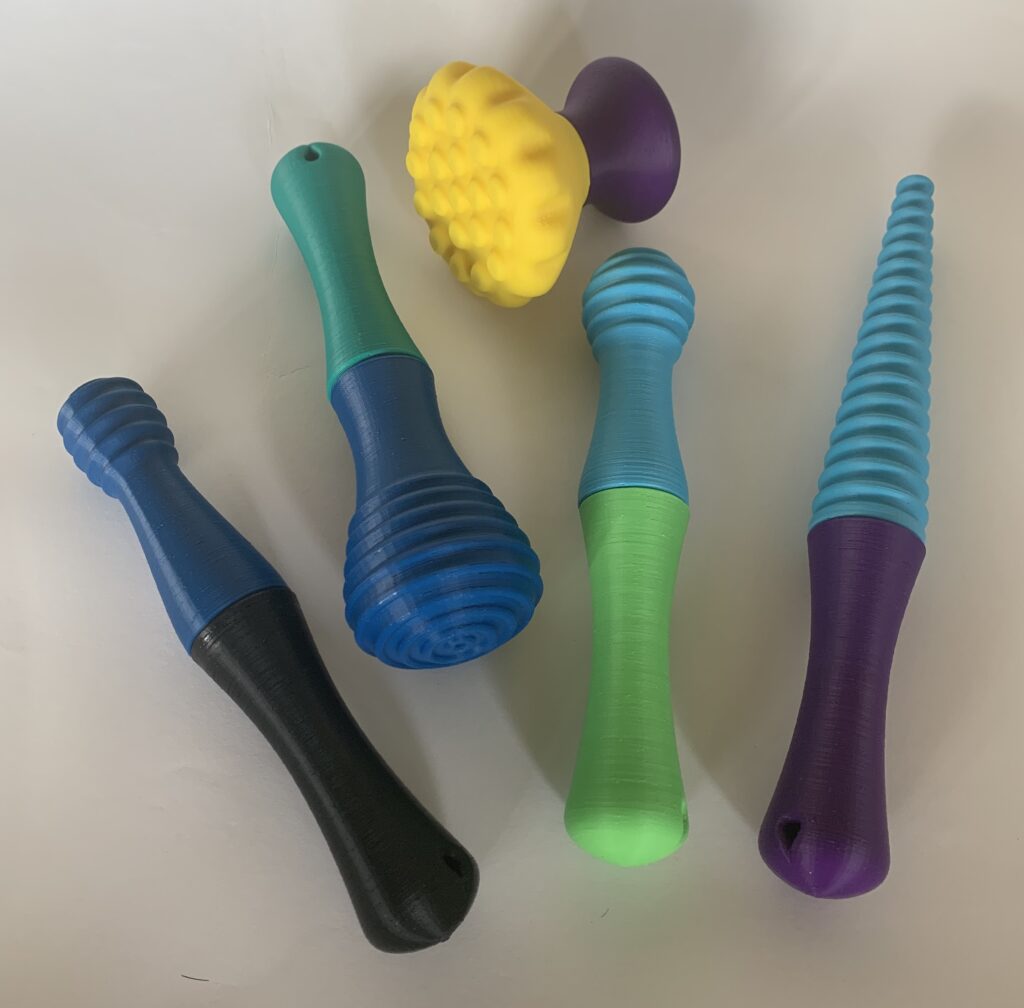
We have designed the tools so that all of the heads can be used with any of the handles.
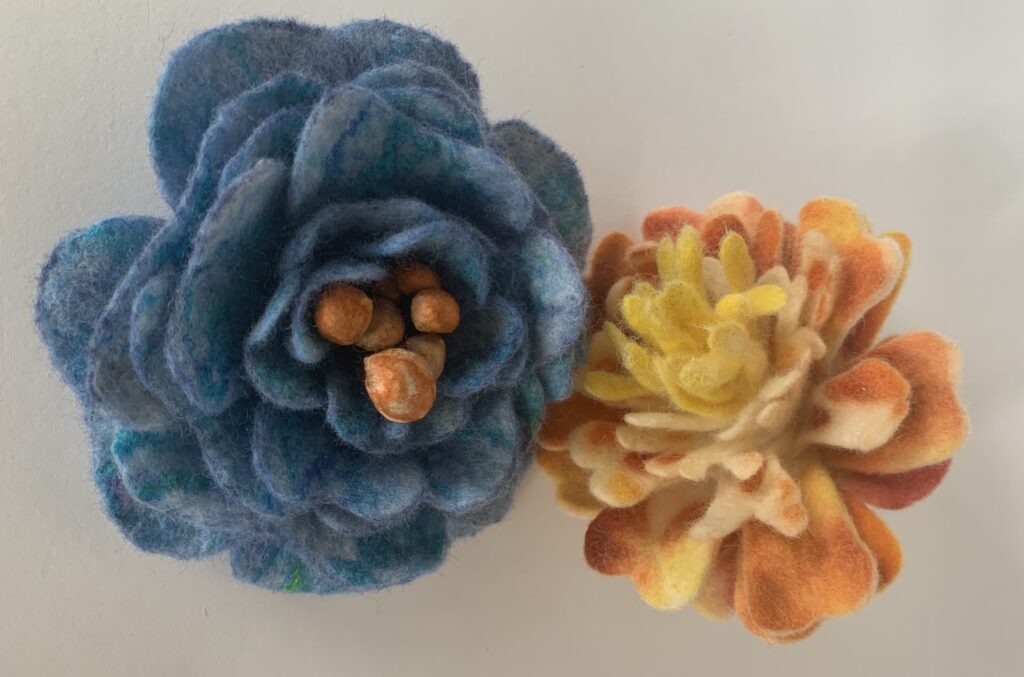
This is the Wand tool in action, shaping a felted flower. These tools are good for getting into narrow spaces, such as inside horns or tubes, shaping and stiffening the feet and handles on vessels etc
I am working the base of each petal to stiffen it and make it stand upright.
Six months on from the initial, failed tool, the family of tools has grown to include 5 different heads and 3 options for the handles. I think it is safe to say I am using his 3D printer far more than Mr TB is! 🙂
In this last video I am using the medium ball tool and the scallopini to shape and full a child’s slipper. The video is sped up but it took me about 7 minutes to completely full and shape each slipper.
The moral of this story? Keep a lid on your irritation if your other half spends a large chunk of your savings on a new toy, redirect your energy into figuring out how you can turn their frivolous spending to your advantage… 🙂
These tools are available in my Etsy shop, if you cannot see them, please let me know where you live (they are currently only set up for shipping to a handful of countries).
I won’t get the chance to post again next week so will take this opportunity to wish you a very Happy Matariki (Maori / NZ New Year) for next Friday (July 14th) and a joyful year ahead.

P.S. If you would like a new felting tool and are happy to pay by bank transfer in UK pounds or NZ dollars, orders placed directly with me will receive a 10% discount. Please contact me (don’t order through Etsy).
Fantastic range of tools! Good luck with sales in your Etsy shop 🙂
Thank you ladies, they have been selling like hot cakes! 🙂
I finally went to go take the plunge on ordering these and couldn’t find them anywhere on Etsy again and I am so upset. I hate America and their stupid Tarriff bs. I didn’t vote for this! I want to leave!
Hi Ivy, I agree sadly some of Trump’s policies are hurting US citizens and anyone who has invested in American companies 🙁
Today I am at Woolfest in Auckland so have temporarily removed the physical items from my Etsy shop (because some are likely to sell out today), but I have reinstated the listing for felting tools just for you 🙂
You can access it through this link: https://teriberryfibres.etsy.com/listing/1450942751
Happy browsing!
The rest of my shop will be back on line tomorrow, apologies for any inconvenience