Author Archives: Teri Berry

Happy Holidays!

Although I haven’t been able to blog much recently I have been working! Below are a selection of pieces I have been working on over the last few weeks…

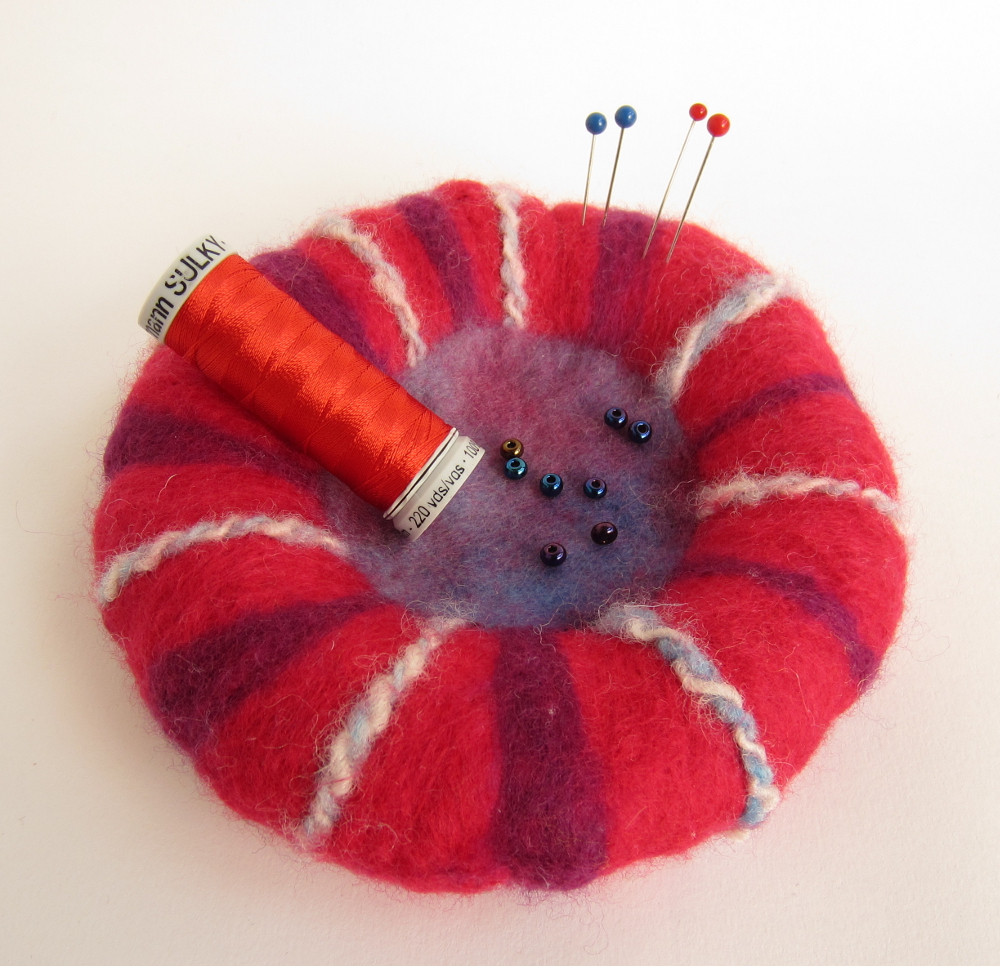
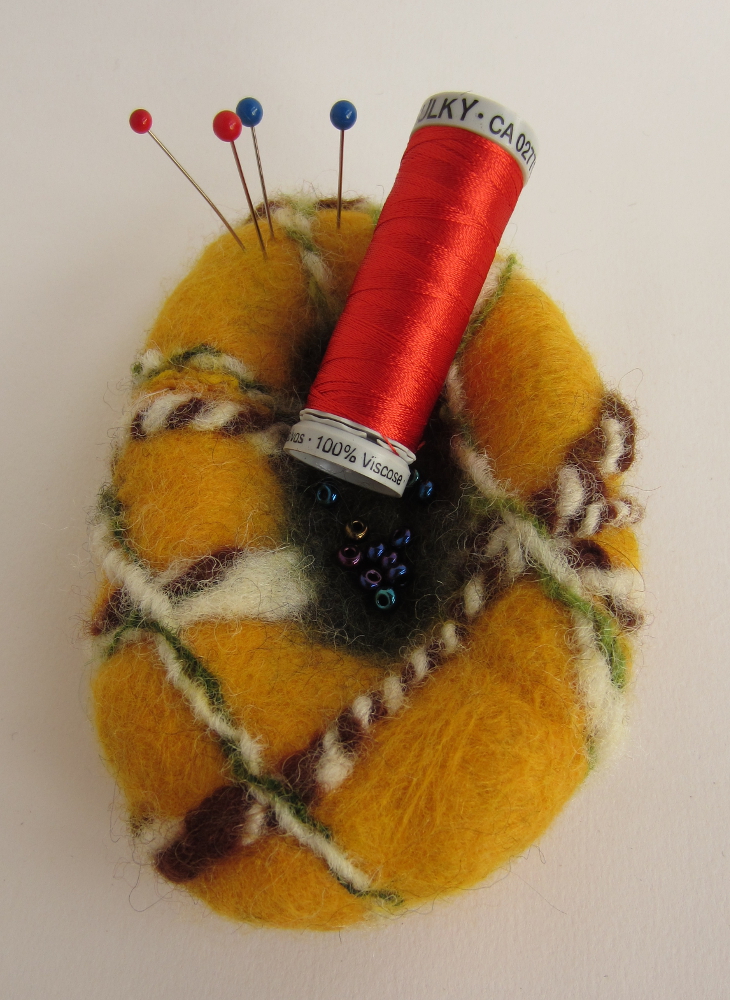
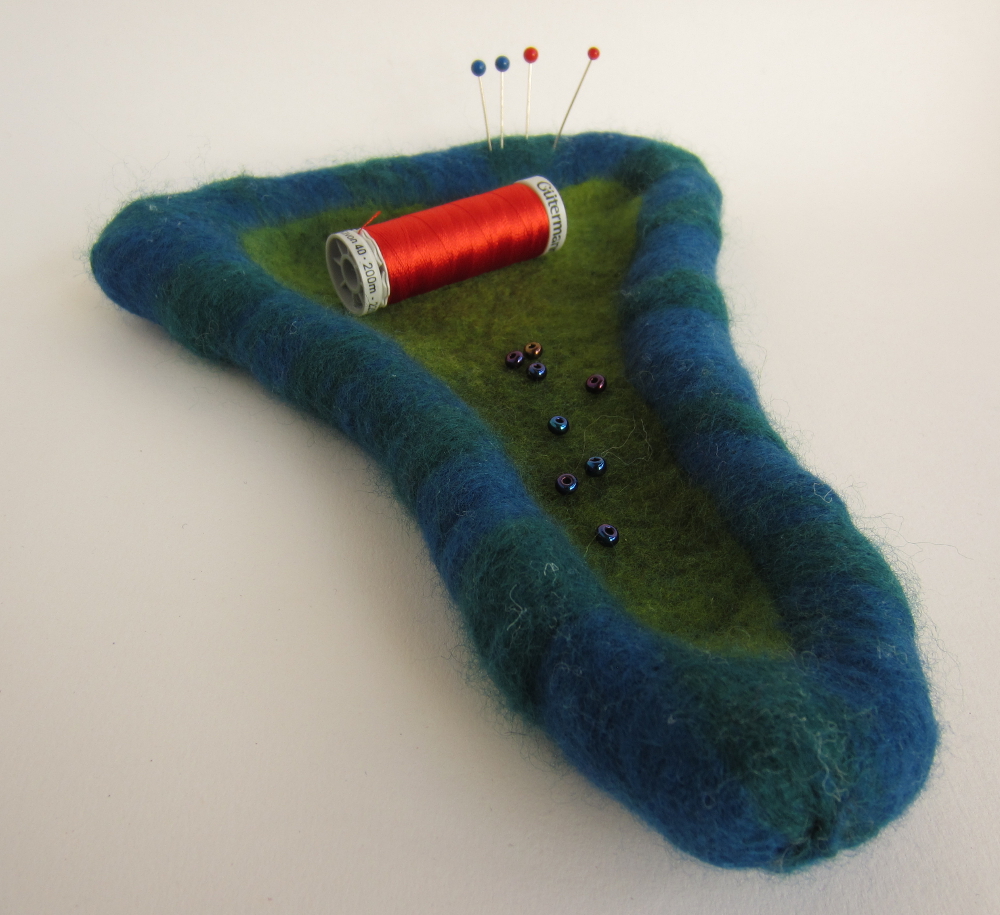
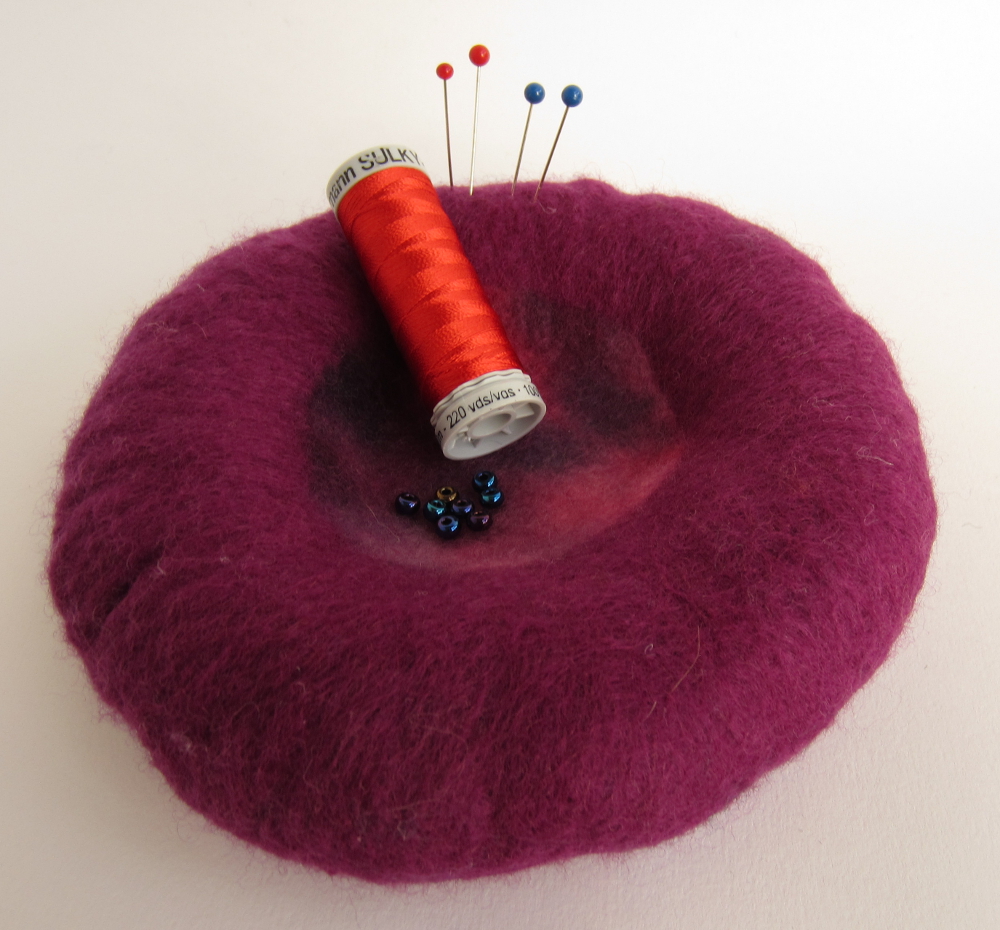
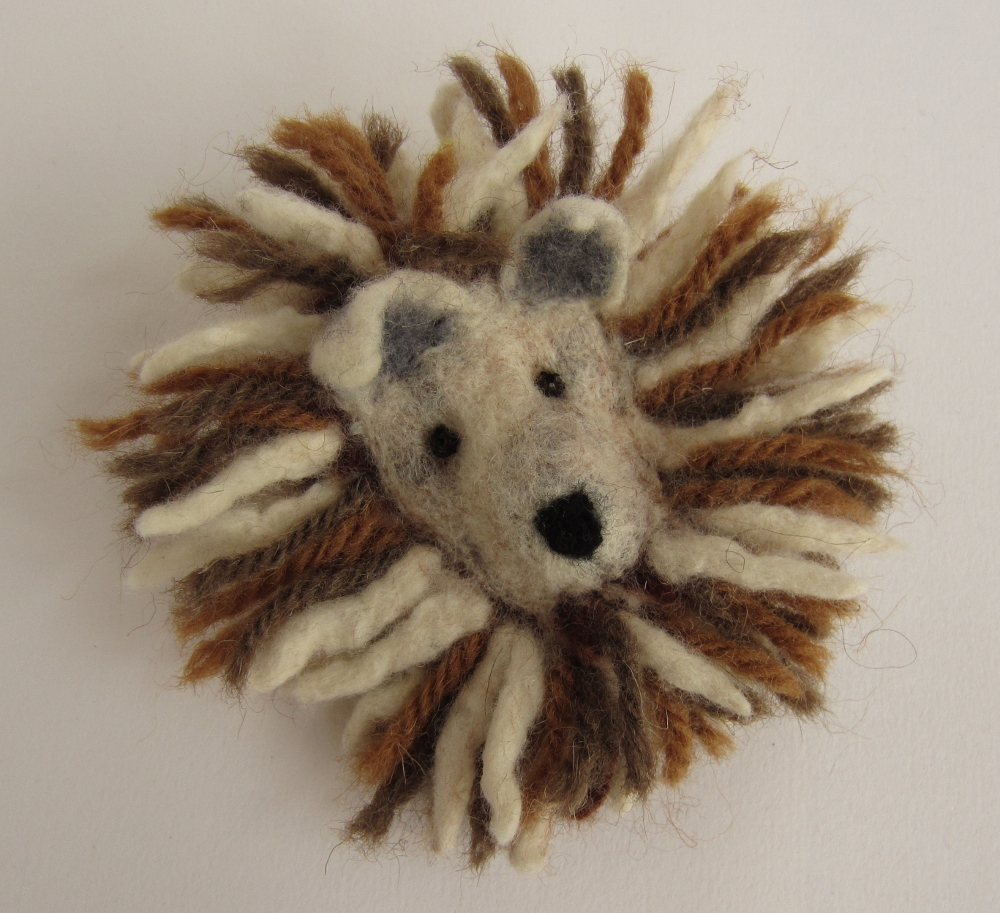
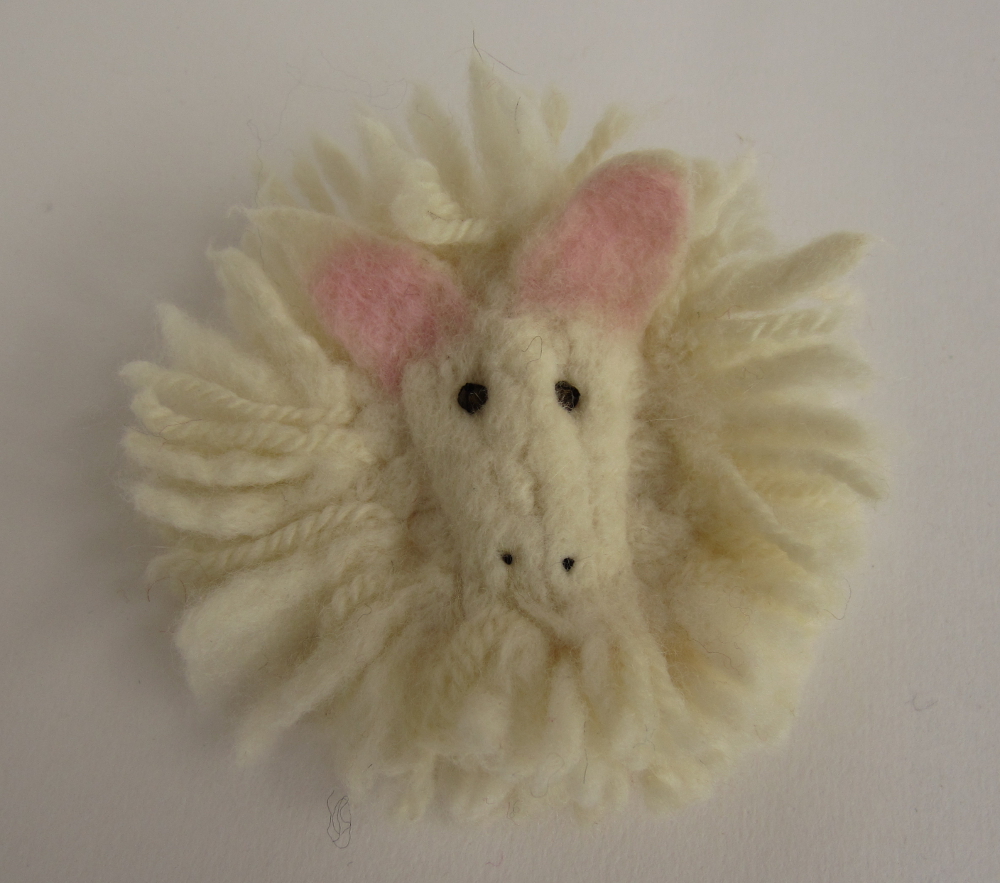
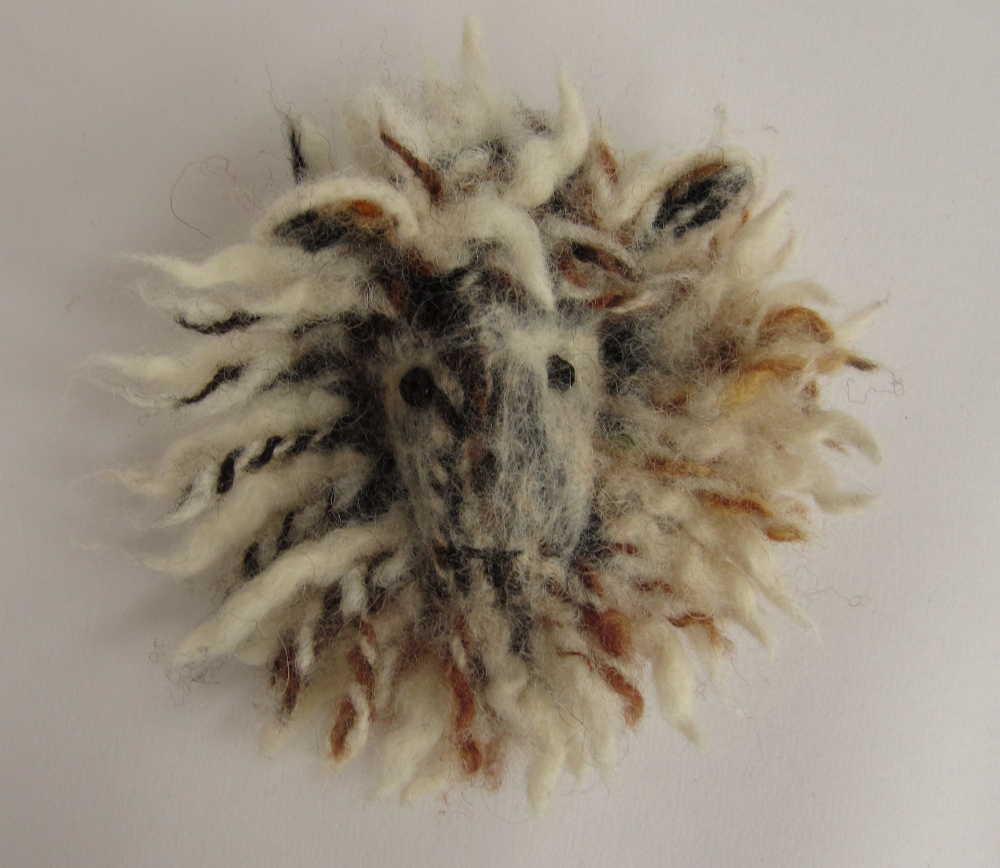
These are a few brooches / pins inspired by a session with the Region 2 IFA ladies, they are just so much fun to make and one of the few things I can make relaxing in front of the TV 🙂
IMG_5640IMG_5642IMG_5643IMG_5647

I finally finished the icicles / snowy night wall hanging that I started nearly a year ago! This is a fairly large piece, measuring approx 3ft x 2 ft.

IMG_5710
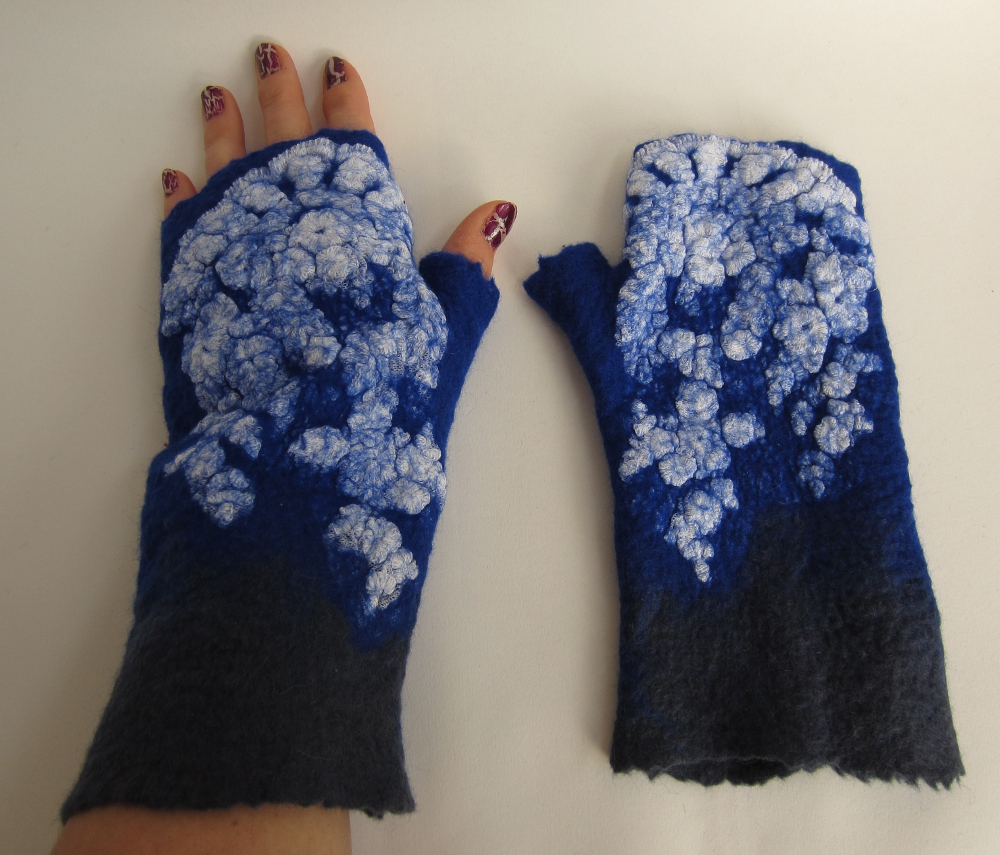
I finished (and photographed) a new pair of gloves. I don’t know about you but I seem to be waiting for days if not weeks for enough daylight to take photos this month. Roll on spring!

IMG_5673
The fishy reef nuno felt made a reappearance from the UFO box too, this is how it looked a few months ago.

IMG_5735
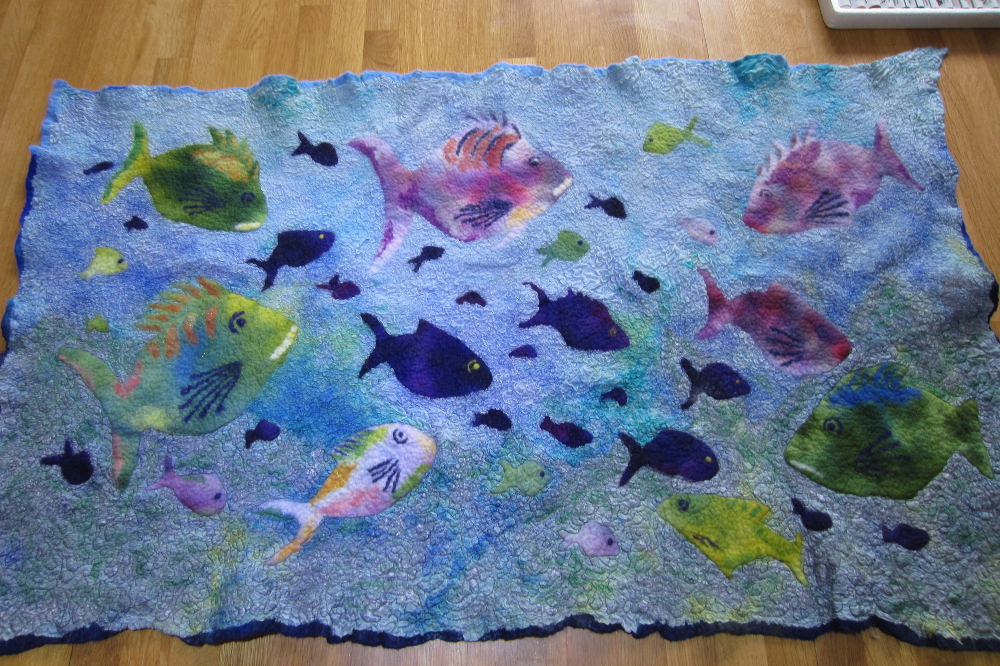
Just adding some darker blue tones where the reef meets the water made a world of difference to the sense of perspective.

IMG_5736
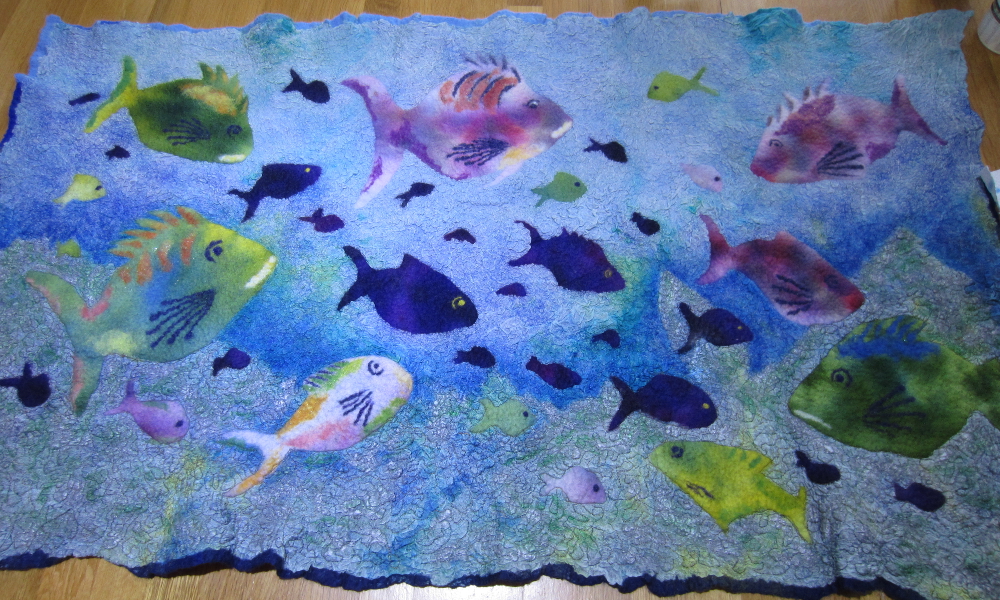
Then I got a bit paint happy…

IMG_5737
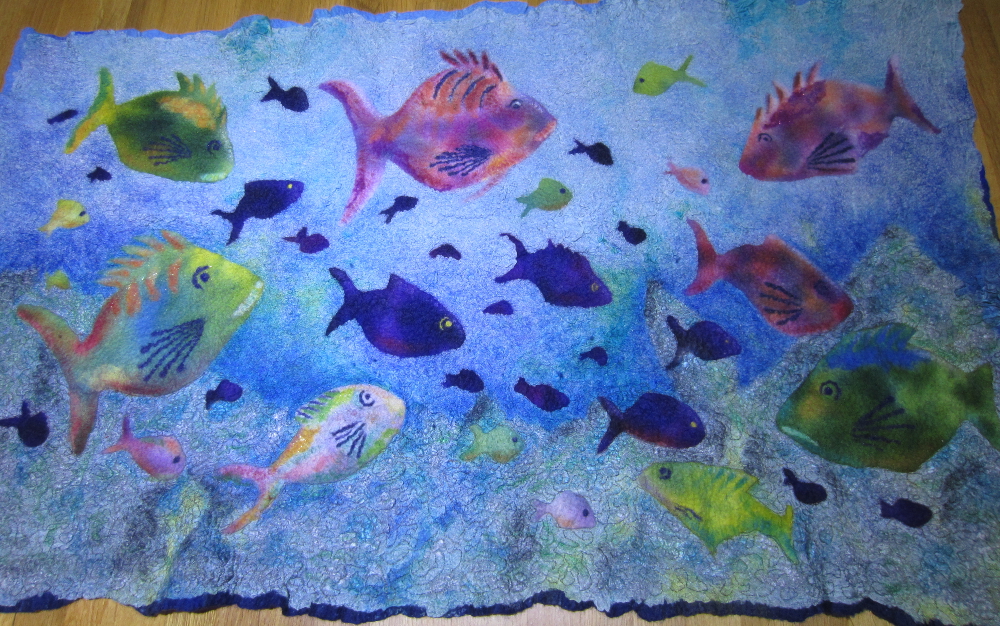
It still needs some work, but it’s making progress, I foresee a trip to the sewing machine to add some tiny fish in the distance….

Some dyeing, the red and orange wool is corriedale that I expect will become a bag. The blues are merino which I have carded into batts and plan to use with the blue variegated blue silk pictured below.

 IMG_5728
IMG_5732
IMG_5731

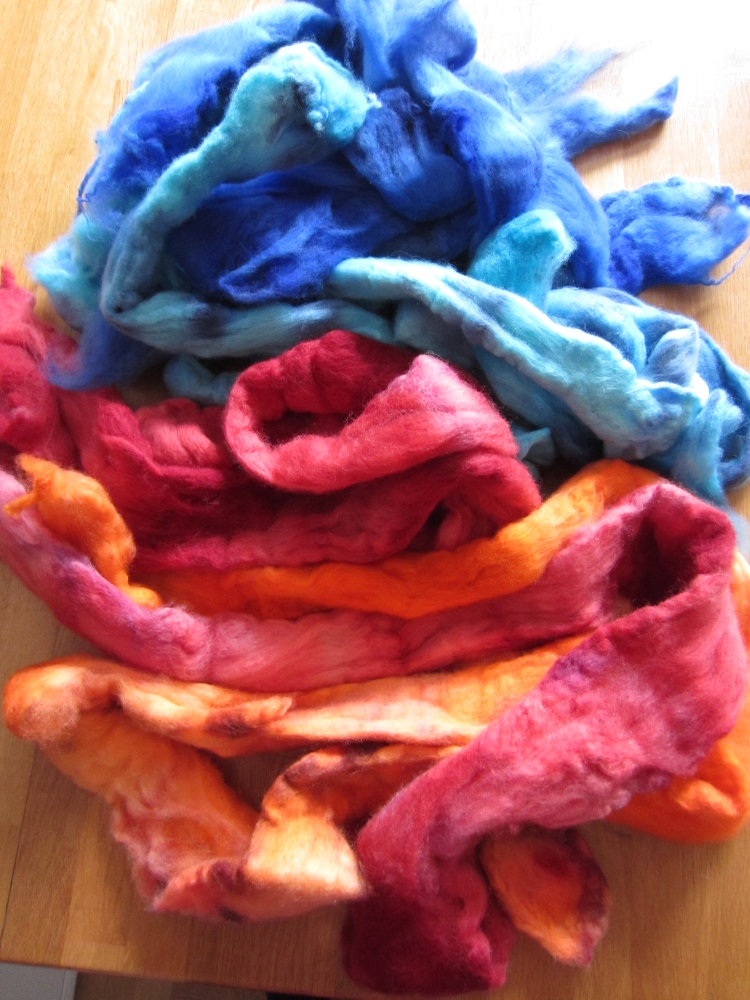
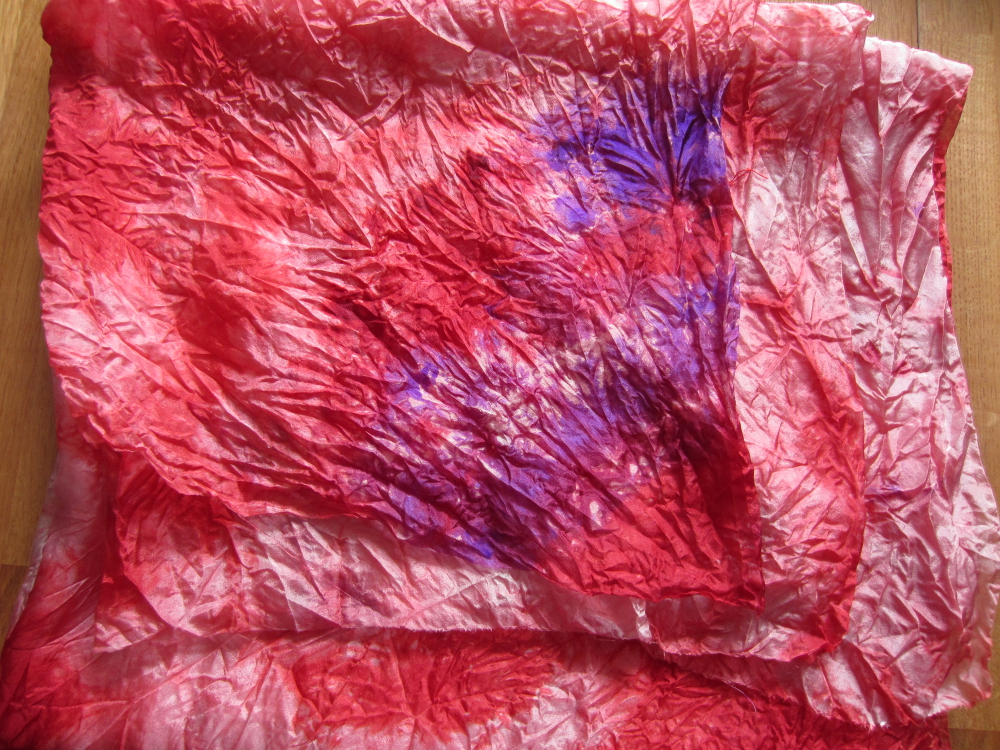
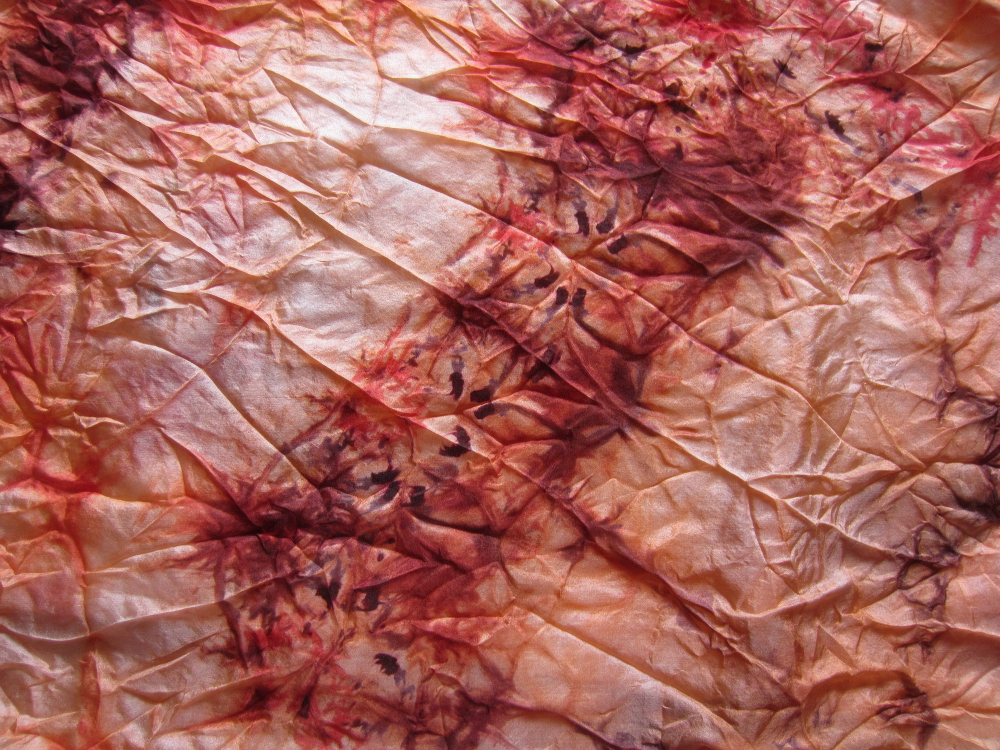
My technique for variegated dyeing is totally random, I just scrunch up handfuls of fabric and stuff it into a bag, hence I was surprised to see a distinct pattern on this piece of silk:

IMG_5733
IMG_5740

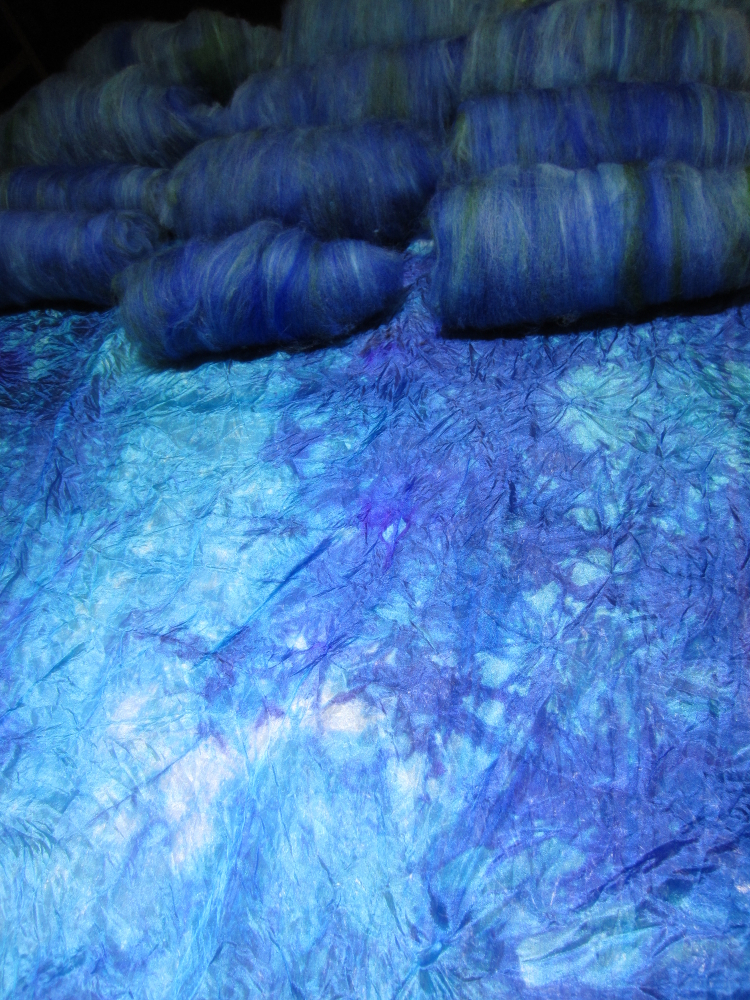
I’m hoping to make a dress from the blue materials and combine it with some screen printing techniques from Ruth’s online class in January (click here for more information). If I can get the idea in my head to work, I plan to submit this dress to the Spinners Weavers and Dyers National Exhibition next year (no pressure Ruth! 😉 )

Whatever your faith or denomination I hope you have a wonderful break, filled with fun activities and surrounded by the people you love.

Sewer’s Friends

This week I have been making a selection of “sewer’s friends”, essentially a cross between a pin cushion and a felt bowl, I have a larger one of these and find it invaluable when working with beads; the bowl part keeps the beads under control and I can thread up a few needles in the pin cushion, all ready to go.

IMG_5693 IMG_5677 IMG_5680 IMG_5686
I also started a waistcoat / gilet / vest using some more of Zara’s Gotland locks, more on that next time…

Gotland Locks – Messenger Bag or Backpack?

Zara from Sweden is selling some absolutely gorgeous Gotland locks on the forum, if you are quick there may still be some left! Of course I couldn’t resist and now they have arrived I’m so glad I didn’t, they are soooo shiny and soft!

Now I have Gotland locks from 4 different sheep (2 from Zara and 2 from UK sources) so its high time I did something with them. I decided to make a messenger bag using the same Gotland resist technique I used on a cat cave a couple of weeks ago.

I used a couple of layers of Corriedale and laid out some pockets over a resist before adding 2 layers of Gotland tops, my plastic resists and some vibrantly blue merino on the outside.

IMG_5630
I only used the locks on the front flap and used a mix from all 4 fleeces as they varied from black/white to grey and almost jet black and are different lengths.

It’s interesting to see the Gotland invade the coarse Corriedale wool too:

IMG_5622


Only the pockets remained white where the resists prevented the Gotland from going walkabout.

Where the resists were placed between the Gotland and merino the blue of the merino can still be seen.
IMG_5626The blue colour was brightened by a little bit of shaving.

It was interesting how the Gotland shrank (fulled) more than the merino, causing the merino to pucker slightly:

IMG_5615

The locks were a little bit matted after I had finished fulling the bag so I combed them out which made some of them go rather fluffy, I used some leave in hair conditioner to try to tame them. Have you ever tried to hair products on your wool?

This is quite a large bag, about 40 cm wide by 40 cm high, now I have to decide what handles / strap to put on it. I was toying with the idea of an adjustable shoulder strap made from felt ropes but now I am leaning towards back-pack style straps, simply because it is so large it will weigh a tonne when I have filled it with everything bar the kitchen sink. What do you think?

Stained Glass Felt Hanging

The lovely Ruth Lane from the Felting and Fiber Studio Forum is creating a book of contemporary designs and posted a request for interpretations of a couple of designs in different art forms, this is my interpretation of the Nature design in nuno felt.

I started by increasing the size of Ruth’s pdf on a photocopier to make it more manageable for felt and traced that design onto the dull side of some freezer paper. This was ironed onto a piece of black prefelt.
IMG_5599
Then cut out the internal sections to leave a black felt frame. I wetted out the prefelt to help the silk pieces stay in place.

IMG_5600
Then I started laying out pieces of hand dyed silk chiffon, trimmed so that they overlapped the black prefelt.
IMG_5601
Once all the cut-out areas had been covered with silk, I laid a piece of white prefelt over the back, if you want to hang your piece in a window so that it will be seen from both sides you can carefully place black wool over the chiffon edges to cover them.

IMG_5602
When I flipped it over the freezer paper was still attached to the front, this was very carefully removed so as not to pull the black prefelt out of position.IMG_5603
Then I gently rubbed the surface through some decorator’s plastic to fix the silk and wool into position before rolling it.

IMG_5604
Take care to check the prefelt has not moved off the silks after every 100 rolls.

The finished wall hanging:

IMG_5606
I think it looks a lot like looking through a window into a garden full of vines. I’m toying with the idea of adding some embroidery and squaring up the frame but I also quite like it as it is and don’t want to ruin it! What would you do?

Effect of Gotland on Merino

A recent discussion on the Felting and Fiber Forum reminded me of a technique I haven’t used for a while, it relies the quality of some coarser wools to migrate through (engulf) finer wools, Gotland is a good example of this.

For this cat cave I laid out 3 layers of Gotland, some thin plastic resist in a scroll pattern and 2 layers of teal merino.
Here you can see the Gotland already starting to invade the merino after just 100 rolls:
IMG_5589

The pattern on the finished cave before shaving, the Gotland has engulfed the merino except where the plastic resist was placed (even there it has tried to migrate over the merino (it really is the Japanese Bind Weed of the wool world):

IMG_5590 cropped

And after shaving:

IMG_5591
This is the resist and the finished cave, it shrank just a little during the fulling!

IMG_5594
The finished cave is about 60 cm across.

Embellish Stitch and Felt Book Review

Does anyone else take the approach of thinking of how much you are saving rather than how much you are spending when you see a sale?

Last week  I was a little bit naughty, I found a Simplicity embellisher on Amazon, reduced from £300 to £100, normally I am a bit sceptical when I see such discounts and think they have previously hyper-inflated the price just so they can offer incredible “discounts” but a quick look around the internet revealed £300 is the standard price for an embellisher and it appears this particular model is about to be superseded, hence the reduced price.

Acknowledging that I know almost nothing about using these machines I bought a book at the same time, Sheila Smith’s Embellish, Stitch, Felt, Using the embellisher machine and needle punch techniques.
These are my thoughts on the book….
First of all the likes:
  • She presents a couple of unusual ideas for “materials” to use, although the majority are rather predictable.
  • The initial “getting used to your machine” projects are well explained
  • There are some beautiful and inspiring photos.
  • She offers some useful tips on how to avoid breaking the needles.
  • The section on creating tucks and folds is interesting and has me reaching for my fabric manipulation manual.
  • There are some basic wet felting instructions, I think it is useful to create your own prefelts as backing fabric / embellishments.
The disappointments:
  • She says you cannot turn the fabric while embellishing, this isn’t true, so long as the needles are moving at a reasonable speed you can move the fabric in any direction, including turning it.
  • I was left with the impression that Sheila had only been using her machine for a couple of weeks when she wrote this book.
  • Although she talks about shading by needling from the reverse side, there was no mention of adding a different colour to the back and needling through to produce colour mixing on the front. I consider myself to be a complete novice so thought this was a very obvious omission.
  • I would have liked to see more samples showing the effect of the embellisher on different fabrics and materials.
  • For those expecting an element of “stitch” as the title suggests, I think you will be disappointed, there are only a handful of photos showing pieces that have been stitched and there are no explanations accompanying the few examples there are.
  • There is a brief section about fibre reactive dyeing but no mention of acid dyeing, given that most of the projects recommend prefelt as the base and yarns for decoration I find this a bit odd.
  • The 3 projects in the back of the book, a bowl, a lattice scarf and a bag recycled from a jumper did not inspire me at all, only the scarf looked like it had been made by an adult.
Overall a good starter book for a complete novice but anyone who has used an embellisher before will probably be disappointed.
My intial thoughts on on the Simplicity 12-needle embellisher:
  • The throat plate has an individual hole for each needle – this is good because it means the fabric / wool does not get pushed through the plate.
  • It doesn’t have a finish with the needles up facility – this is a bit of a pain because you have to turn the hand wheel to bring them up before you can move the fabric.
  • The presser foot will not raise more than 5 mm making it really difficult to feed 2 layers of medium weight prefelt under the needles. While I appreciate it’s not wise to feed multiple layers through at once, you really should be able to feed 2 layers of felt at once.
  • You can use anywhere between 1 and 12 needles, the latter allows really quick coverage of large projects.
  • Each needle can be replaced individually, I understand there are some machines that expect you to replace the entire head when you break the needles.
  • The replacement needles are quite expensive (about £2 each).
  • The machine is small and light-weight, the carry handle on the top makes it very transportable.
These are the results of my first experiments with the embellisher, I can see it being most helpful using up my thicker fabric remnants and the synthetic organzas that don’t nuno felt that well. Some of the fabrics in these pieces have metallic qualities that catch the light very nicely.
IMG_5592


Productive Weekend

It’s not quite finished but now the sleeves are attached the hooded jacket looks a lot closer to finished.

IMG_5550 IMG_5547

It just needs a button and some top stitching down the front and it is finished

Yesterday I made another cat-eating fish, cat cave from some hand-dyed Corriedale.

IMG_5555 IMG_5557  

Feeling inspired by this pine cone:

IMG_5560
I made a bowl:


IMG_5570 IMG_5562 IMG_5561

And I finally finished these 2 scarves, originally I put a rolled hem on these but did not like the finish so removed the hems, reshaped the scarves and felted the edges to stop them from fraying.

IMG_5577 IMG_5580

The silk is still very shiny, the photos really don’t do it justice at all.

IMG_5579

What have you been up to?

Fourth Quarter Challenge 2015

I’m still feeling a bit direction-less on this challenge, ambling from one idea to the next but I have at least managed to commit to making a couple of pieces of felt this week, both based on the challenge.

The first is a small hanging based on this photo of some cone flowers (rudbekia):

cone flowers

My idea for this picture was to use different tones and shades to visually bring some of the flowers forward while sending others into the background.

Using the ball of ochre coloured wool in the middle of this photo I blended some different tones and shades by adding different quantities of white or black.

IMG_5498

And used these batts to make some prefelts:

IMG_5499

I confess I cheated a little – the yellow in the middle is not a tone or shade of the ochre colour, the original colour is the square 2nd from right on the bottom row.

These prefelts were cut up and arranged on a square of black commercial prefelt:

IMG_5502

After lots of rubbing and a little bit of rolling all the pieces are firmly attached and it is ready for some finer details to be added.

IMG_5531

I quite like the jolly, cartoon-like effect but think I can make the flowers look more 3-dimensional with some shading using the left over prefelts and pieces of the batts.

This weekend I also made a start on a hooded jacket, again applying the challenge instruction of using just one colour plus black and white. There’s still some way to go but here is a little taster…

IMG_5504
Rummaging through my stash I found some bundles of carded natural merino batts in white and dark brown, I had an idea that using batts would speed up the layout, which it did, but any time I saved in the initial lay-out was lost needle-felting more wool over the thin spots at the prefelt stage. 🙁

IMG_5505

I attached a hood to my favourite dress resist. Masking tape is great for making temporary changes to resists. You can see where I have permanently altered this resist to add sleeves using duct tape.

IMG_5503

Laying out the wool with some lovely Wensleydale locks for extra texture and some white mulberry silk for a little bit of sheen.

IMG_5508

Starting to layout the front sections:

IMG_5510
With a little luck I hope to post the finished jacket next time.

Q4 Challenge and Winkworth Arboretum

The final Felting and Fiber Studio Form challenge for this year centres around tone and shade, mixing white and black with a single colour. Although I had a small hand in creating this challenge I know I am going to find it difficult to retrain myself to a single colour. I can’t resist the drama created by placing complimentary colours next to each other.

Last weekend we paid a trip to Winkworth Arboretum, a National Trust property just south of Godalming in Surrey, a beautiful place, especially with all the trees just starting to turn red and gold, and definitely worth the excursion if you are an NT member. These are just a few of the photos I took.

IMG_0104 IMG_0100

IMG_0176 IMG_0172 IMG_0164 IMG_0139 IMG_0112

I am finding myself strangely drawn to the last image, I think it is the feeling that path is inviting the viewer to some unseen destination.

Initially I had an idea to create a triptych wall hanging depicting a woodland scene with one panel each of yellow, orange and crimson but I am already wandering off on another tangent. I might still come back to that idea though as I still think it has “legs”.After having a play with the colour tools in GIMP (a free photo-editing software that is similar to Photoshop), these were the front-runners:

I quite like the last one which is more of a grey-scale with the greens added back in, although the third image down, also has merit, that one is essentially a posterised version of the last image but I am finding it looks like there is snow on the ground while the trees are in leaf. The greens are also showing splashes of blue and yellow rather than just shades and tones.

Challenge Cheat

This quarter’s challenge from the felting and fibre studio was to dye or blend our colours to match samples from a colour pallet generator. I only had an afternoon this weekend for felting so decided to bend the rules a little. I found a photo I liked in Pinterest and plugged it into a colour pallet generator with this result:

IMG_5486

Instead of blending / dyeing my own colours, I rummaged through my wool stash for the closest colours I could find to pallet of colours above:

IMG_5490
I decided to make something small, a phone case for an iphone I haven’t even bought yet. I know, I’m a little bit mad but when I get an idea in my head I rarely have the patience to be sensible.

Keeping to the flower theme of the original photo, I created a resist based on phone dimensions I found on the web and started laying out my wools and found some scarlet cotton in my scrap bag along with some pieces of hand-dyed prefelt that I thought would work well with this colour pallet (another deviation from the challenge brief).

IMG_5495

This is the nearly finished case, I just need to trim the pocket where the phone will sit, but I will wait for the phone to arrive before I do that final step, even I’m not that brave/stupid/reckless (delete as appropriate).

Here it is drying (front and back):

IMG_5496 IMG_5497

I’m already thinking about adding some machine embroidery to the front flap….