Category Archives: dyeing

My favourite colour is October

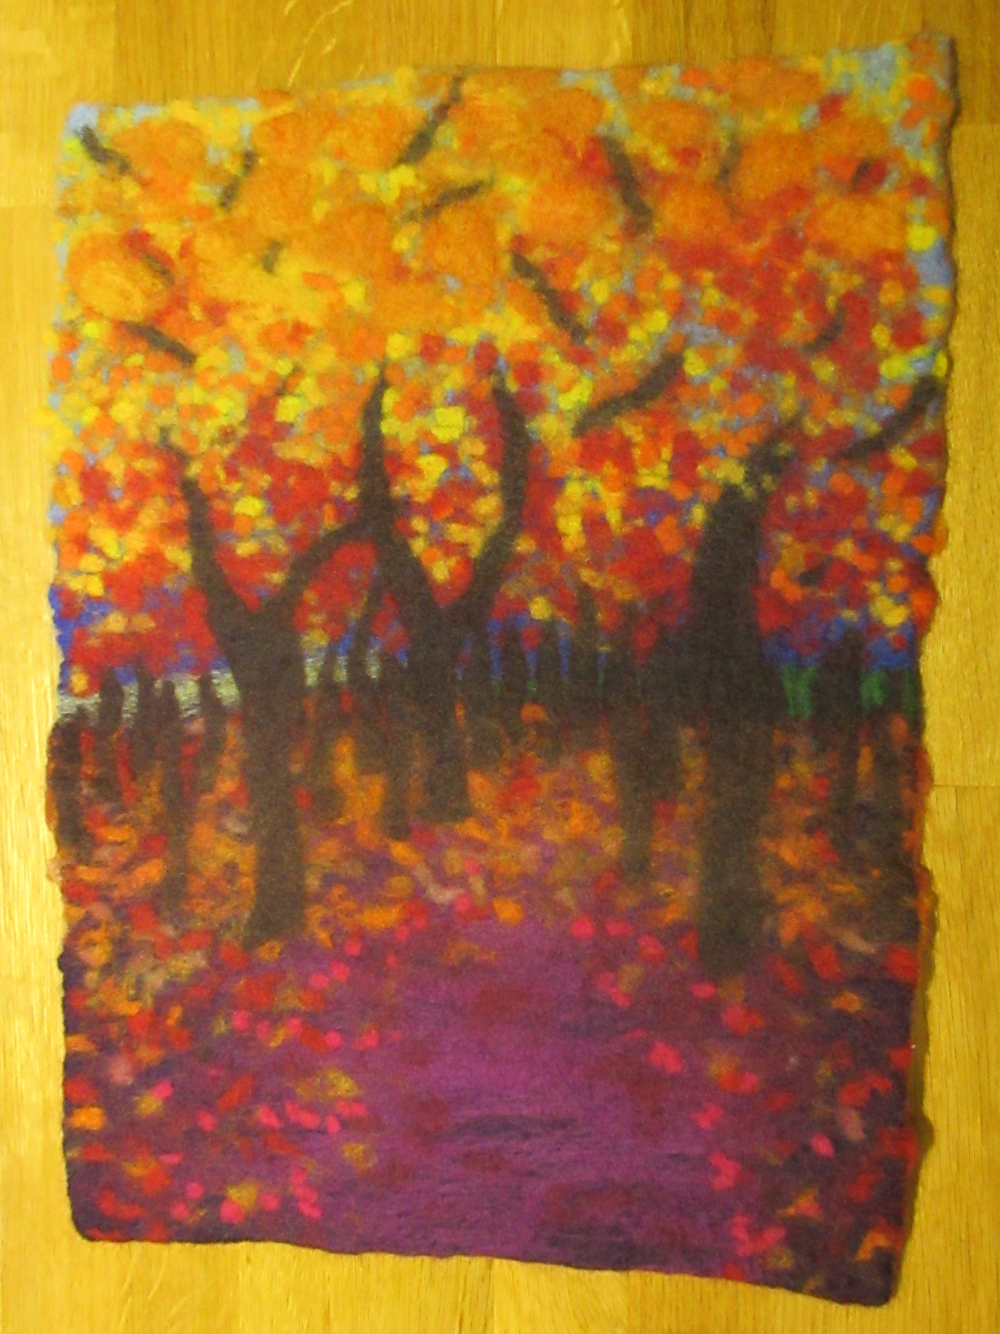
I have been asked to teach a group of school children to make a felt picture and the theme will be “autumn”, I love autumn, it is easily my favourite season. While researching images to inspire the children I found a post on Pinterest that read, “my favourite colour is October”, I couldn’t agree more! All the rich, vibrant oranges, golds, crimsons singing on a backdrop of deep green, what’s not to love?!

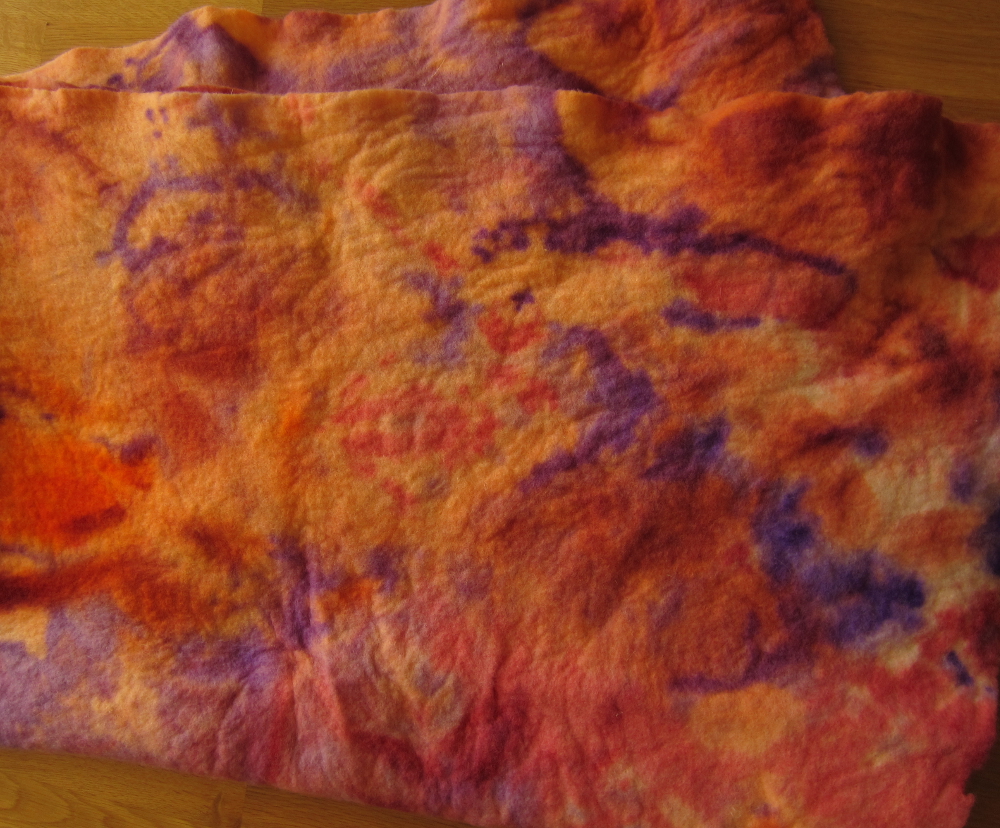
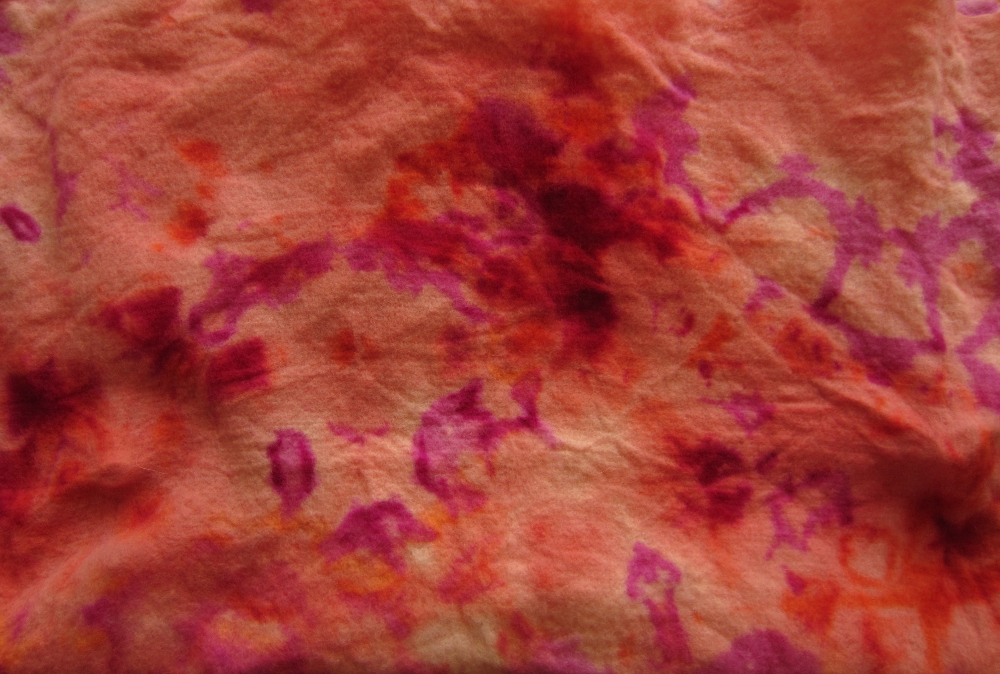
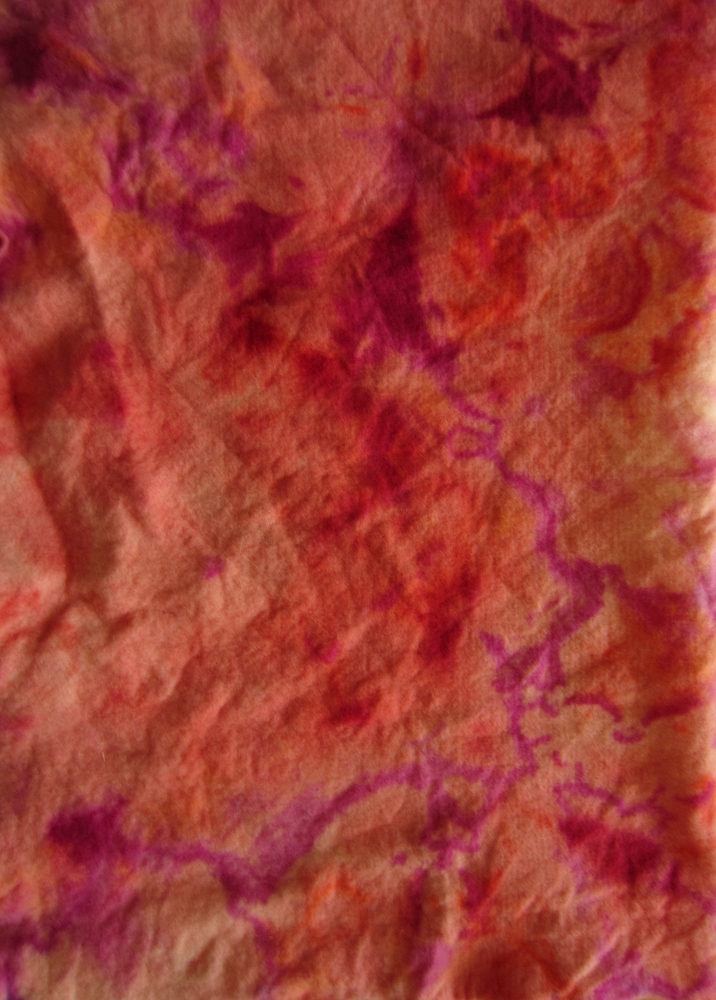
Today has been spent preparing for the class in 2 weeks’ time, first dyeing a stack of prefelts in mottled autumnal colours and then creating a felt picture to use as an example of what they might like to make. Being only A4 in size (approx 12″ x 8″) it was surprisingly difficult to achieve the level of detail I had in mind.

img_7796

img_7797

I am really looking forward to this class but it is going to be hard to keep my hands off these prefelts in the meantime! 🙂

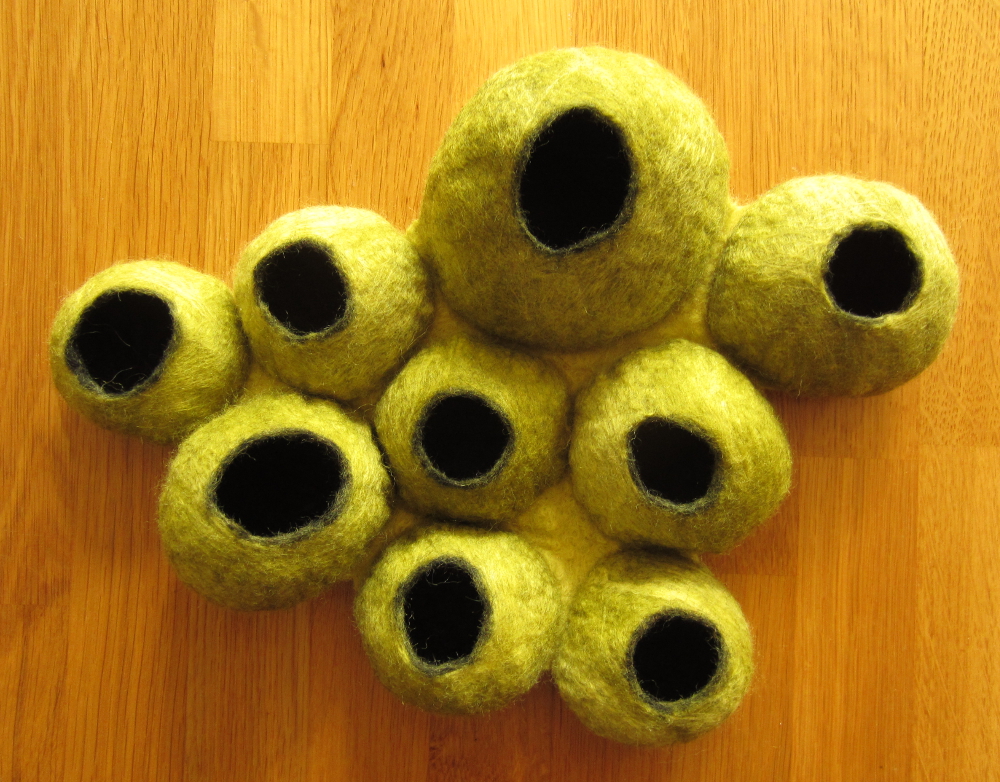
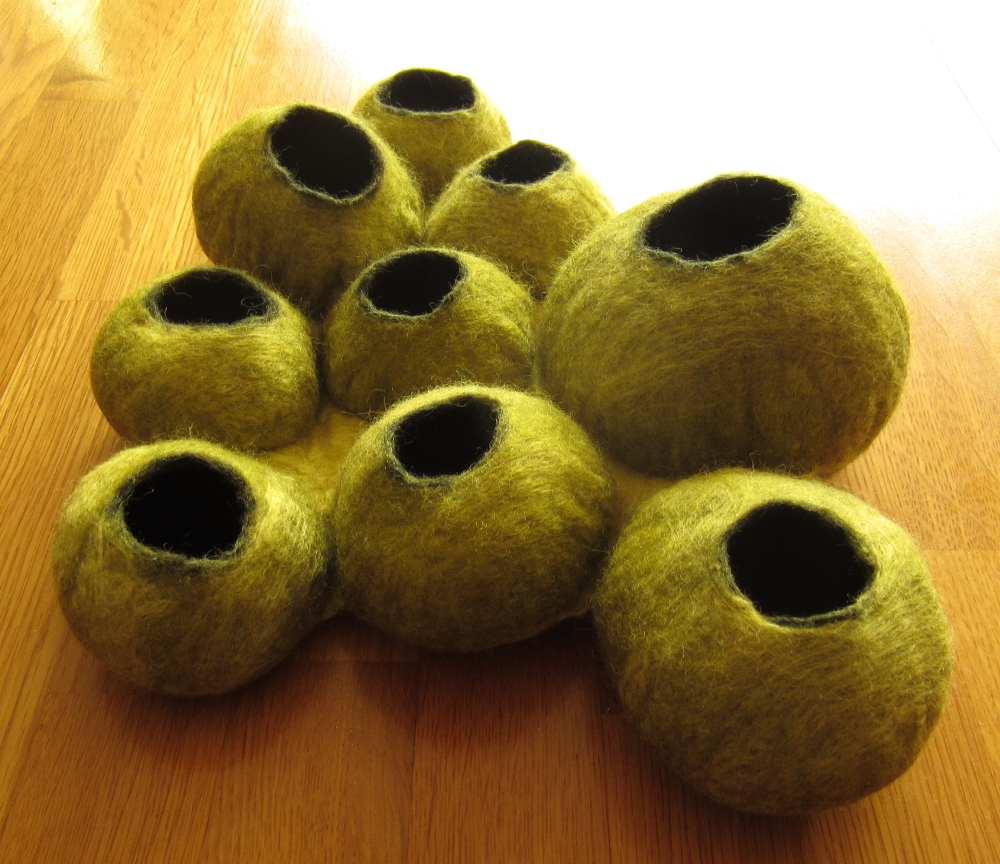
Writing of classes, Alison, from my concertina hat class, forwarded some photos of her snail hat that she finished after the class ended, thank you Alison, she looks wonderful. The perfect summer cap! 🙂

img_4241

img_4242-1

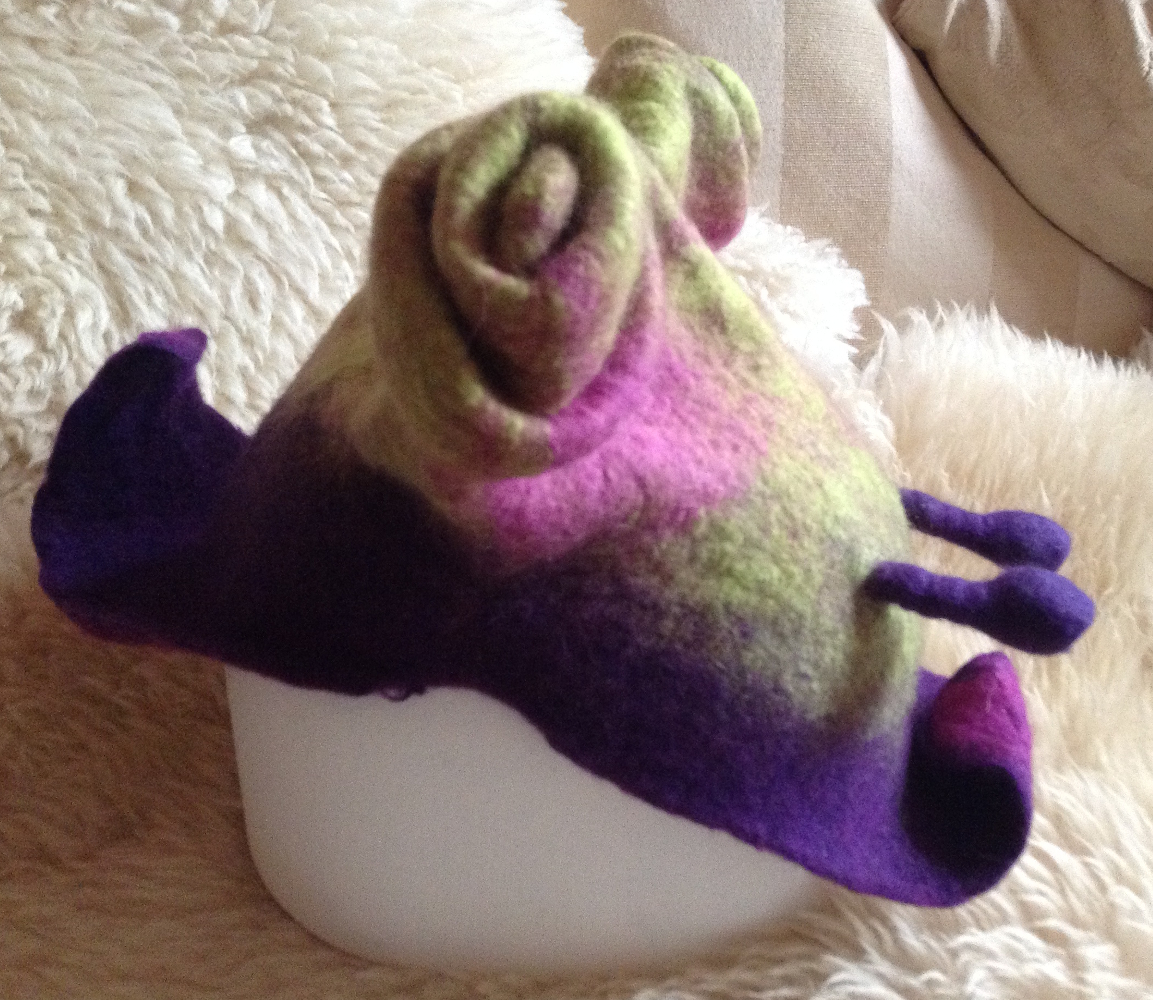
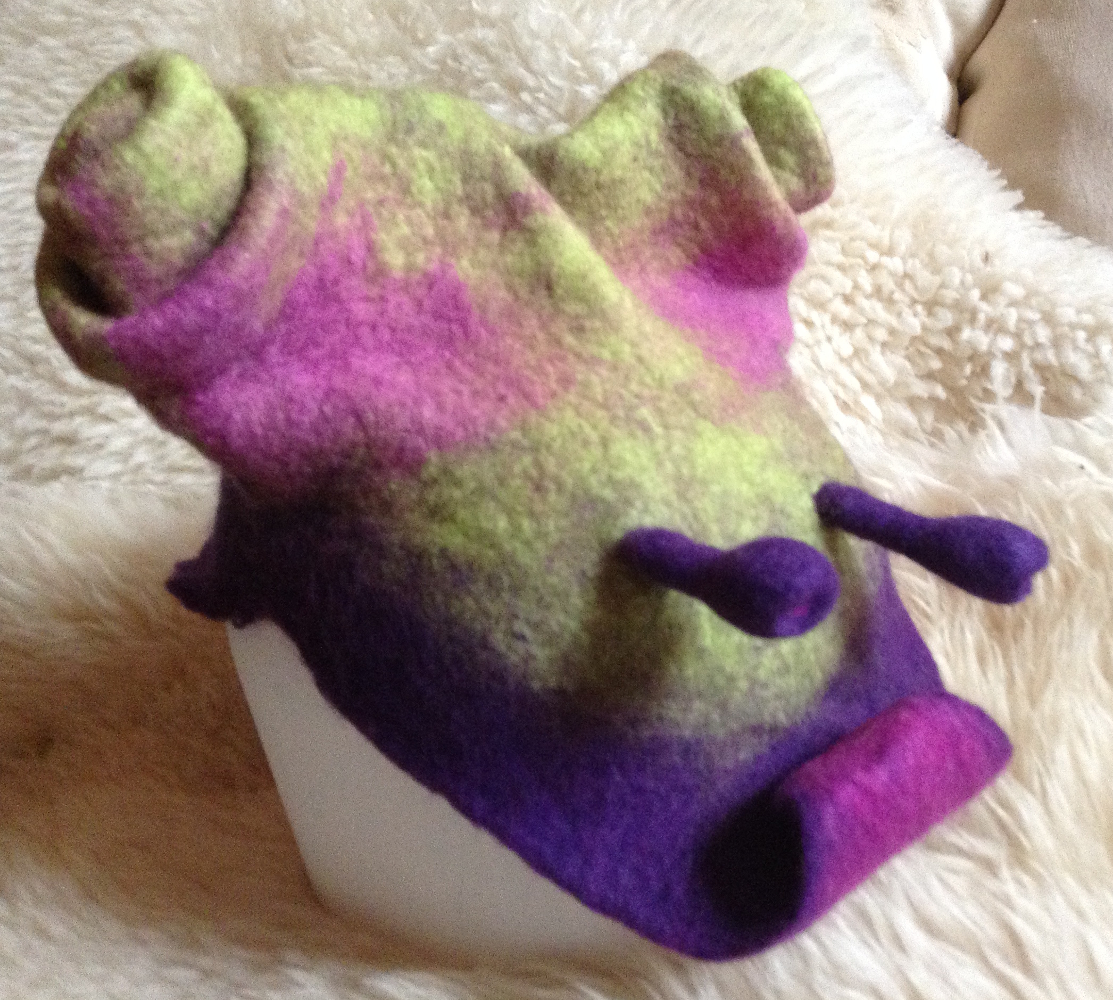
We will be running the concertina hat class again next month, if you would like to join in please pop over to the Felting and Fiber Studio pages for more details and the sign-up form. If the the last class was any indication it will be a lot of fun and there will be some wonderfully fantastic hats made. Don’t delay though, the closing date for registration is 31 October 2016.

Easter Weekend

I love the long holiday weekends and Easter, with both the Friday and the Monday off is the best of all, a whole 4 days to do with as I please, and invariably that means textiles!

I’ve had my fingers in lots of different textile pies this week:

A new nuno dress (photos of that later – it is nearly finished so won’t be too long to wait).

My first attempt at a tailored jacket, I love everything about it except for the collar reveal, it’s all lumpy and misshapen and I can’t figure out why… it will be accompanying me to my dress-making class, hopefully the tutor can explain what I have done wrong and, more importantly, how to put it right.

IMG_6506

Back in the felt world, I made a new lacy scarf and, while I was dyeing this, I put in a few pieces of prefelt, I’m debating on cutting up the prefelt to make nuno scarves with geometric designs.

IMG_6433

IMG_6451

IMG_6452

IMG_6453

I am finding myself drawn back into the beauty of the microscopic world (in part thanks to pinterest) and have been developing an idea for a 3D representation of a carpet of cells. I am thinking a series of small pods, the interiors will be black so that when I cut an opening they will appear to have nuclei. The question is, how to join them together? I have 3 or 4 ideas on how I might achieve this. This is my first test piece…

IMG_6502

IMG_6505

I’m ashamed to say I have been procrastinating terribly over posting my work on Etsy for the last few of months to the point where I have a box full of work now waiting to be listed. However, I have been making amends this weekend and photographed 80% of it, now I  just need to make myself sit down and write the descriptions and titles. Definitely a job to be done in front of the TV with a glass of wine in hand! 🙂

What have you been up to this weekend?

Happy Holidays!

Although I haven’t been able to blog much recently I have been working! Below are a selection of pieces I have been working on over the last few weeks…

These are a few brooches / pins inspired by a session with the Region 2 IFA ladies, they are just so much fun to make and one of the few things I can make relaxing in front of the TV 🙂
IMG_5640IMG_5642IMG_5643IMG_5647

I finally finished the icicles / snowy night wall hanging that I started nearly a year ago! This is a fairly large piece, measuring approx 3ft x 2 ft.

IMG_5710
I finished (and photographed) a new pair of gloves. I don’t know about you but I seem to be waiting for days if not weeks for enough daylight to take photos this month. Roll on spring!

IMG_5673
The fishy reef nuno felt made a reappearance from the UFO box too, this is how it looked a few months ago.

IMG_5735
Just adding some darker blue tones where the reef meets the water made a world of difference to the sense of perspective.

IMG_5736
Then I got a bit paint happy…

IMG_5737
It still needs some work, but it’s making progress, I foresee a trip to the sewing machine to add some tiny fish in the distance….

Some dyeing, the red and orange wool is corriedale that I expect will become a bag. The blues are merino which I have carded into batts and plan to use with the blue variegated blue silk pictured below.

 IMG_5728
IMG_5732
IMG_5731

My technique for variegated dyeing is totally random, I just scrunch up handfuls of fabric and stuff it into a bag, hence I was surprised to see a distinct pattern on this piece of silk:

IMG_5733
IMG_5740

I’m hoping to make a dress from the blue materials and combine it with some screen printing techniques from Ruth’s online class in January (click here for more information). If I can get the idea in my head to work, I plan to submit this dress to the Spinners Weavers and Dyers National Exhibition next year (no pressure Ruth! 😉 )

Whatever your faith or denomination I hope you have a wonderful break, filled with fun activities and surrounded by the people you love.

Q3 Challenge Part 1

The lovely ladies at the Felting and Fiber Forum recently posted the third quarter challenge. I confess I have been a bit rubbish  at completing these this year, although I did give some thought to the Q2 challenge and thankfully Q2 and Q3 are similar enough that I can transplant my idea from Q2 to the Q3 challenge.

I wanted to make a textural wall hanging using silk cocoons to add some extra dimension a bit like this but on a larger scale:

This quarter’s challenge is focussed on colour and we are to use the colours selected from a photo or image as seen by a colour selector program in a textile piece.

This is the image I chose, Mr TB took it on one of our Sipidan dives and 6 years on, it is still one of my favourites (one day I will get around to making a more literal interpretation of it in felt):

I ran the photo through 2 programs:

Colour Adobe

adobe - Copy

Palette FX

colour pallete - Copy

Of the two I much prefer the wider range of colours from Palette Fx so dyed some silk, yarn and cocoons alongside blending some merino and Norwegian wools on the drum carder in an effort to match 9 or 10 of the colours.

The results of the dyeing was interesting, I threw a mixture of materials into each bag filled with dye and acid solution expecting them to come out looking very similar.

Well the yellow did, only the yarn is a slightly deeper intensity:

IMG_4715

And the cyan was similar, although again, the yarn is a stronger /deeper colour.

IMG_4713
But the orange/brown gave me a complete range, the silk top and cocoons were the lightest and really quite orangey, while the silk chiffon is more of an orangey-brown colour, while the yarn is bordering on chestnut brown. Quite a range…. all from the same bag.
IMG_4714

Is this just down to the light reflecting qualities of each material or do you think they are interacting (chemically) with the dye in different ways?

Here is the result of all the blending too, I’m including a couple of balls of merino that are similar to the colours generated by Palette FX and found a skein of sari yarn in my stash that is very similar to the purples. Not sure if it will make it into the final piece but I certainly have quite a range of fibres to play with 🙂

IMG_4717

I’m really looking forward to putting the blue (second from left) with the yellowy-orange (second from right. They are complimentary on the colour wheel and of similar intensity so I’m expecting them to really make each other sing.

Now I just need to figure out how to assemble this wonderful pile of fluff into something interesting to hang on the wall…..

3D Coral

I came across this photo of coral by Wolfgang Seifarth on pinterest and it got me thinking about a 3D felt piece. It looks like felt already doesn’t it?

Color, Pattern and Texture, Wolfgang Seifarth, Photographer, coral

Using a similar technique to the one I used to make my felt cuff for my C&G course I thought I should be able to make a 3D wall hanging. I wanted to dye it so that the folds of the “coral” are visually thrown forward of the background but I thought complementary colours would be too much, maybe a lighter colour on the tips than the background?

I constructed this piece from prefelts stitched together before fulling and then dyeing. I’m afraid I forgot to take a photo in my excitement to dye this piece. Here it is after the first round of dyeing.

It looks OK but I felt was missing something. So it went back into the dye pot…

And after mounting…

I like it but can see ways to improve it, most notably by placing the raised squiggles closer together as they are in the coral photo.

BTW, I got my dates for Weyfest mixed up, it’s not until next weekend, so I’m sure to make one or two more hats between now and then! Watch this space 🙂

Translucent felt

As I mentioned in my last post, I have been doing almost obscene amounts of dyeing this week, one batch was for my C&G course and was predominantly focussed on dyeing different animal fibres in the same dye vat (bag in my case) so you end up with a harmonious blend of colours in a range of materials. I chose to use each pair of primary colours so had 3 “vats” and the these are the results.

Each vat contained, Corriedale top, some alpaca top, silk hankies, ponge 5 silk, a piece of commercial prefelt, some merino pencil roving and a piece of hand spun White Faced Woodland.

For good measure I threw in some of my scoured Jacobs fleece too…

The colours are so lovely I kept finding myself standing in the bathroom literally watching them all dry 🙂 Needless to say I couldn’t wait to use them…
Our brief from the course was to create a piece of textured felt using the design work form previous weeks (in my case I had been working with bone micrographs).
I cut out some silk shapes that resembled the holes you see in bone when under the microscope.

And laid resists over the top that were just slightly smaller than the silk.

Then added 2 layers of the corriedale roving, pulling the tufts was lovely as I had different colours with each pull.

I even spun some of the orange/red pencil roving, my spinning is definitely improving but I’m not about to win any prizes for producing beautifully even yarn.

After felting and cutting out the resists.

I’m really pleased with how this piece turned out but it really comes to life when you hold it up to the light:

The corriedale has produced a beautiful crimp and the silks look like stained glass windows. I think this technique would make a stunning lampshade or even curtains.
Here is a closer look at the curly corriedale, this is fast becoming one of my favourite wools to work with:
Now I just need to figure out a way to hang it so it can be hung in front of a window and the frame / hanger does not cast a shadow that would detract from the design….
I also repeated the dyeing a variety of different fibres exercise. Following advice from Ruth I tried some grey and brown too (thanks Ruth). It’s still a bit monochromatic but an improvement on the last version 🙂
Linking up to nina-marieoff the wall Friday

Blending dyes on wool

This week I have been doing quite a lot of dyeing so thought I would share one of my favourite techniques with you. I use this technique to blend colours on wool when I want a gradual change of colour or to mix colours on the felt itself. It involves finger painting so is a lot of fun too 🙂

For this technique you will need:
Pieces of prefelt or finished felt (the method below was for 100g of felt)
washing up liquid
acid fast dyes
white vinegar or citric acid
measuring jug and scales
cling film
latex or rubber gloves
pots for mixing dyes in (old jam / chutney jars are good)
disposable pipettes or syringes
steamer (or microwave)

Method:

  • Soak your prefelt in a sink / bucket of 2L water, 0.5 cup of vinegar or 5g citric acid and, a generous splash of washing up liquid, making sure it is well saturated. If you live in a hard water area you can also add 1g of calgon to this soak.
  • Lay out some cling film, overlapping the pieces if necessary to make it big enough to lay out your felt.
  • Squeeze about half the water out of your felt (it should still feel heavy with water and be dripping but water should not be running out the bottom of the felt)
  • Lay your felt flat on the clingfilm.
  • I mix 1g of dye to 10 ml of water but you could easily use half as much dye if want paler colours. I apply my dyes with those 3 ml disposable pipettes but syringes work well too or you could just pour the dye on in the pattern you desire.
  • You can add a second or third colour now to make colour blending easier but I have applied 1 colour at a time to show how they spread.
  • After applying the first colour use your gloved fingers to spread the dye around (the washing up liquid in your bath will really help with this). If it is difficult to move the dye your felt is probably not wet enough, carefully pour some water from your soaking bath onto the felt and try again.
  • Then add your second colour (I used yellow but it looks very orange in this photo).
  • And blend with your fingers again. Continue adding colours and blending until you are happy with the design.

  • Carefully roll the felt up in the cling film
  •  And twist the ends shut or wrap in another piece of cling film to stop steam getting into your parcel.
  • I like to put mine in a zip lock bag too (very “belts and braces”!)
  • Then steam for 45 min to an hour before rinsing under running water.

Natural Wool Colours

This week I have been a good girl (mostly) trying to catch up on my City and Guilds work, there’s been some dyeing of wools and animal fibres and using natural fibre colours. It’s very easy to overlook all the lovely browns, creams and greys that wool naturally comes in when confronted by the vast array of juicy, commercially dyed wools that are so readily available but I hope I can convince you to at least take a second look at the natural colours too….

For the current series of C&G assignments I have been using bone micrographs as my starting point and this piece was no exception. I found this photo on the Microlab Gallery and used it for inspiration. This is a piece of fossilised dinosaur bone as seen under the microscope.

Here are the fibres wetted out ready for rolling, I even used some of my hand-spun Jacob wool for drawing lines (my spinning is still a bit erratic but is getting better and I like the thick and thin effect in this painting).

And the finished piece.

I really like this piece, it is quite heavily textured and I’m finding hard not to stroke it whenever I wander past. I think it looks lonely and needs some companions, so will have to make a few more ;o)

For a related assignment we were also asked to make a piece from just white fibres with the intention of dyeing it so that the different design elements would be revealed as not all fibres accept the dye at the same rate. Here is the piece laid out, ready to be wetted out and rolled:

And before dyeing (not very inspiring!):

And after dyeing:

I’m a little disappointed with this piece, I’m glad I incorporated some vegetable fibre (igneo corn top) which does not accept the acid-fast dyes, the corn top is the only element that has provided a reasonable amount of contrast. All the wools, silks, mohair and alpaca seem to have accepted the dye fairly evenly so the changes in colour are rather subtle. The different textures are nice though. I am tempted to add some embroidery to make it more interesting…..

Sculptures to Dye For

I confess I have been a bit slack about posting lately. Sorry about that but I have been doing bits and pieces of felt making and dyeing. I dyed these pieces from my workshop with Yvonne Habbe a couple of weeks ago but have only just got around to taking photos of them. I think most of them turned out really well.

This one is about 4 inches long and I am tempted to stitch some beads into the cleft down the centre and turn it into a brooch.

This was my spherical pod from the first exercise on the workshop, I’m pleased with how the rainbow dyeing has turned out.

I love the colours and floral shape of this piece but it is too large to be a brooch – maybe a small bowl?

I have been making lots of these to test out how different wool breeds behave in these small sculptures. This one already has a brooch pin on the back.

This is another brooch, it wasn’t intentional but after adding the dark beads it now reminds me of a pomegranate.

This sculpture (about 10 inches tall) reminds me of a tellytubby – again that wasn’t my intention at all when I drew the template and started shaping the felt!

This piece still needs a bit of work, I think I will stitch down the curly tips to hold them in a tighter spiral and add a brooch pin to the back. It measures about 6 inches across.

OK – so the eagle-eyed amongst you have probably noticed this one and the next have not been dyed, instead they have been treated with a cellulose based stiffener.

Not sure if anyone else has tried making a hollow cube from felt? This has to be one of the most difficult things I have tried to do with felt, as you pull and stretch one side to straighten it you end up pulling another edge out of shape. I plan to add some stitching to this one, more on that next time.

And finally, a little tease, this is one of the bag designs I have been working on since Yvonne’s workshop, it is actually a coin purse (or will be) that will have a matching handbag.

Have a great weekend!

Linking up to nina-marieoff the wall Friday

Sun Dyeing

I was reading a blog a couple of weeks ago with some scepticism. With the benefit of hindsight I concede my scepticism was a little unfair. The blogger in question had posted about sun dyeing and said that you don’t need to buy those expensive photo-sensitive fabric dyes / paints, any old fabric paint will do. My initial reaction was, if any old fabric paint will do why is there a market for those expensive photo-sensitive paints? Too good to be true right?

The scientist in me made me set my scepticism to one side long enough to perform a little experiment. We all want to save our pennies to spend on more textile toys don’t we??

Materials:

  • Light coloured cotton based fabric (I expect silk will work too but synthetics possibly not – those are experiments for another day 🙂 )
  • A pad of newspaper or a large box (I used a plastic under-bed storage box)
  • Masking tape
  • A spray bottle filled with water
  • Fabric paints (I used Setasilk (iron-fix) silk paint and acrylic paint mixed 50:50 with textile medium). If you don’t plan to wash your fabric you can replace the textile medium with water.
  • Large brushes (I used the foam type)
  • Resists – I used leaves but anything that will lie flat on the fabric and block the light all work well. Paper cut outs and opaque stencils work well.

This is what I did:

  • Stretch your fabric over a box or a pad of newspaper with masking tape
  • Spray with water until evenly wet, allow the water to disperse while you gather some leaves or other objects to create a resist.
  • Working quickly, cover your fabric with fabric paint and lay out your resists, ensure they are as flat as possible to the surface of the fabric.
  • Leave in a sunny spot for 2 hours (beware of breezes blowing all your resists away if you put your box outside – I left mine in front of a south facing window).
  • The hardest part is resisting the urge to lift the leaves to see what is happening underneath 😉
  • Remove the leaves / resists and iron for several minutes to heat fix.

Sitting in the sun catching some rays, the pink and blue on the left is the Setasilk paint and on the right is red acrylic paint mixed with textile medium.

I think I applied the acrylic paint (on the right) too thickly, hence the effect is not so noticeable. In the areas where the paint is a little thinner the leaves are paler.

A second attempt with a lighter coating of acrylic paint. I also sprinkled a few grains of rock salt in the bottom right to see what effect that would have:

After 2 hours on a sunny windowsill:

Close up of the salt effect, it appears to have concentrated the paint under the grain and drawn the paint from the surrounding area:

A close up of an acer leaf outline.

Have you done any sun dyeing? What paints / fabrics did you use?
Linking up to nina-marieoff the wall Friday