Category Archives: felt sculpture

Monstrous Felting Retreat

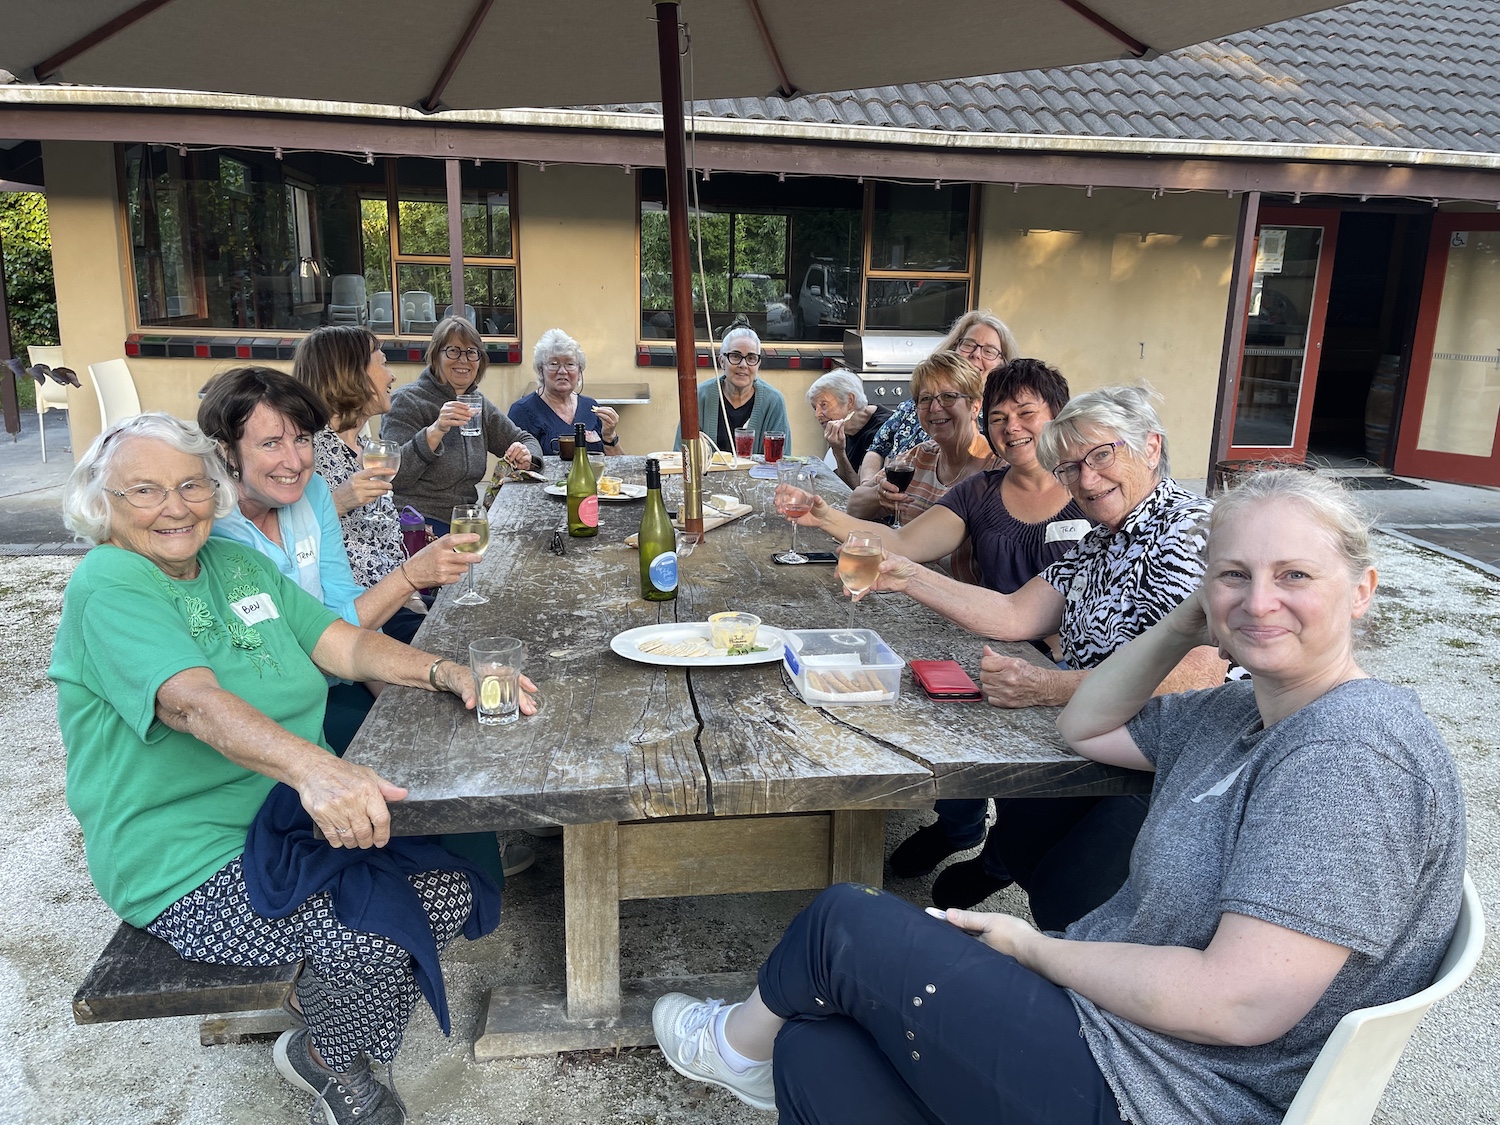
A few weeks ago I experienced the delight that is the Auckland Fun Felter’s Retreat, 2 full days of felting bliss! 🙂

We were 13 like-minded ladies at a retreat centre, tucked away in a quiet and leafy corner of west Auckland, we had the entire centre all to ourselves and were blessed with some lovely weather.

Jenny, our organiser extraordinaire, asked if anyone would be willing to teach / lead a short workshop on Saturday morning. Due to the pandemic, I haven’t had the chance to teach face to face since 2019 so jumped at the chance and then immediately panicked that I had nothing to teach this incredibly creative and experienced group (most of the members have been felting at least as long as I have!).

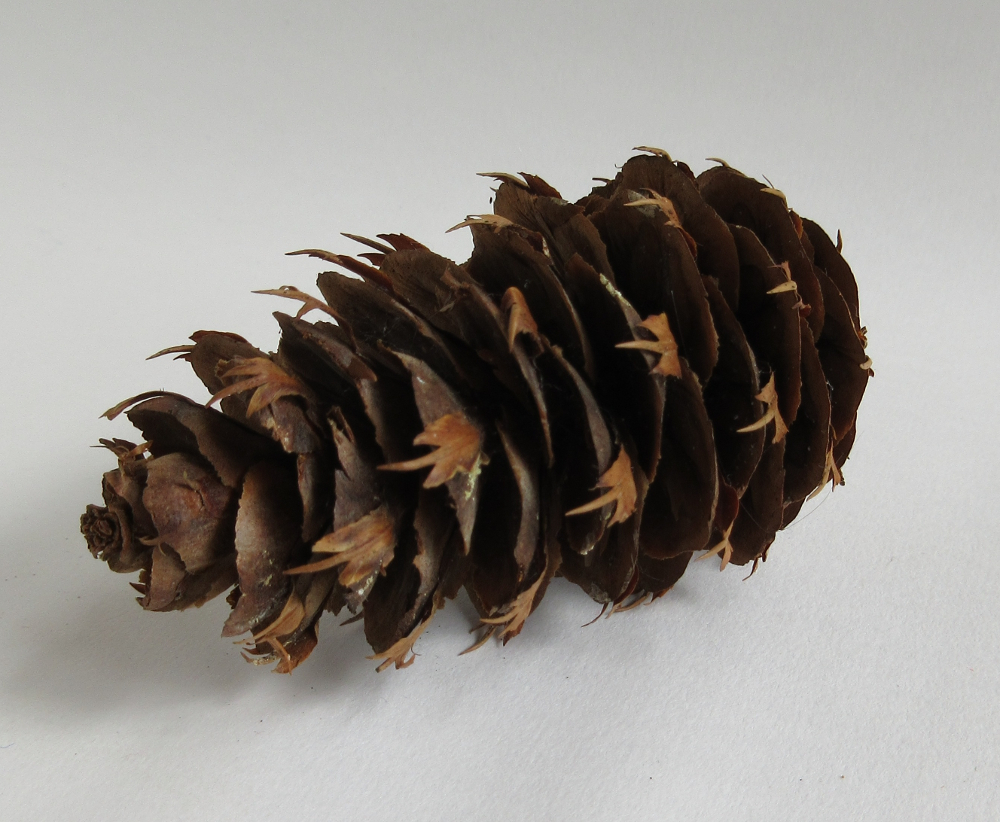
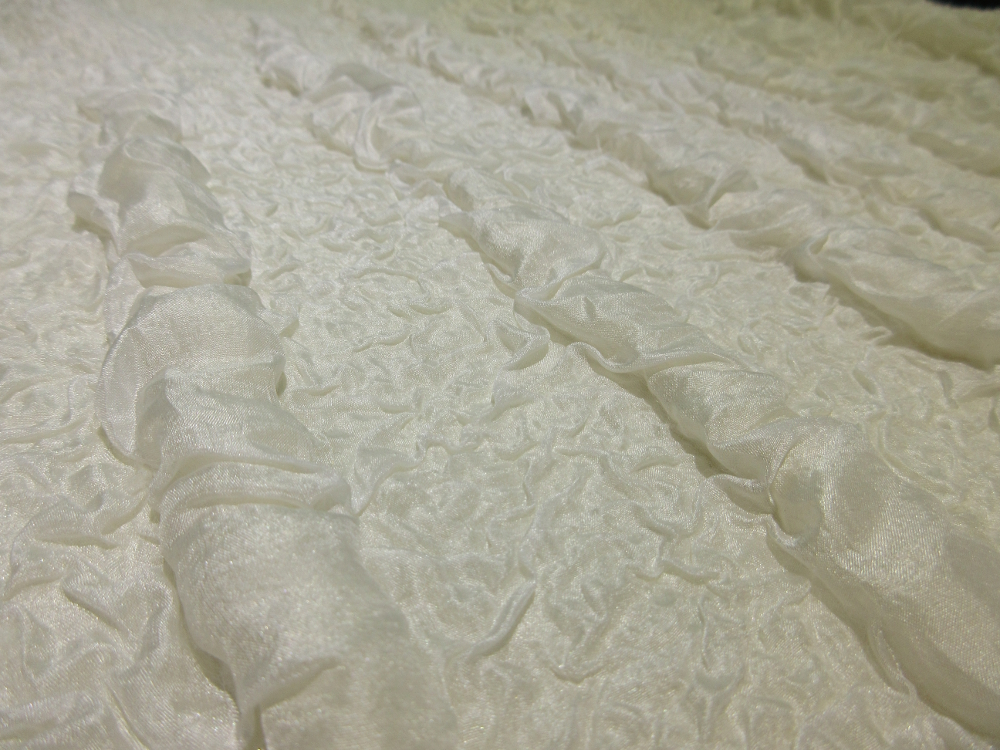
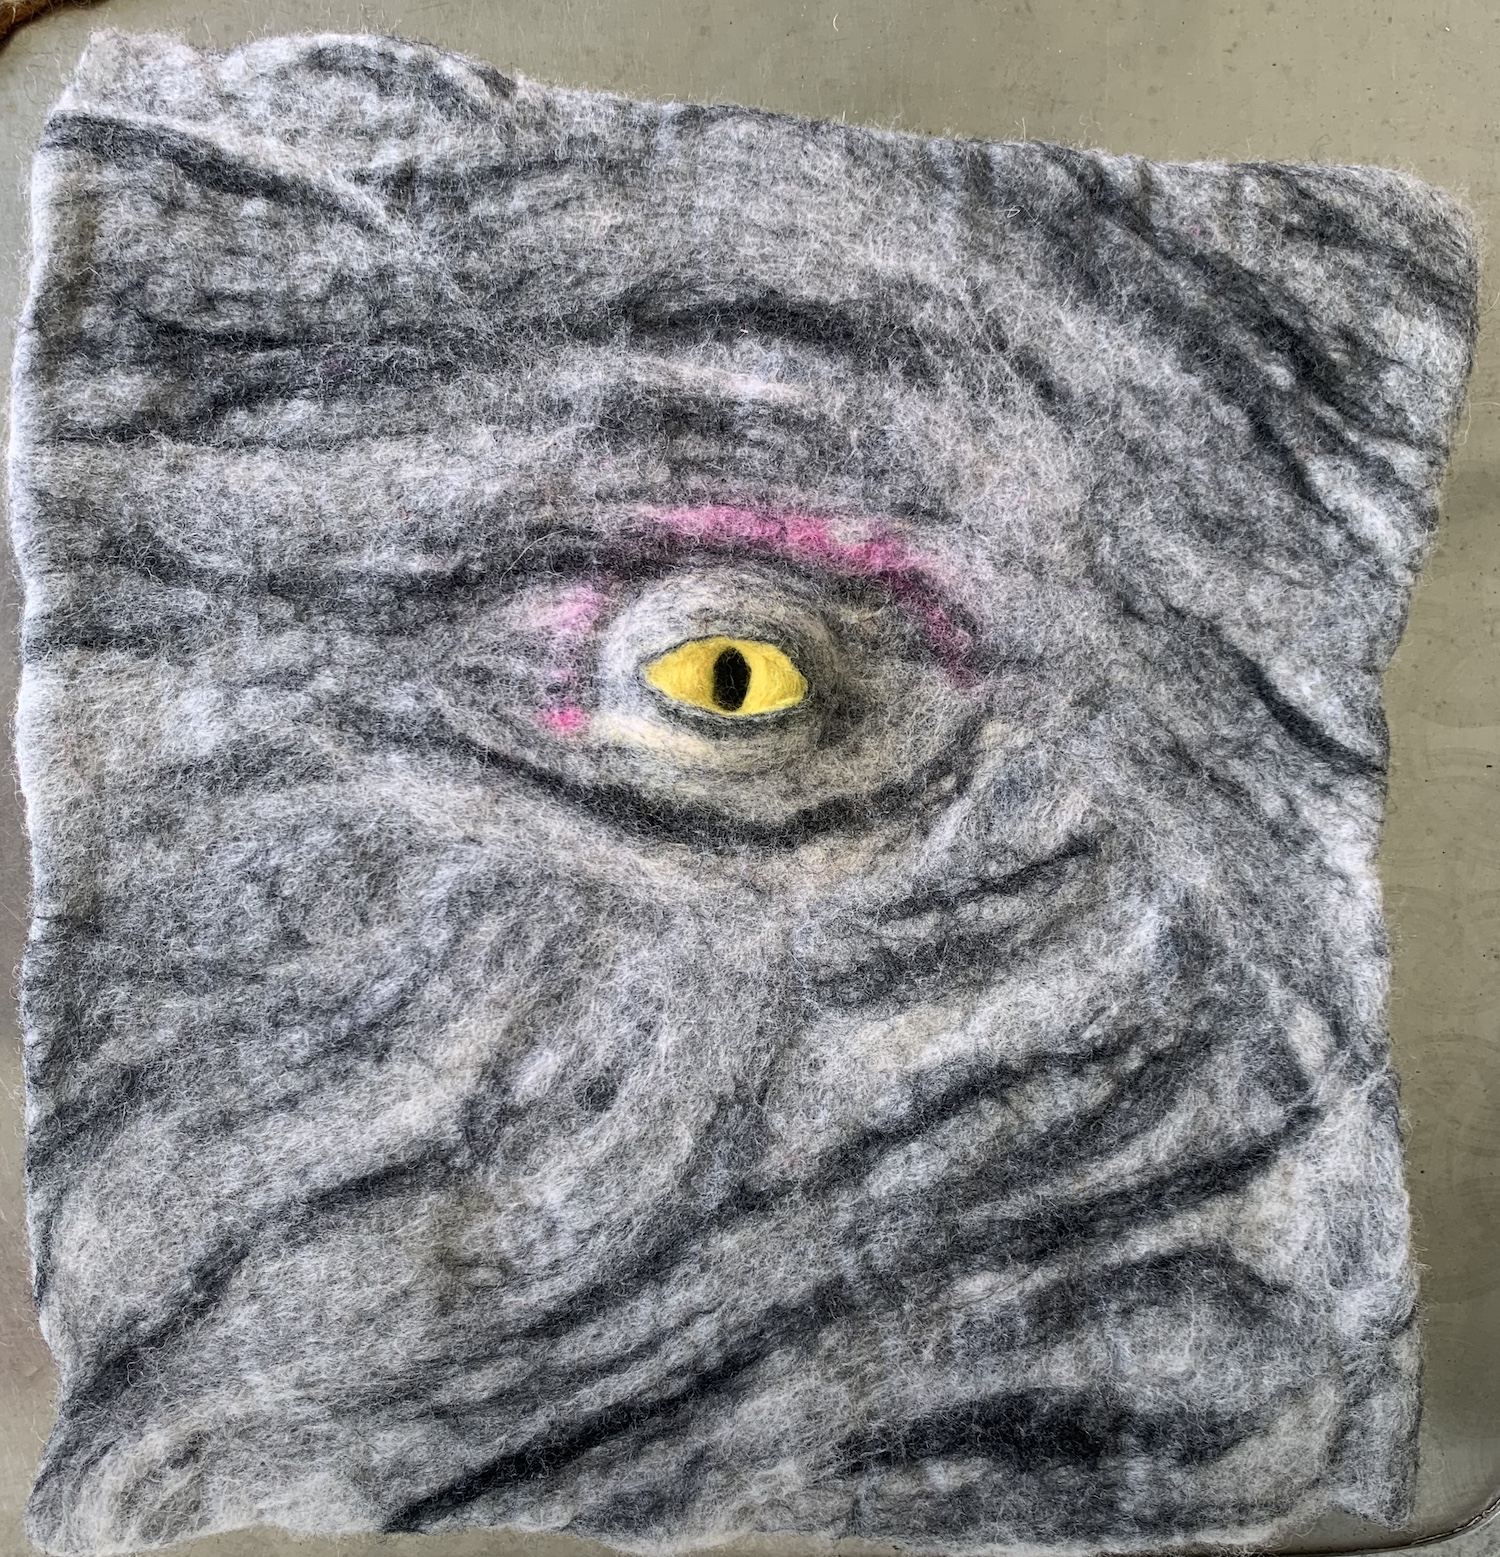
After several weeks mulling it over and talking to other AFF members I settled on “animal textures in felt”, I thought this would lend itself to a series of pre-prepared samples that we could discuss the potential pitfalls and then each member could incorporate one or two into their own project. This group is so experienced I couldn’t imagine any of them wanting to waste their precious felting time watching me laying out fibre over a resist.

We all arrived on Friday afternoon, settled into our rooms and started playing with our fibres in the main hall. After talking to a few members I realised not everyone would be happy for me to share some samples and tips on how to achieve different effects, they wanted a project to follow…. my heart sank, I hadn’t planned for this, how was I going to come up with a project that included, fur, scales, eyes and locks before tomorrow morning?!!

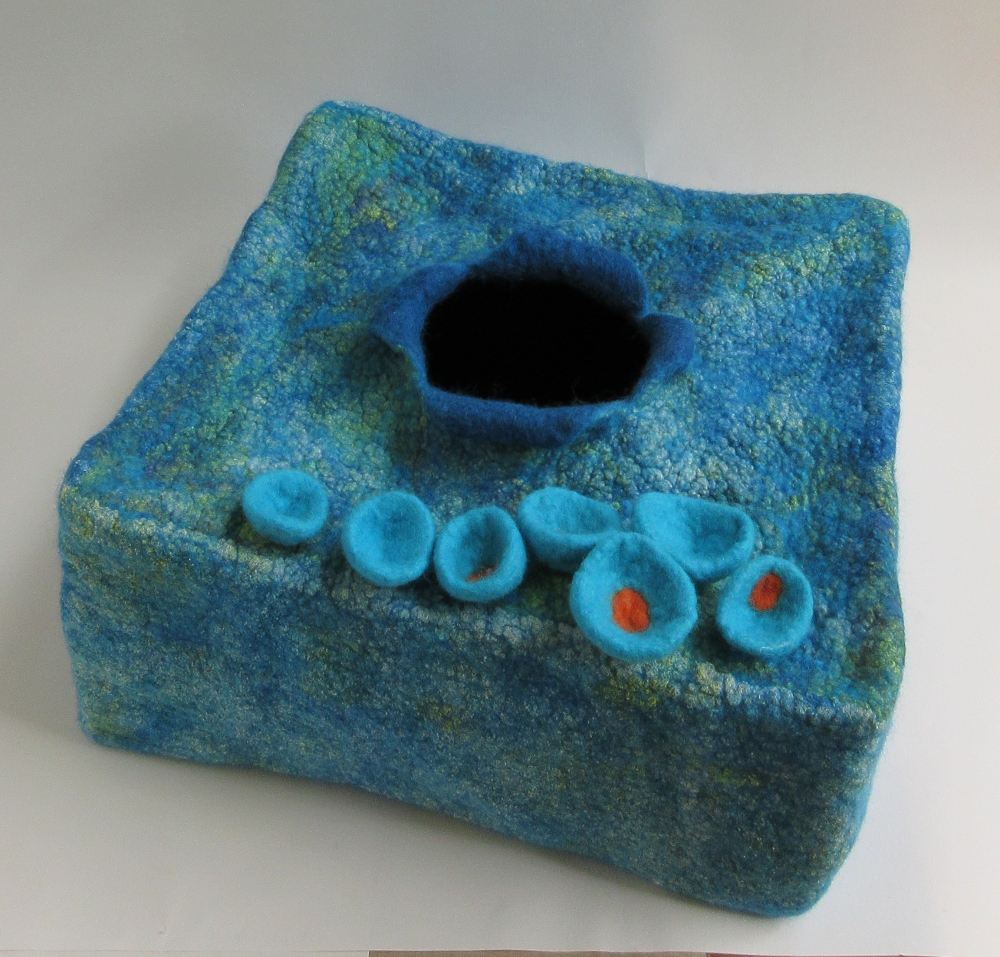
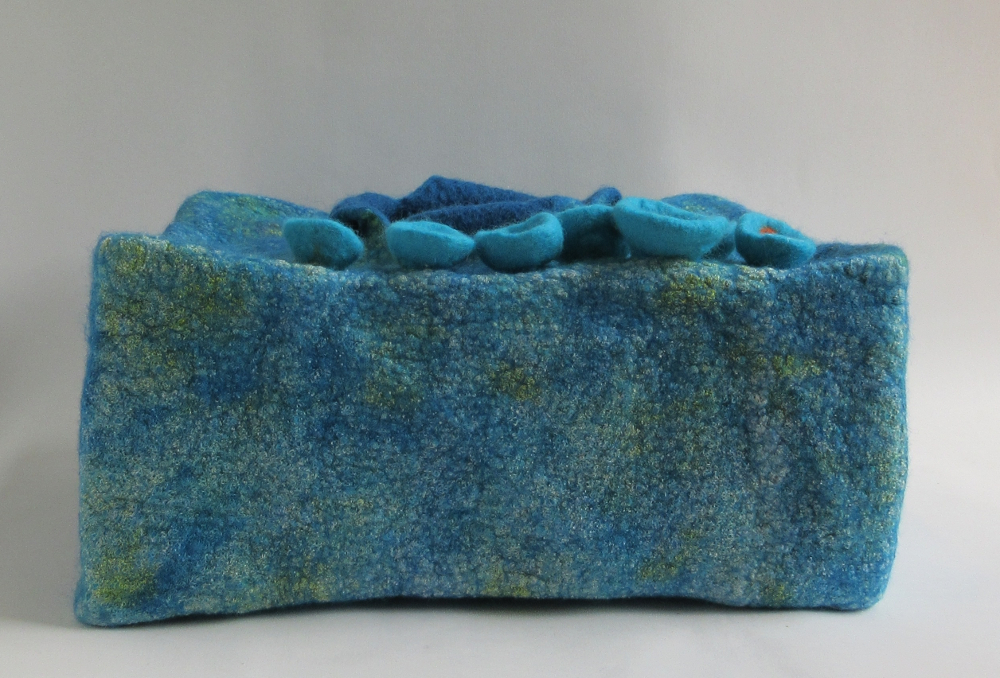
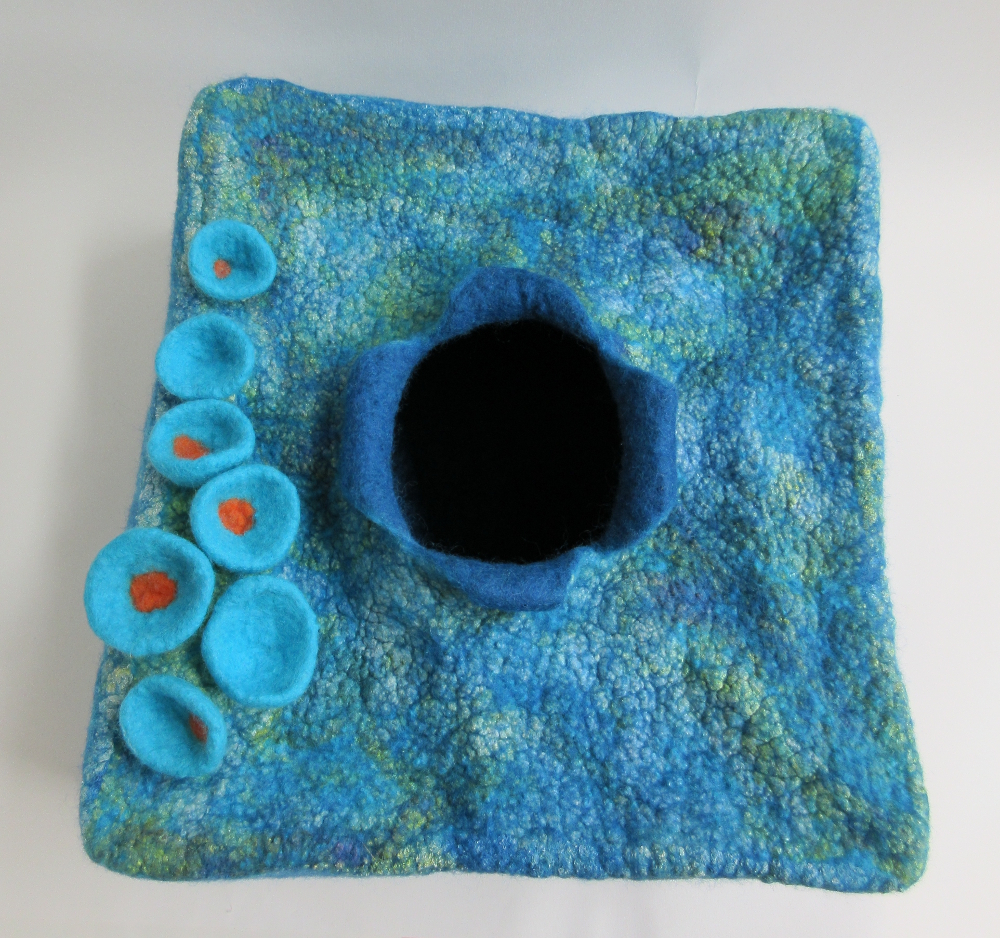
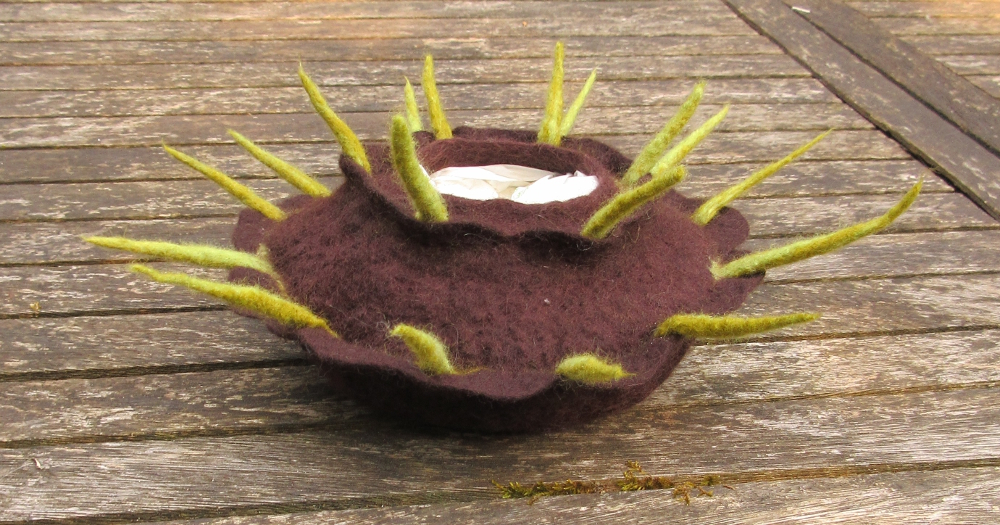
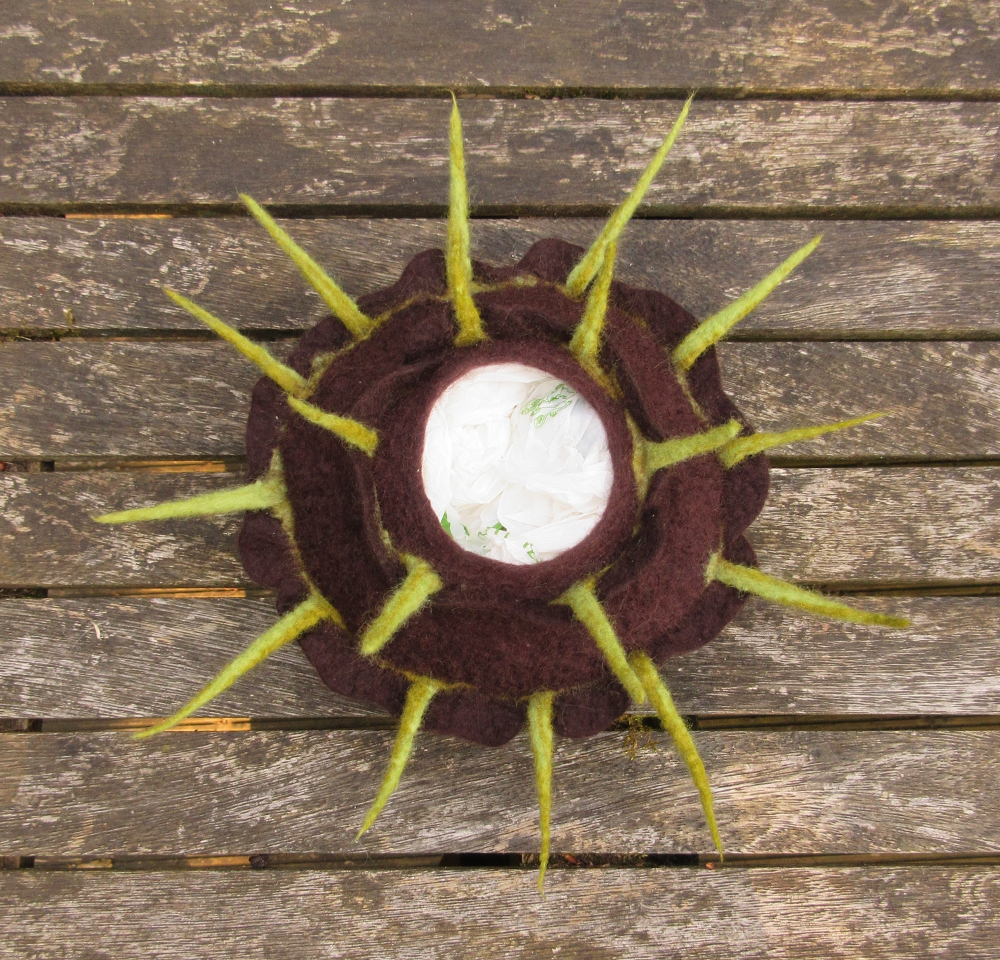
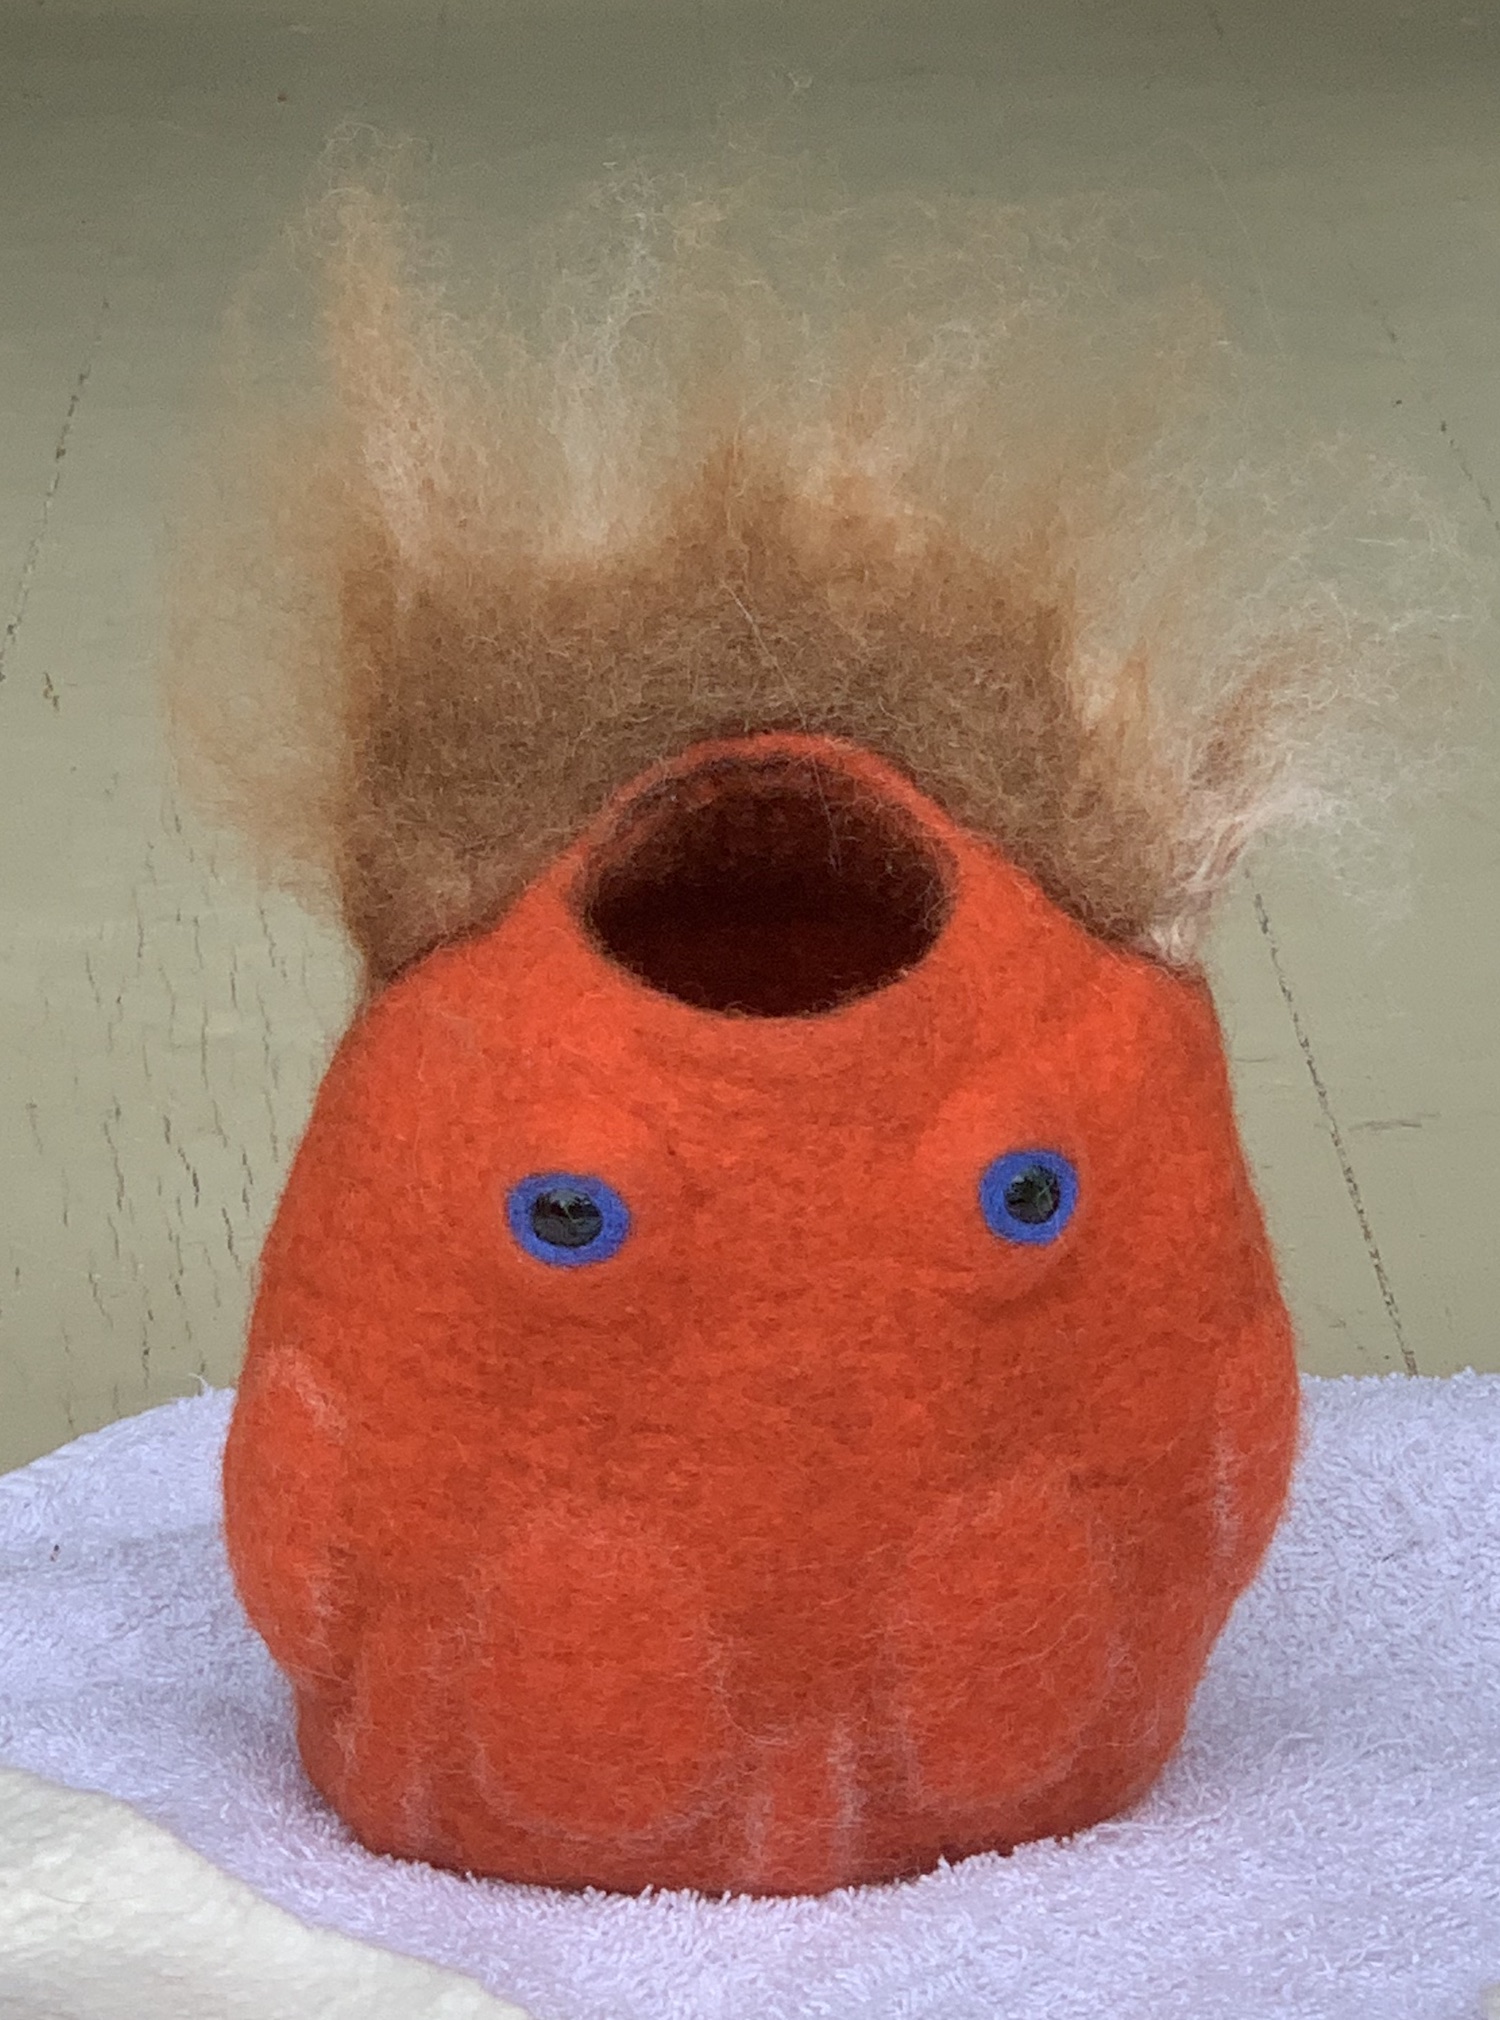
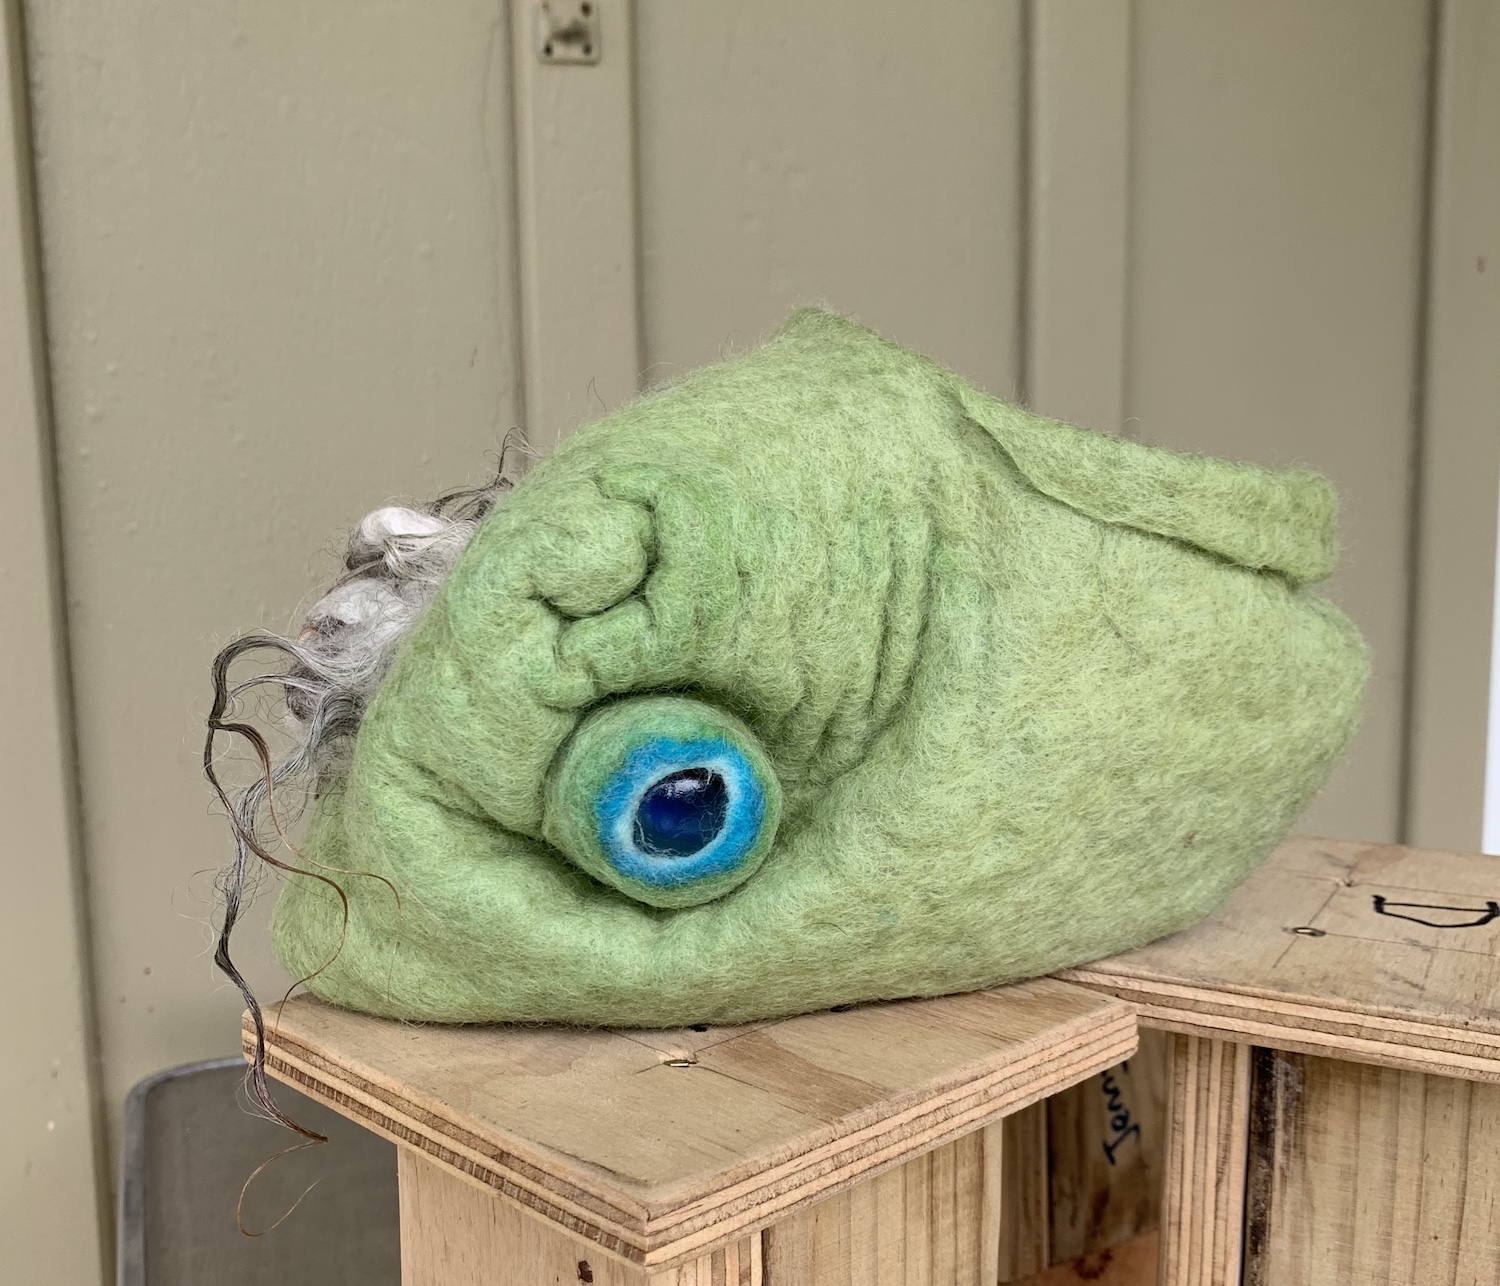
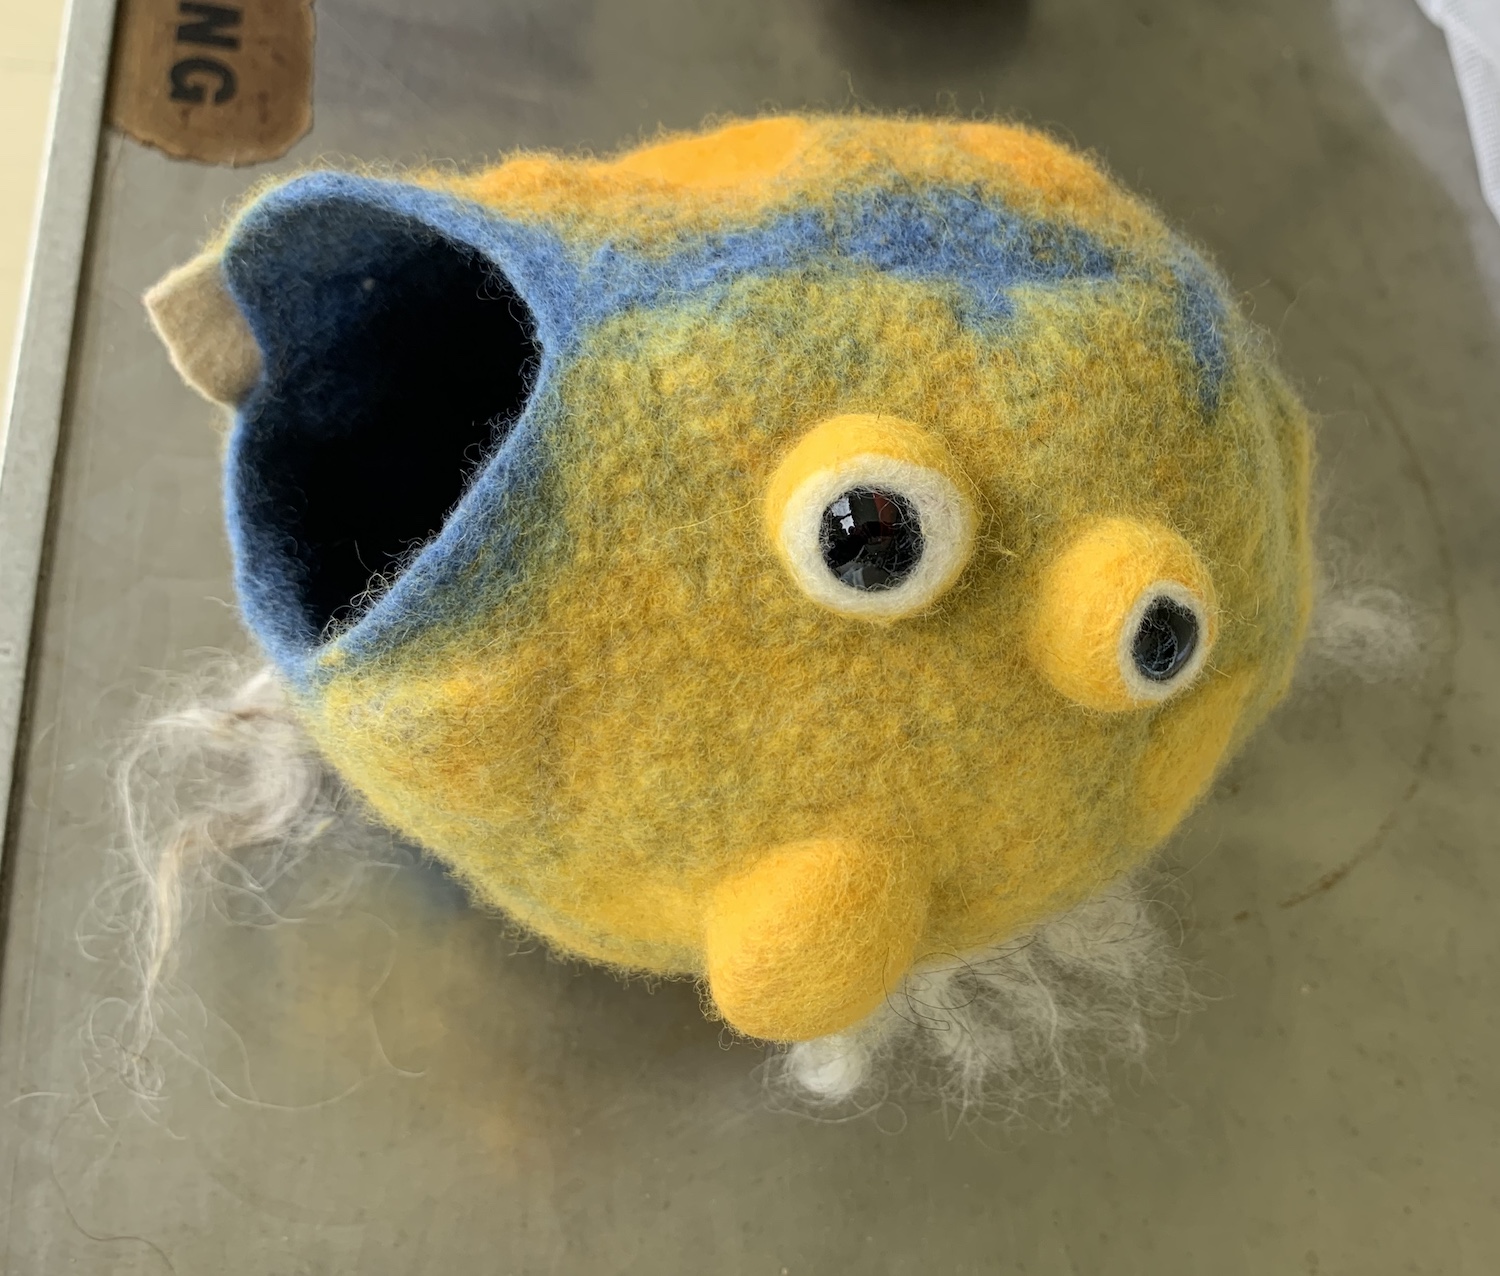
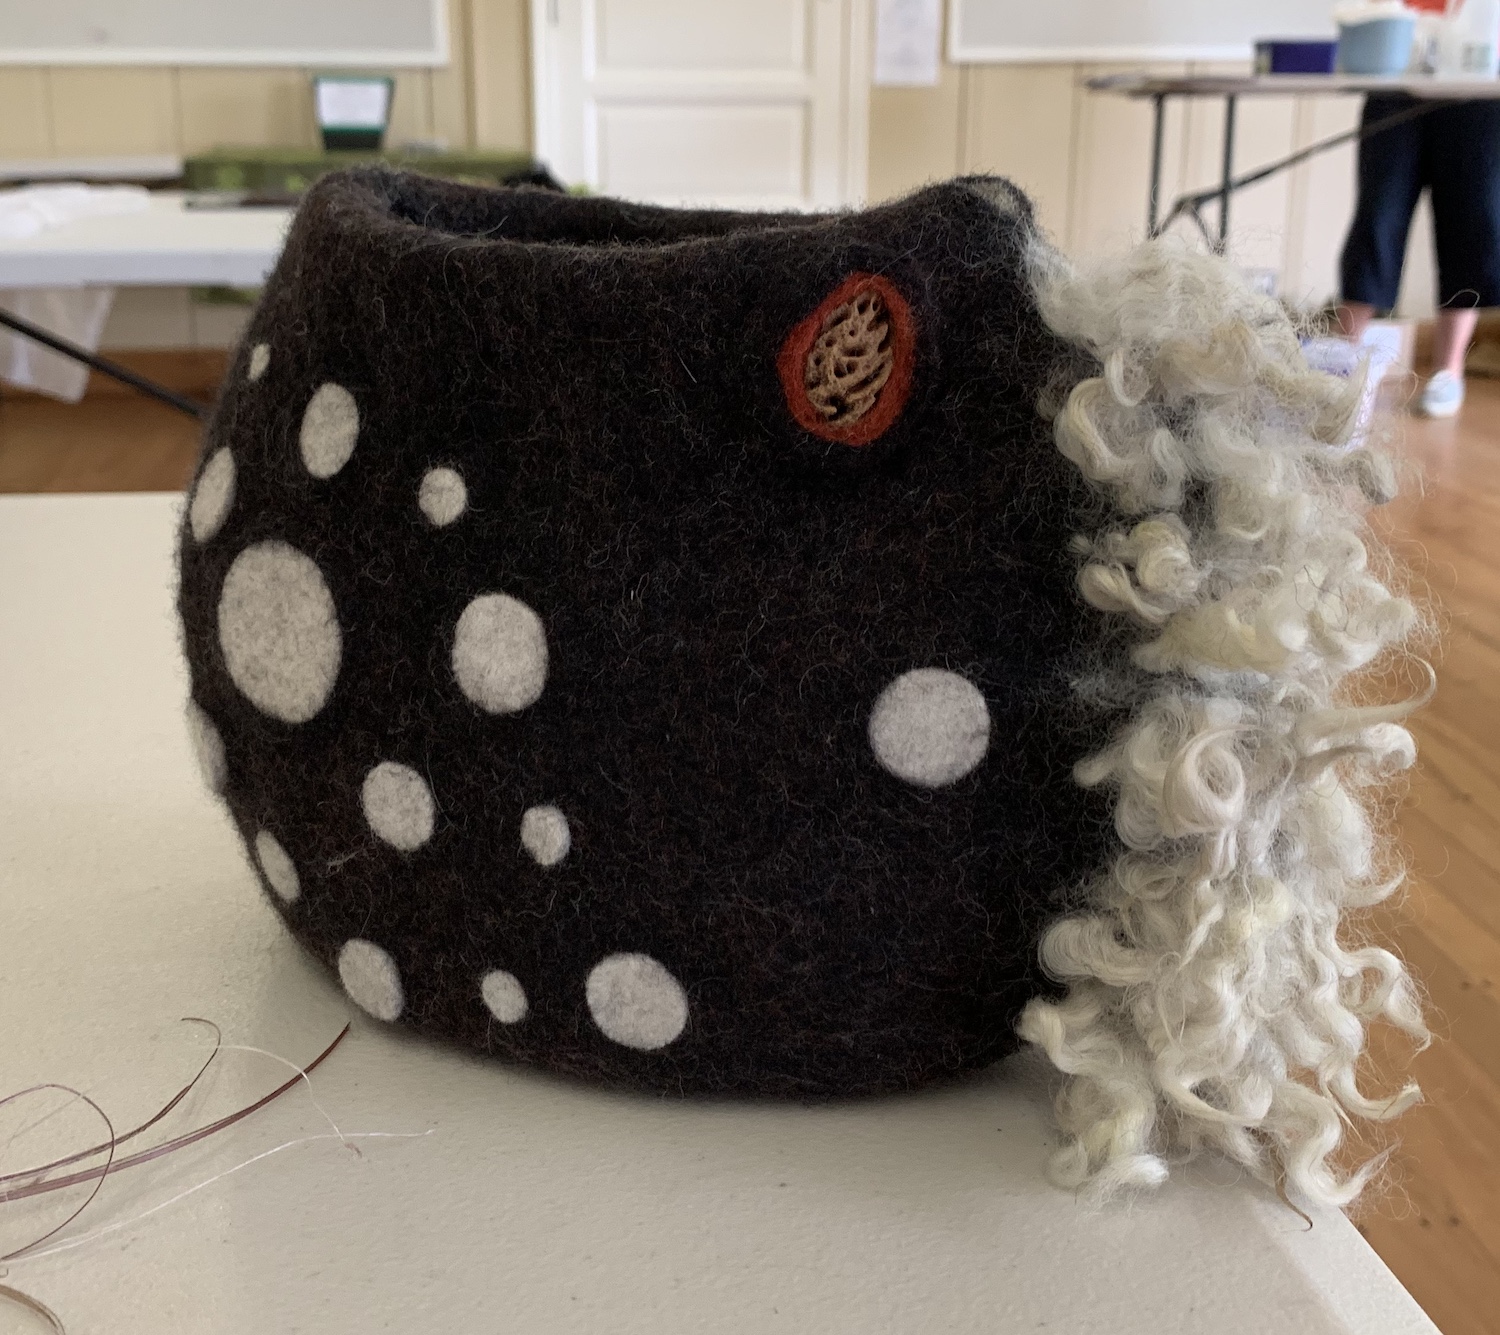
So it was that Fugly was born….

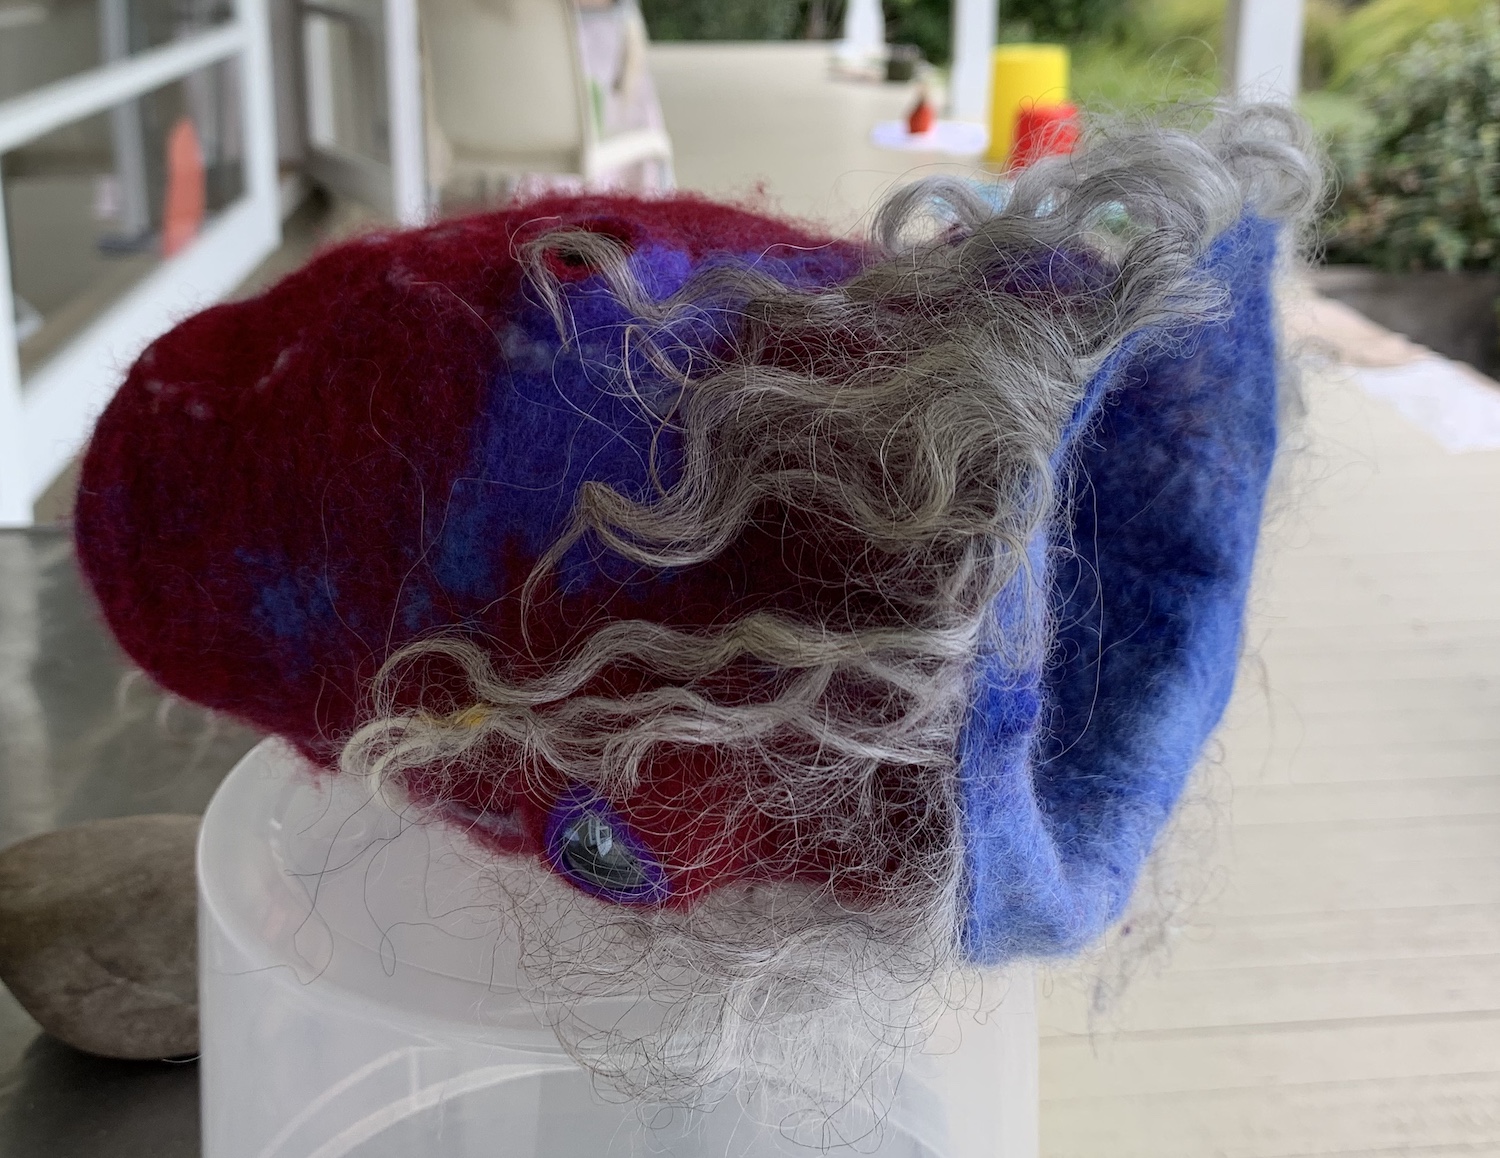
A little pod critter, with eyes, scales on his back, a lambs tail and an unfortunate ear-hair problem – for the record I would never normally recommend trying to cram so many different techniques onto one item but now he is finished I do find Fugly quite endearing 🙂

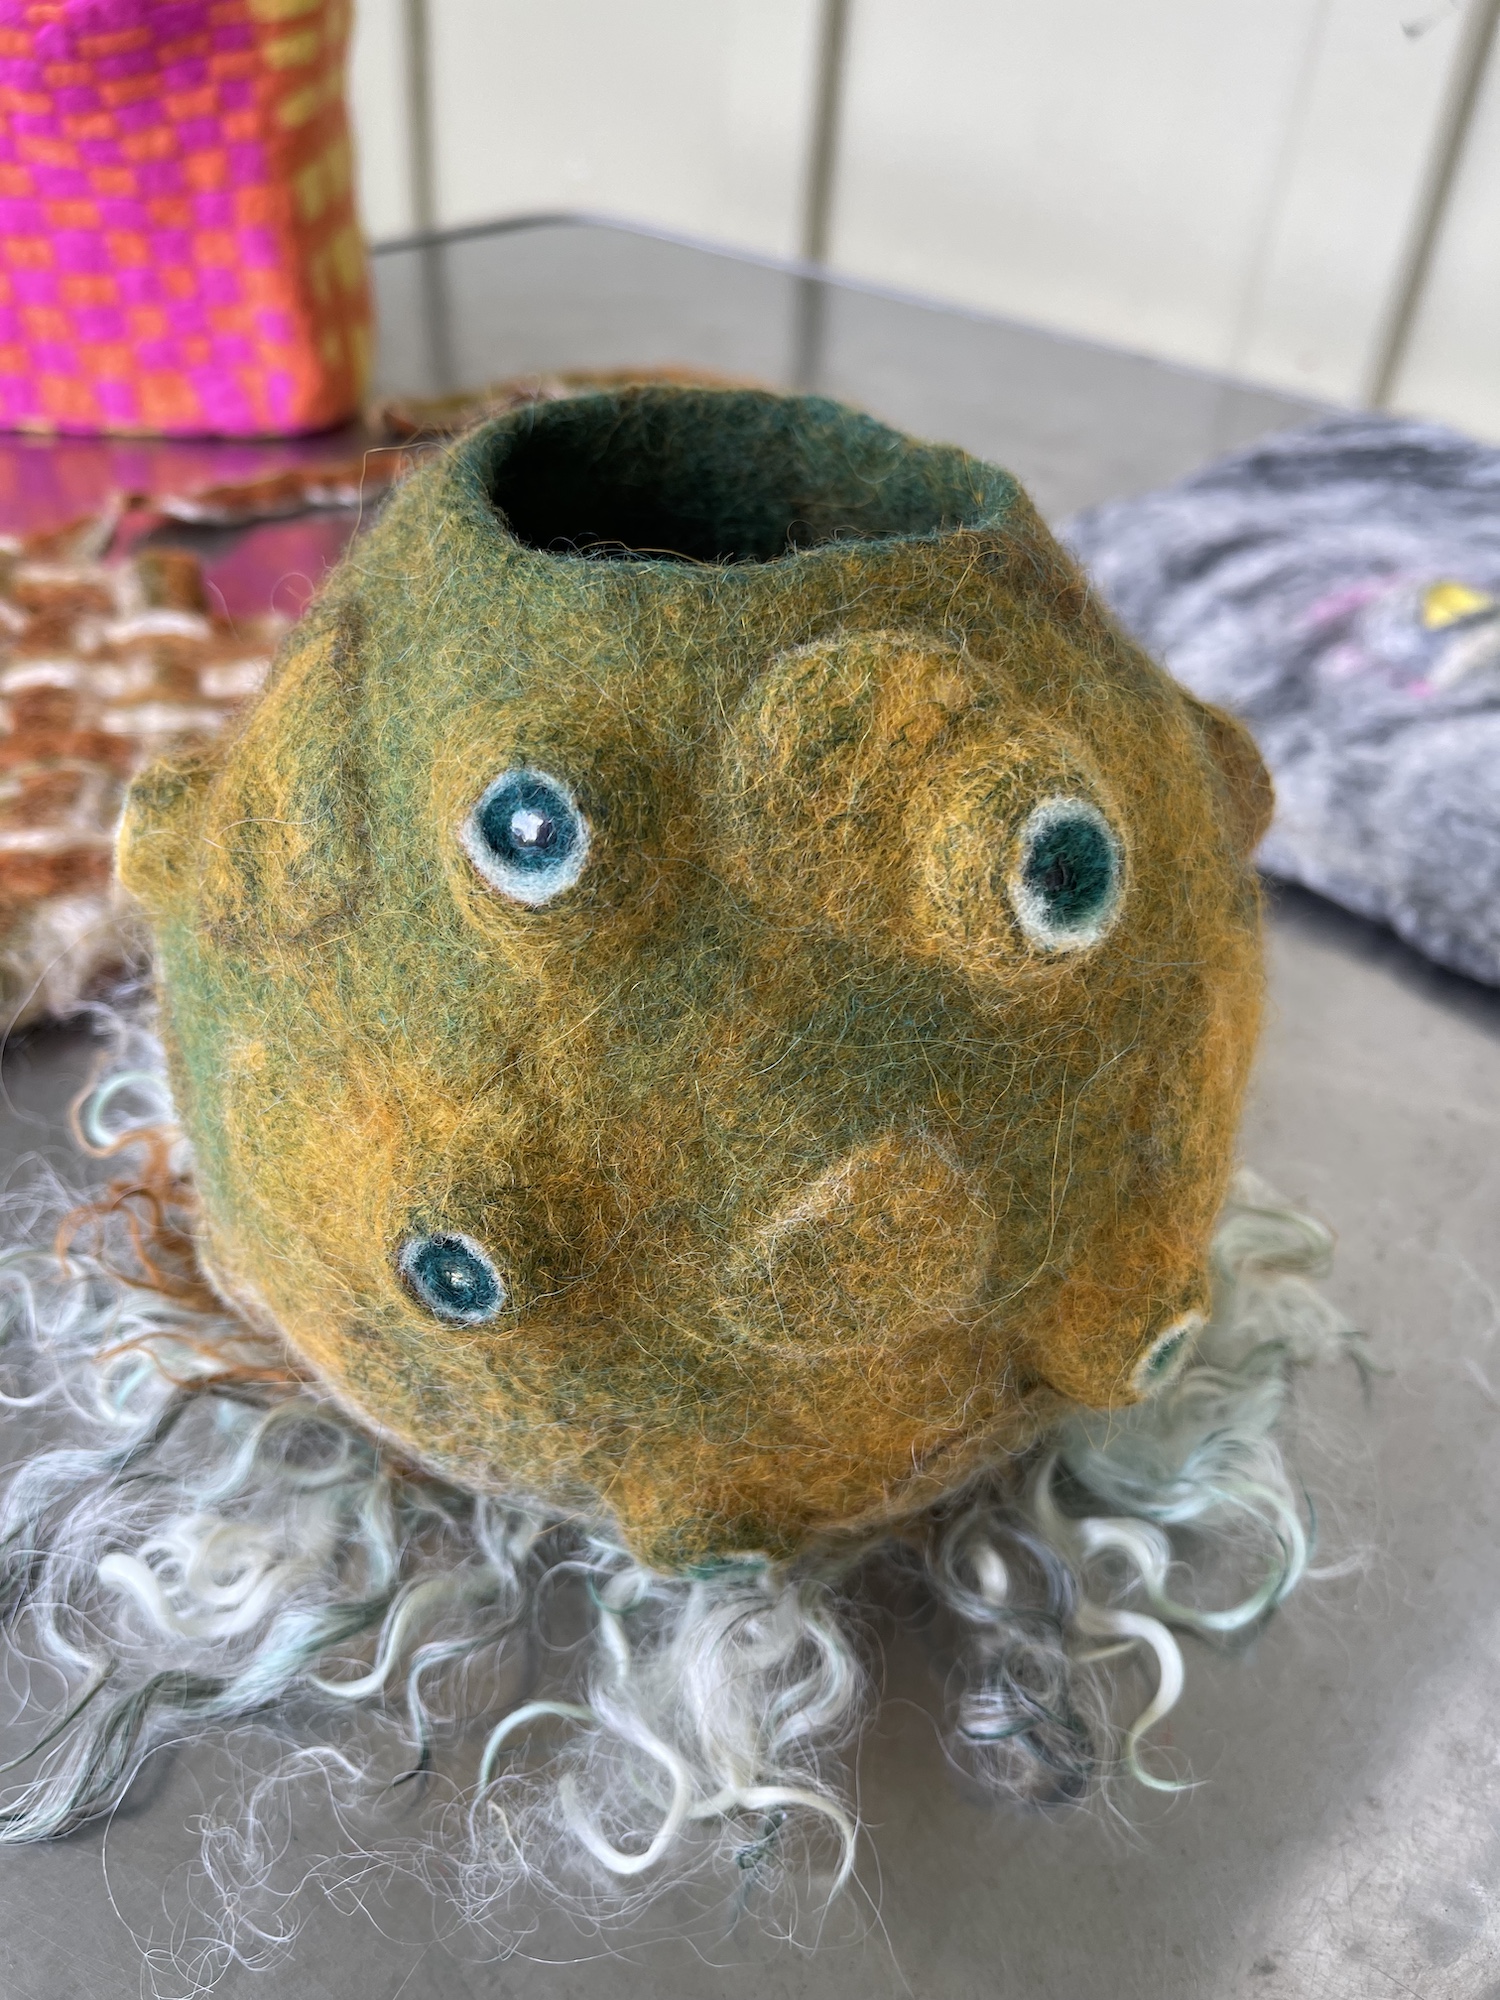
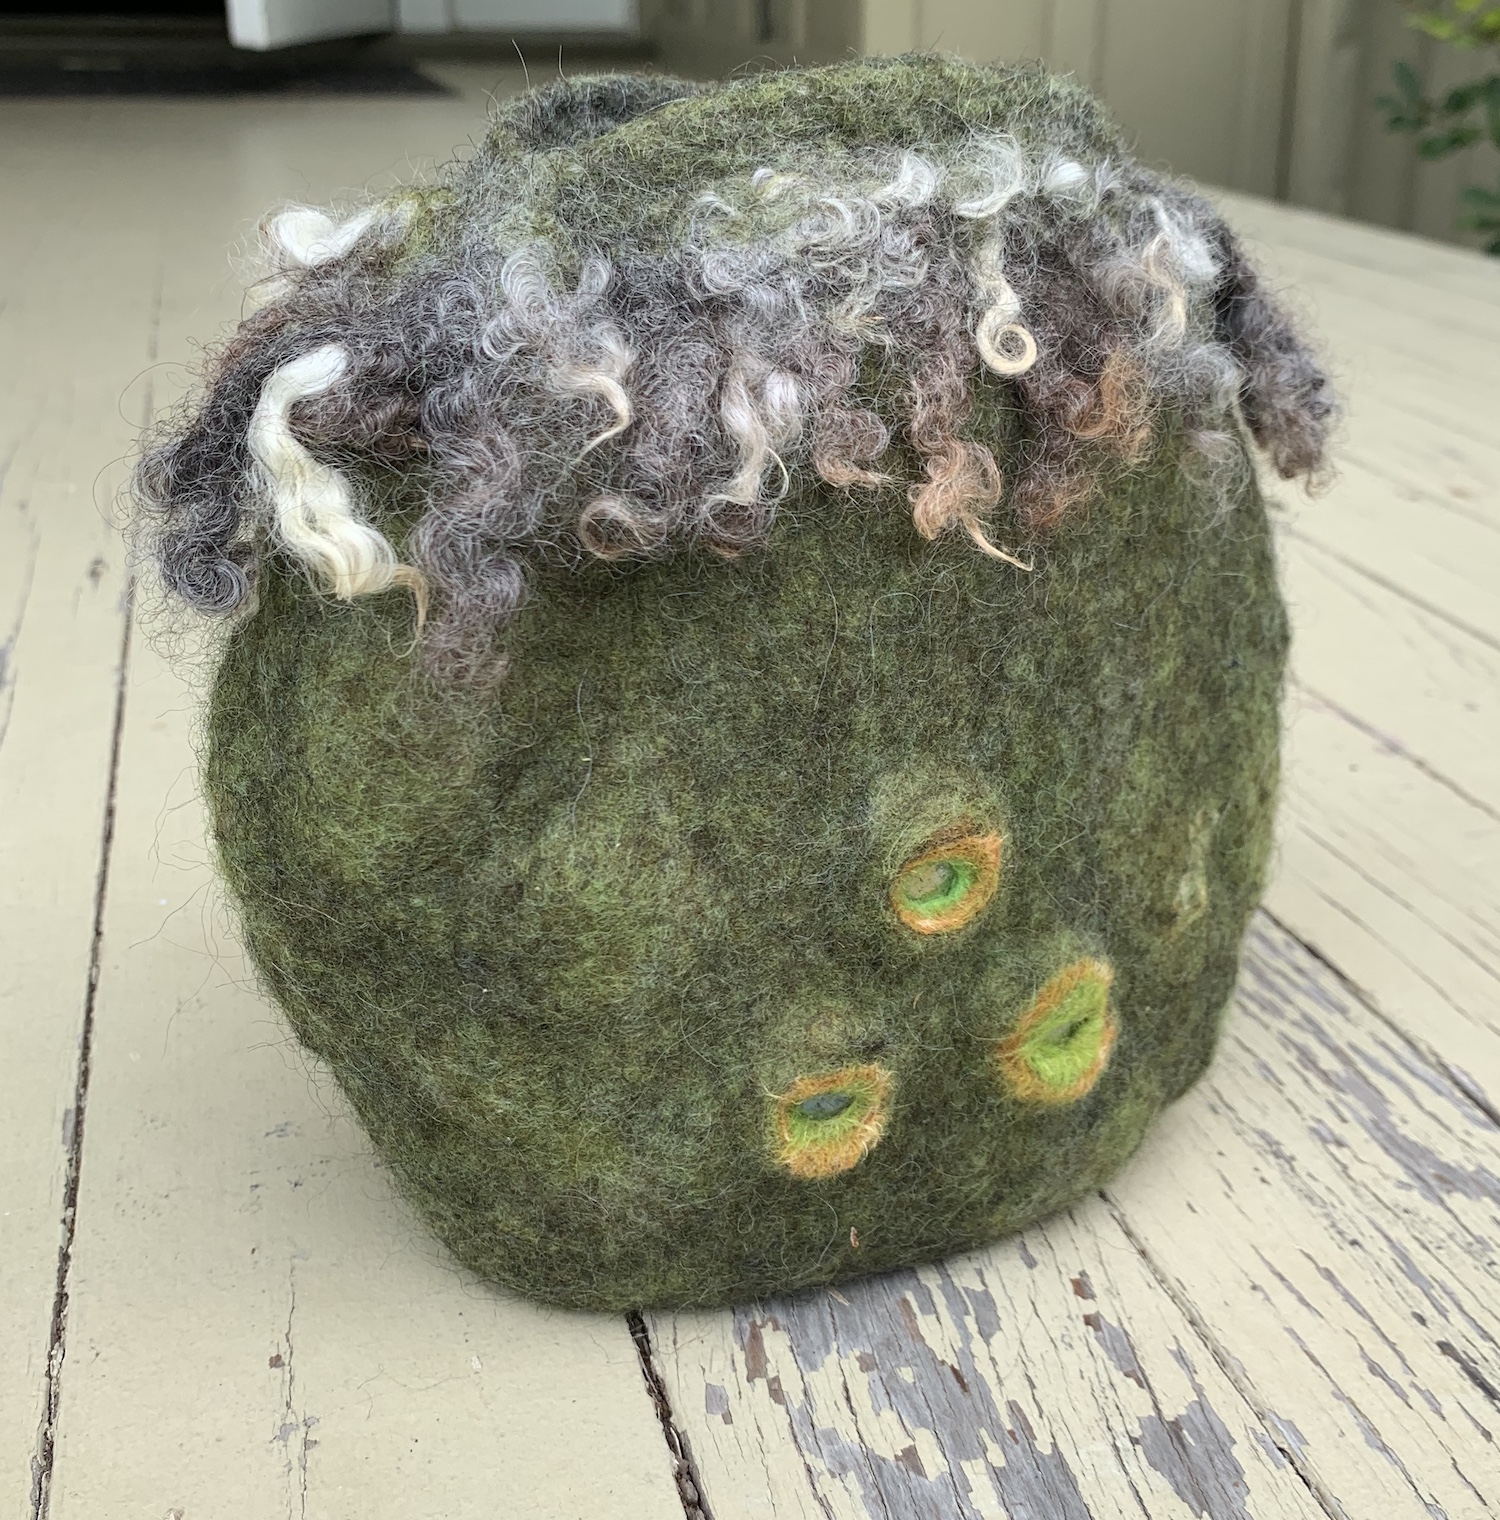
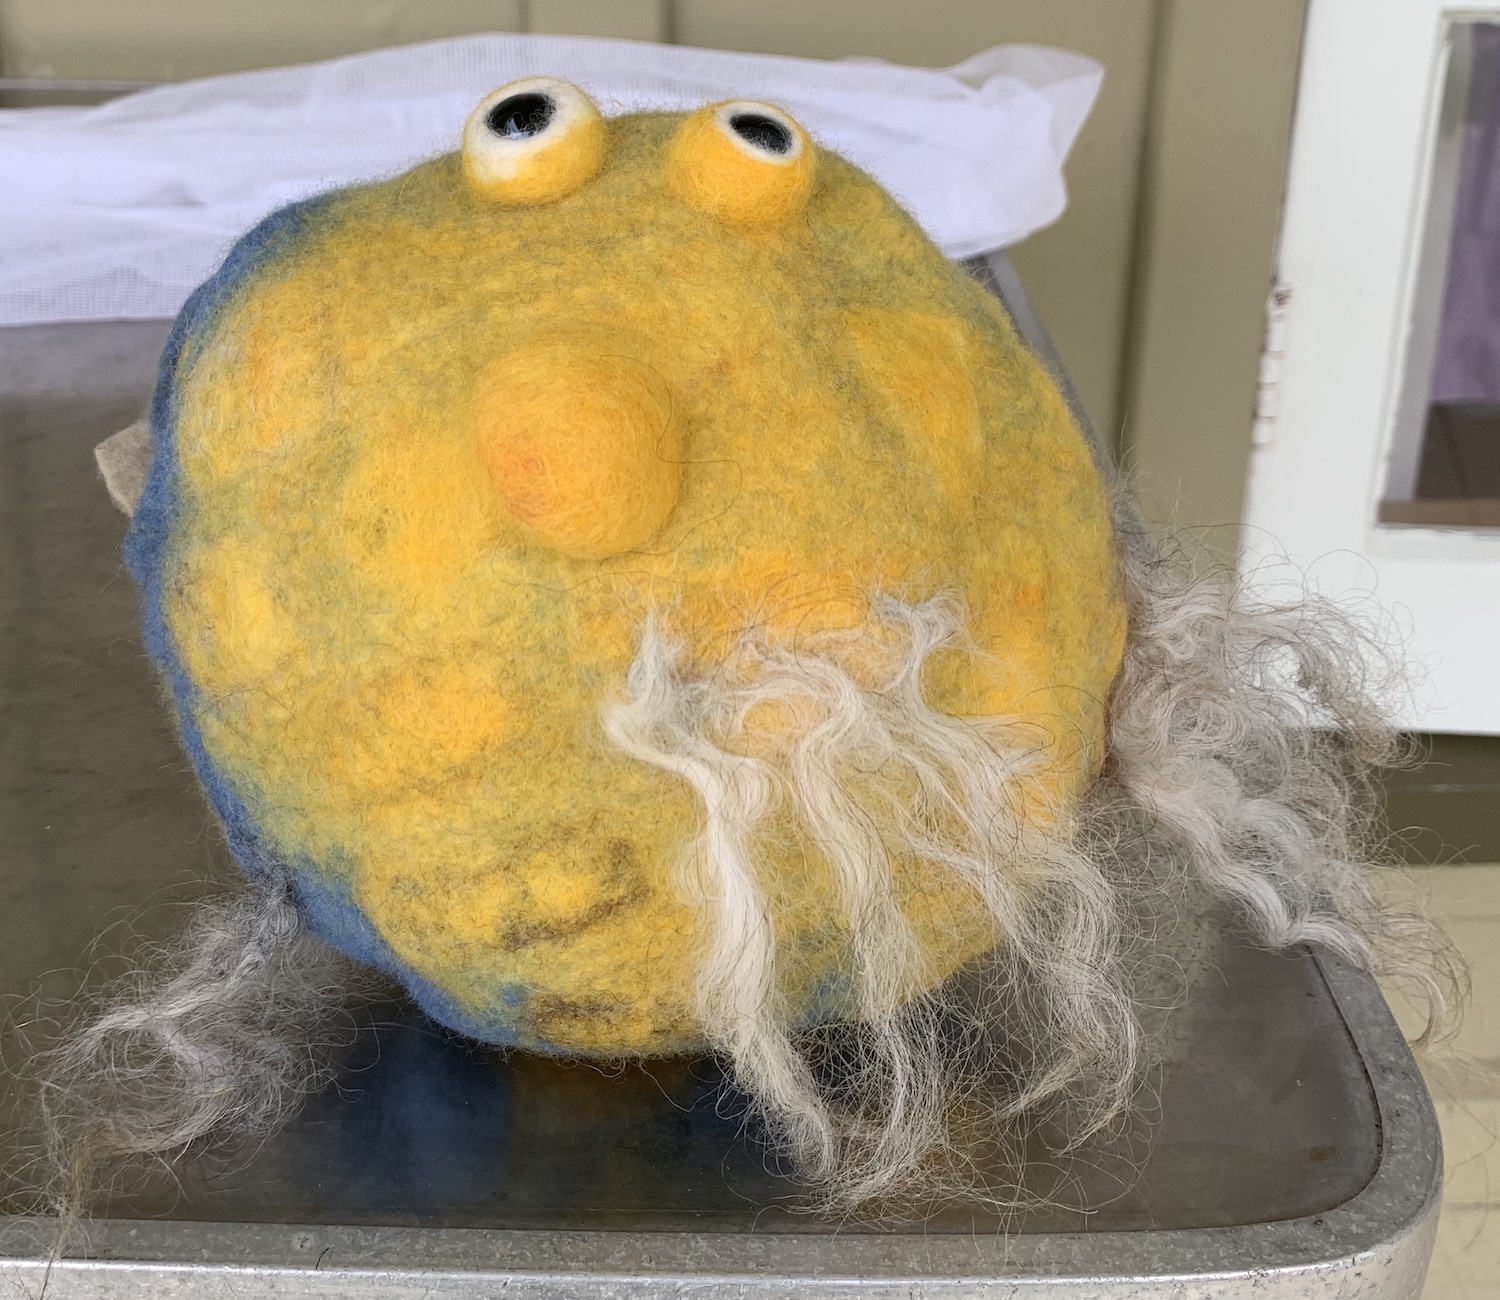
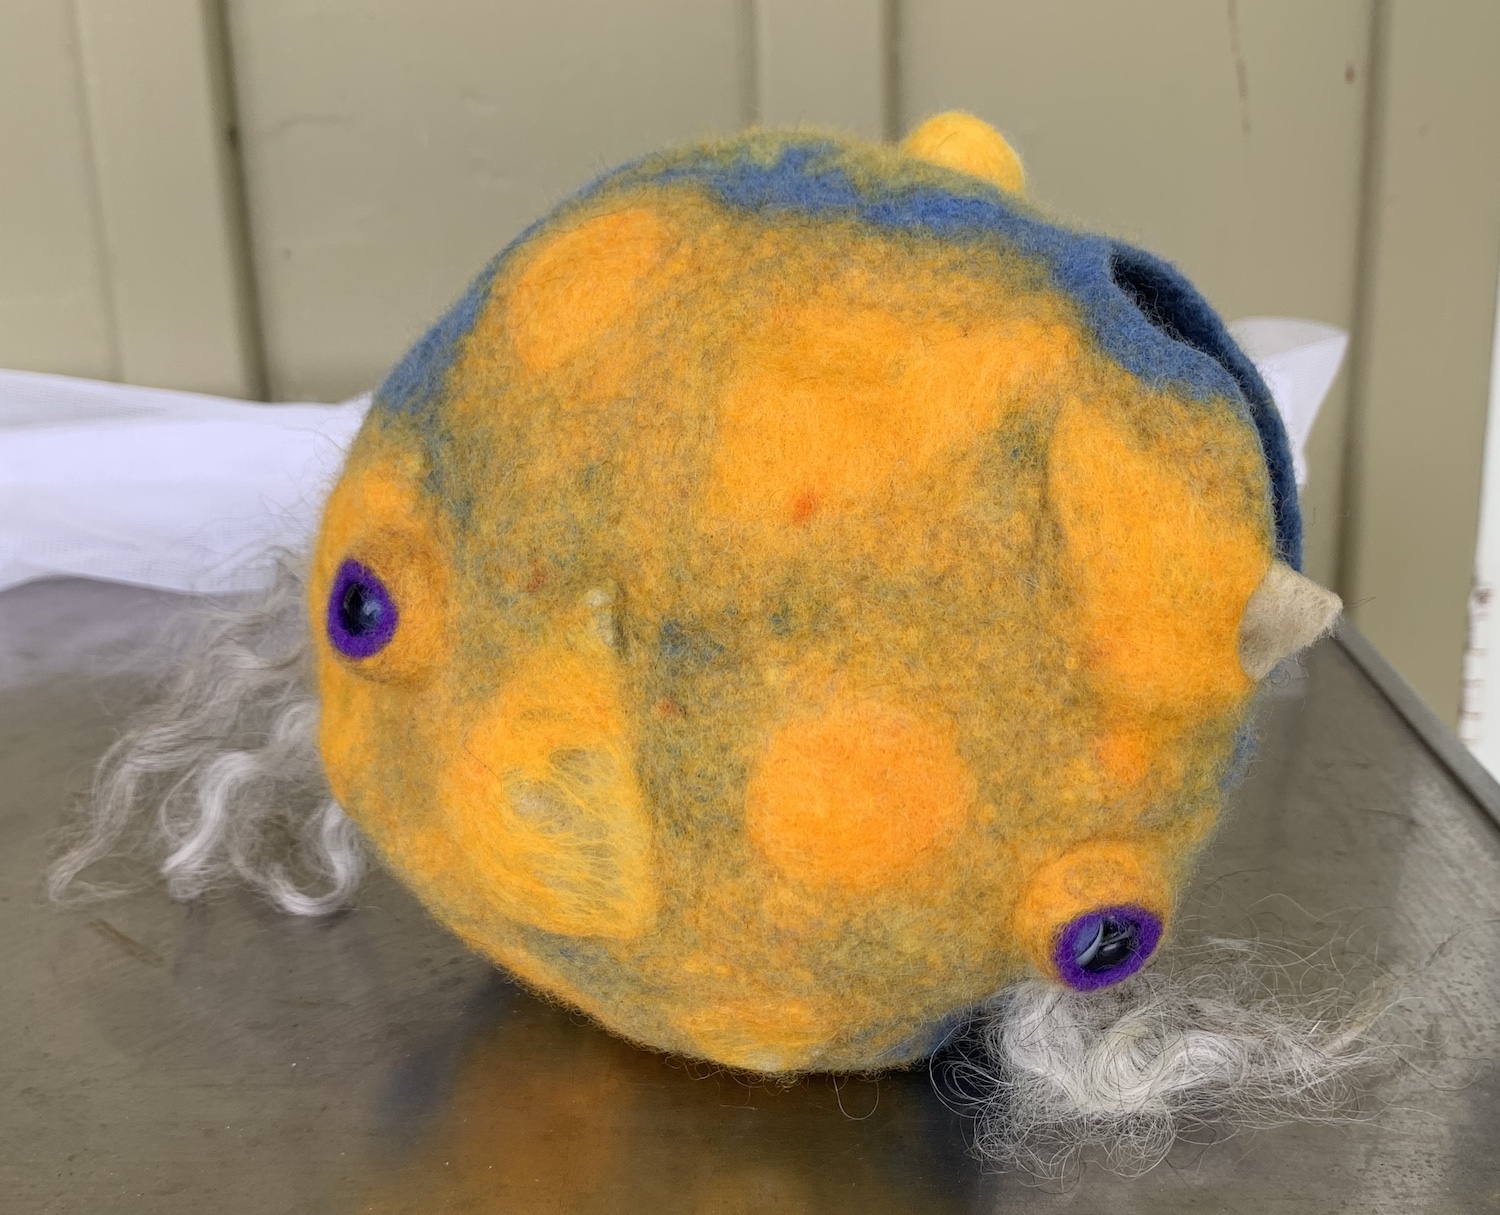
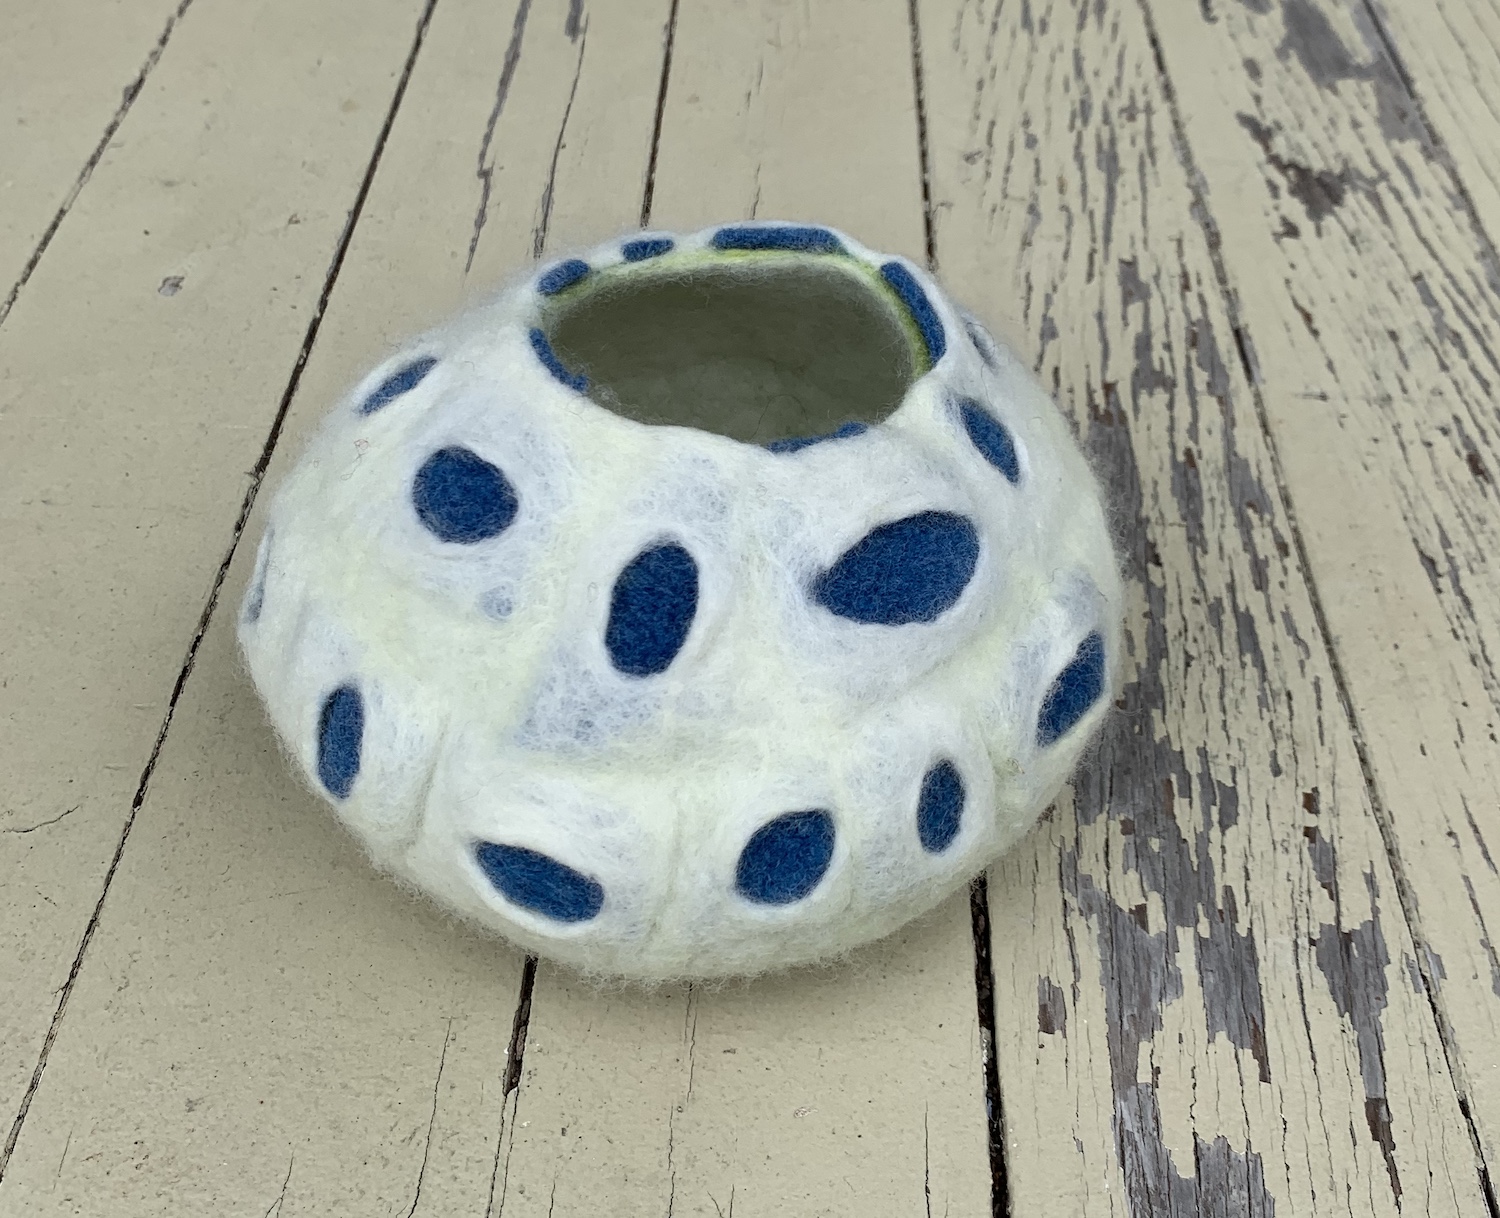
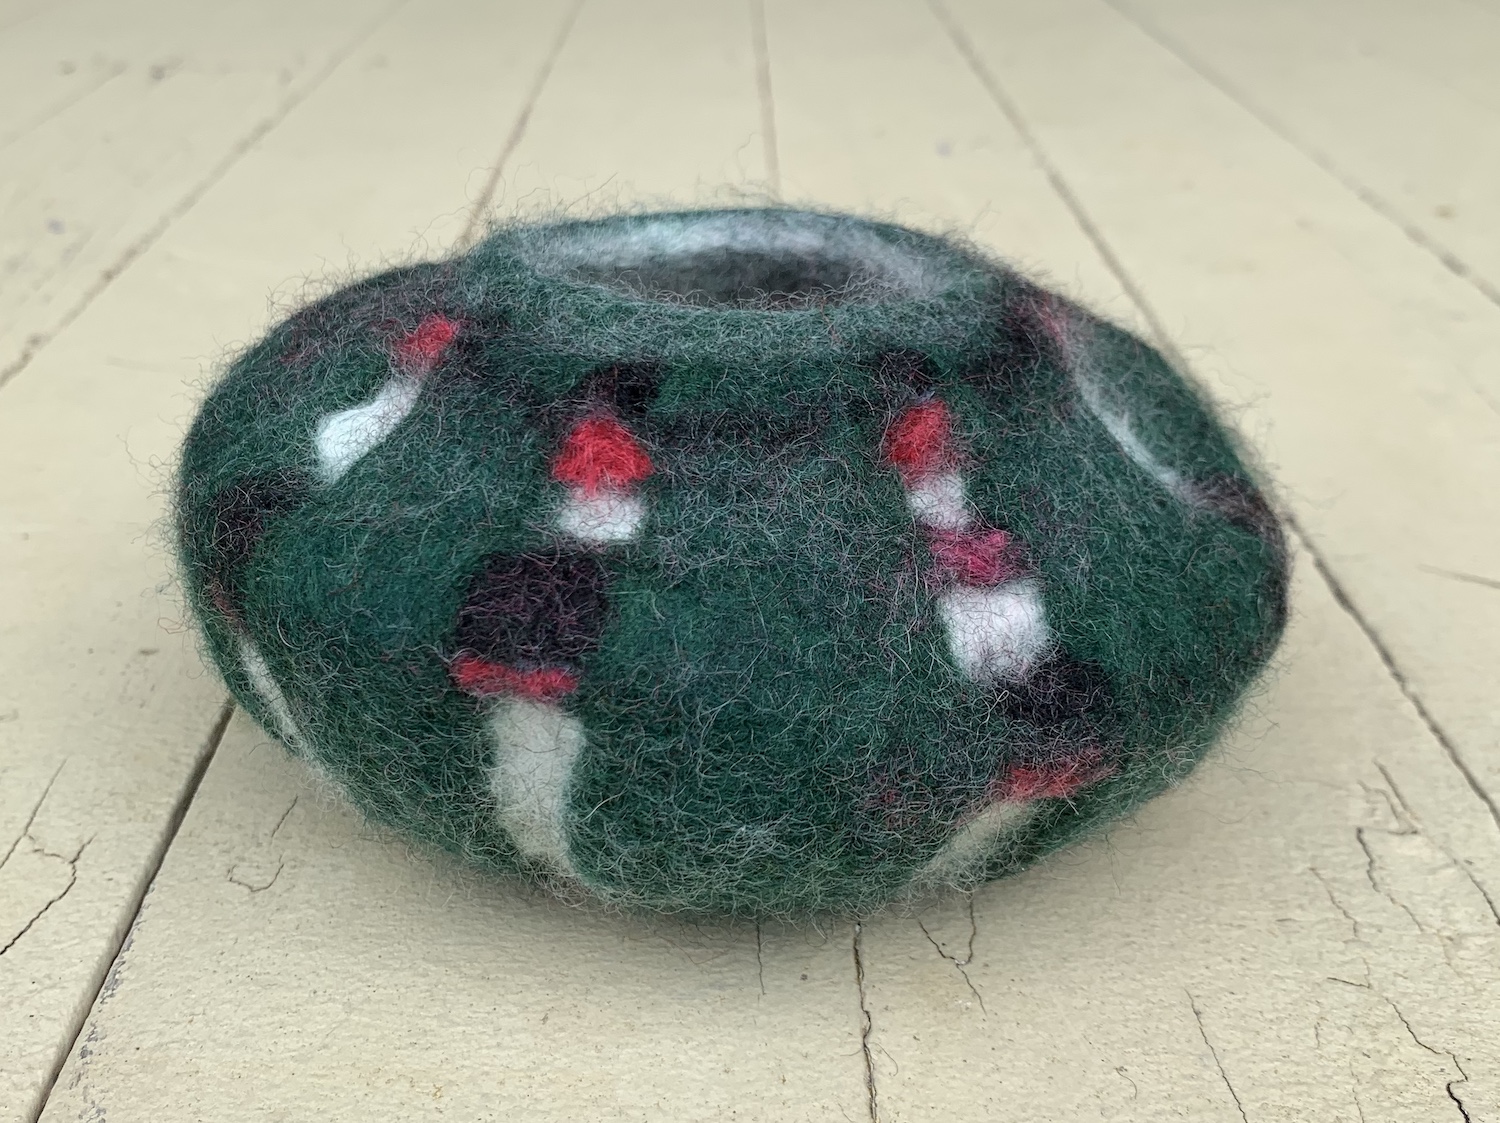
To my surprise most of the group also made pods that incorporated most or all of the techniques and we ended up with a ?gaggle, ?fright, ?laughter <insert collective noun of your choice here> of funny little monsters:

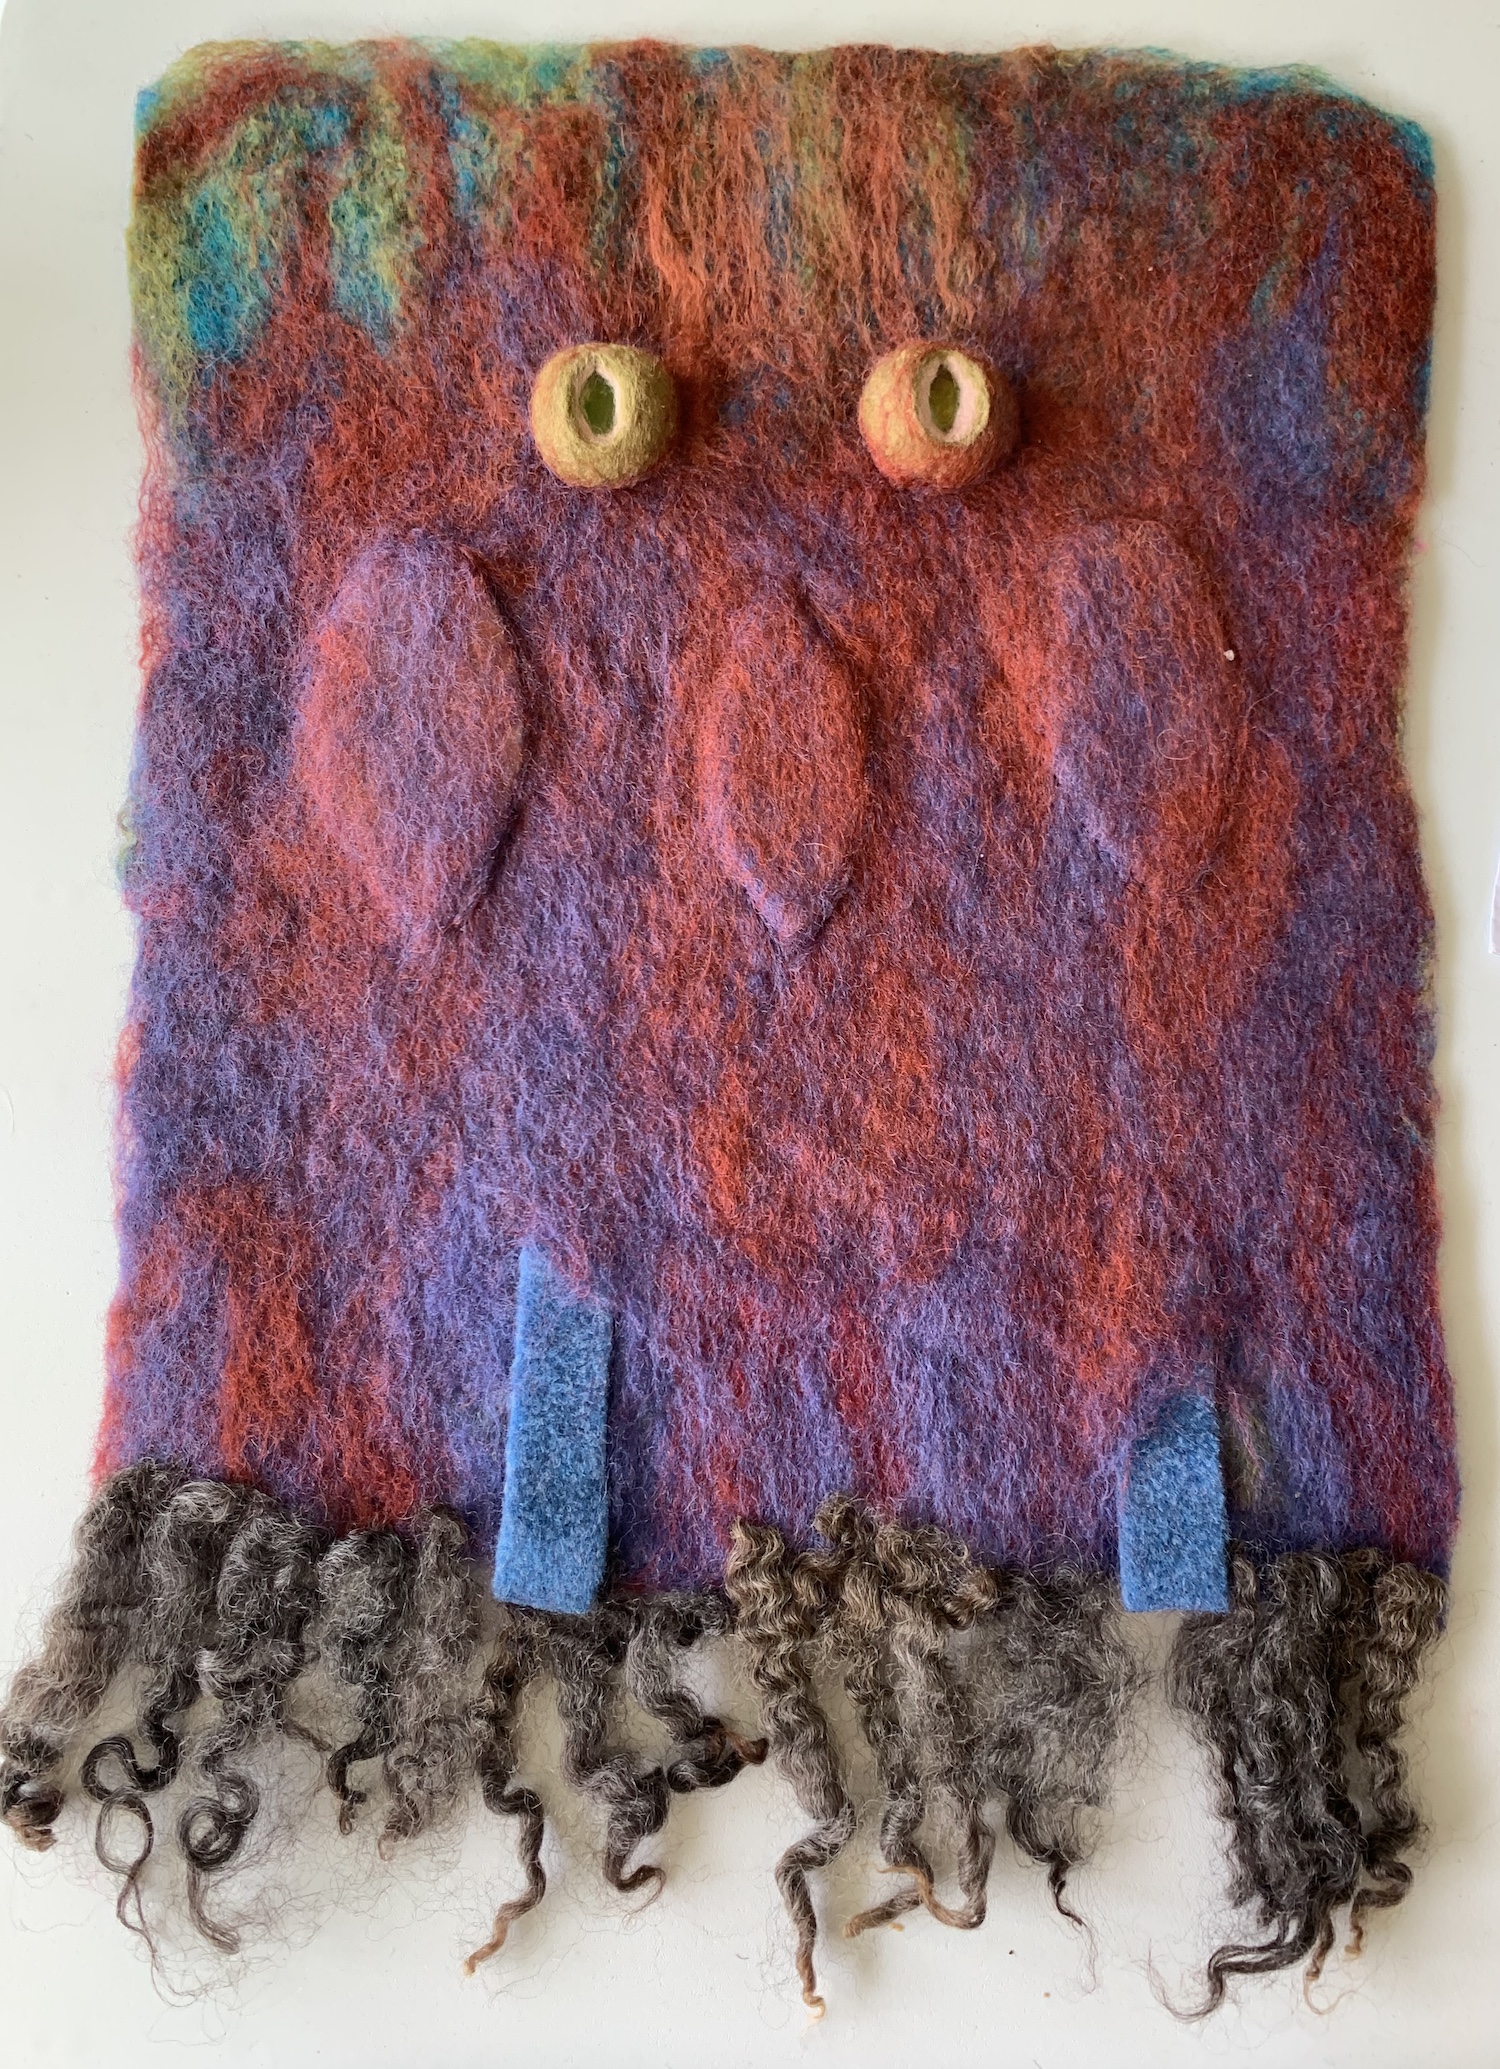
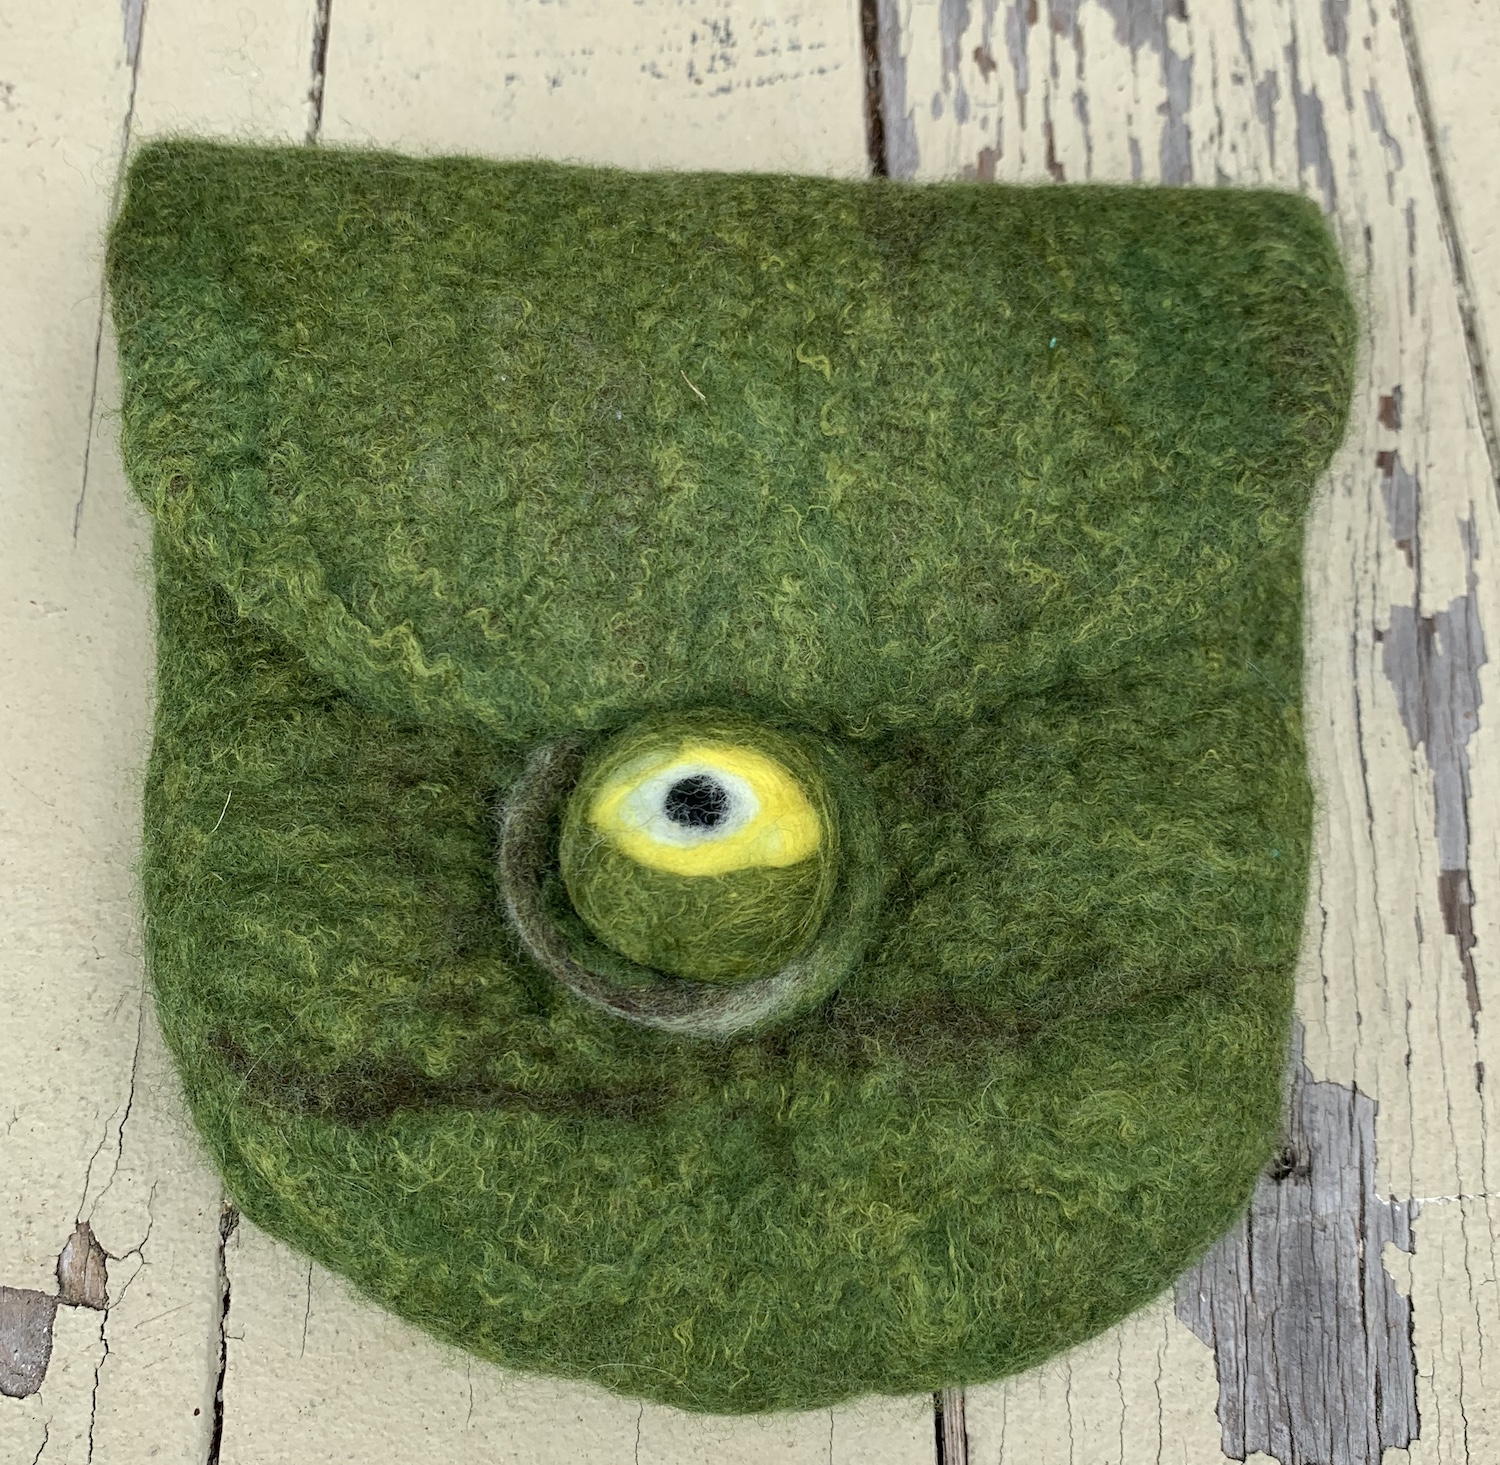
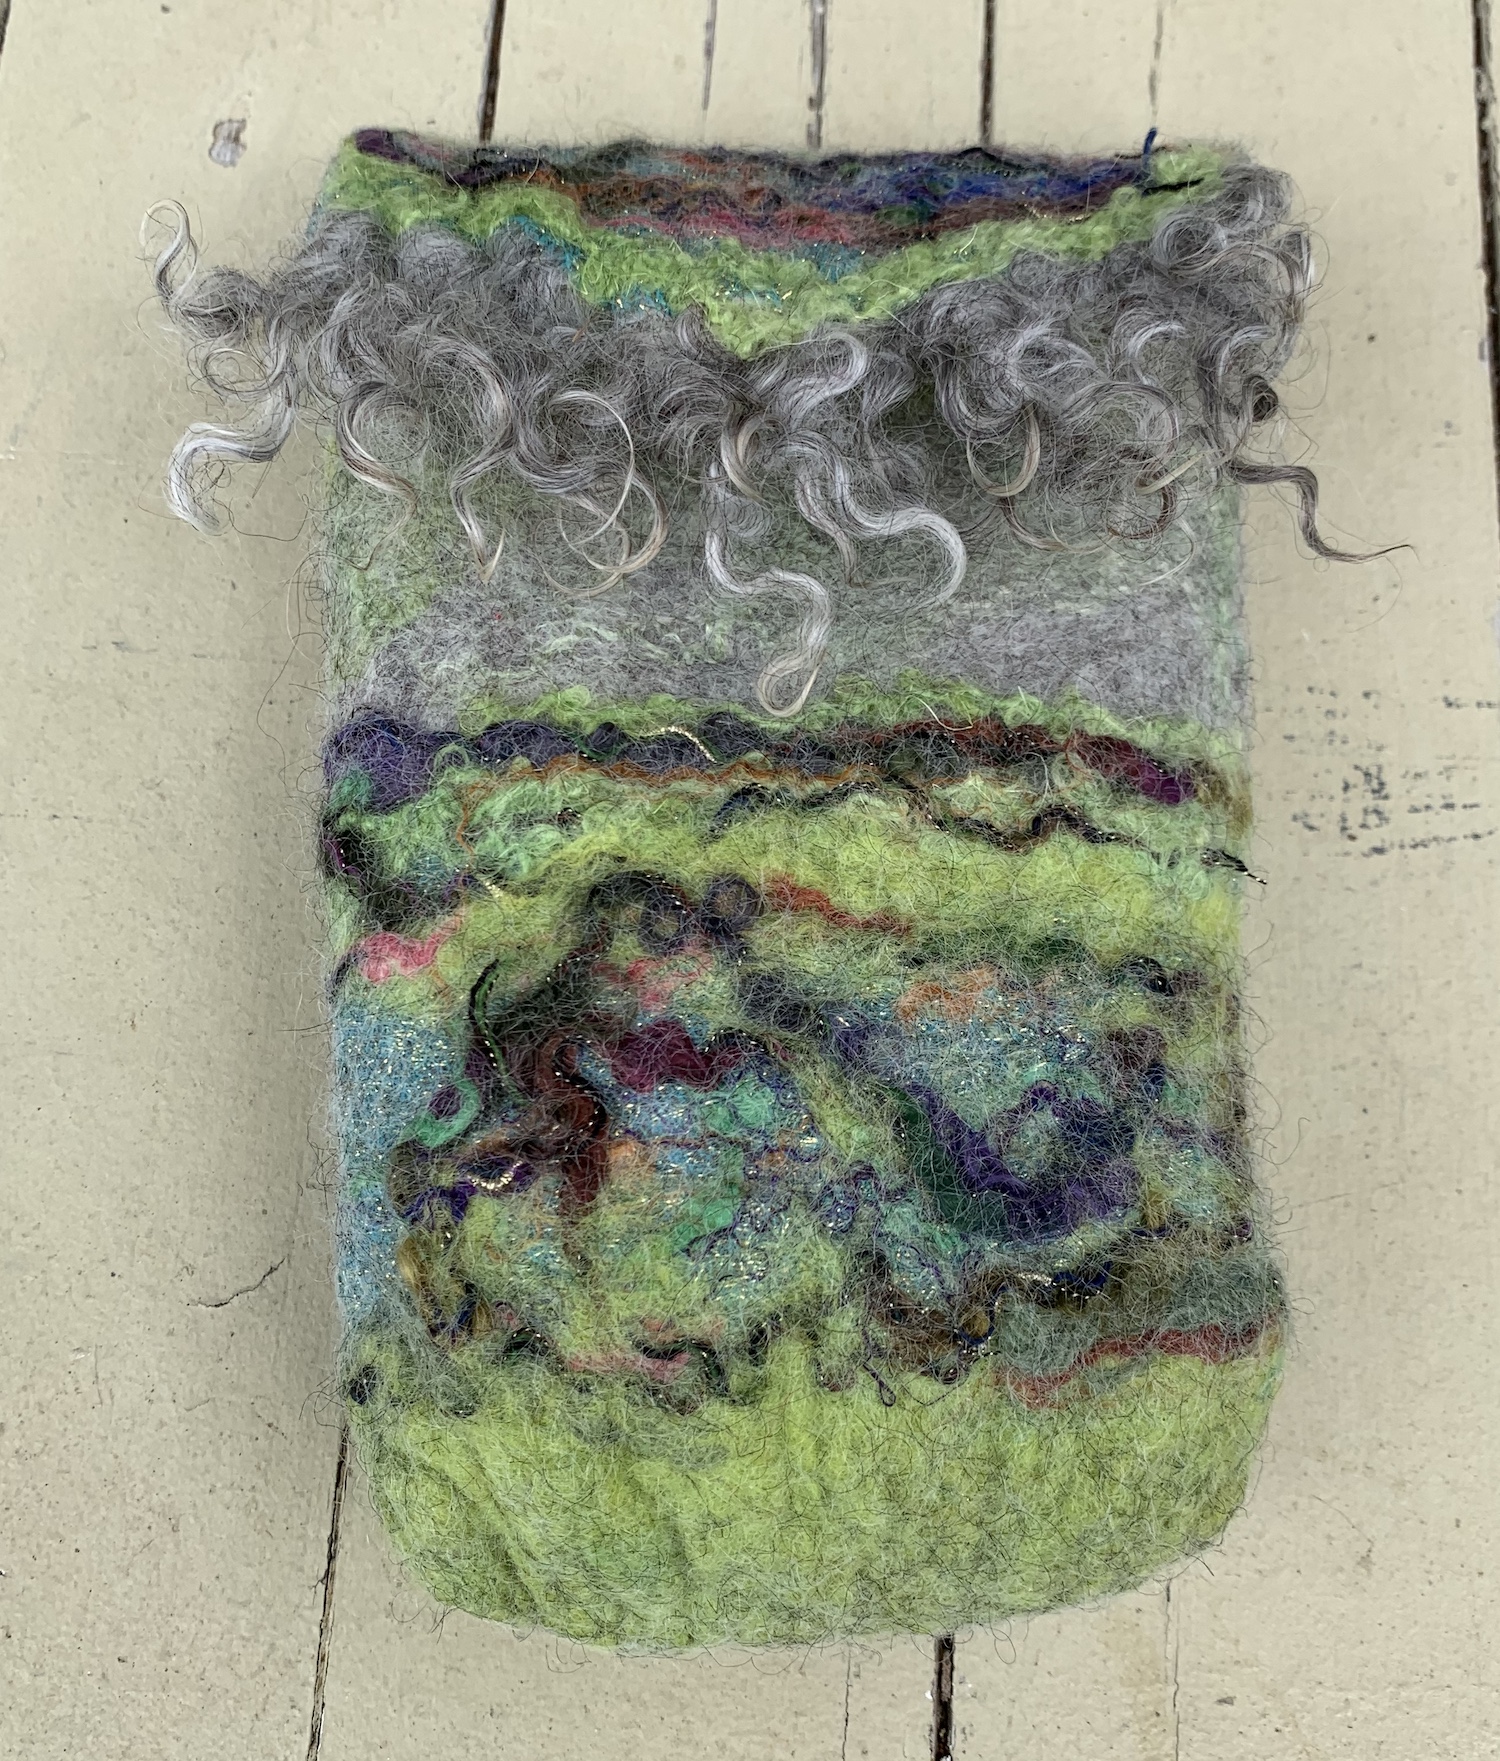
A couple of members applied to techniques to small bags with great effect…

This weekend was such a success we agreed to do it all again in just 6 months time! 🙂

Adding Dimension

This quarter, the FFS challenge is to add dimension to our felt, on the face of it I should find this challenge easy, almost everything I make is 3D in nature but that rather seems to defeat the purpose, after all, surely a challenge should be just that! 🙂

Last weekend I had a mini epiphany; I really like the effect of shibori felt like the brooch below but using the “tie in a stone/button/marble technique” is not very practical when you are creating a 3D object over a resist as you need extra felt to stretch over the inclusions and it invariably makes the surrounding felt uneven too. I woke up on Sunday morning and my first thought was to create these cup shapes separately and then attach them to the main piece of felt. Is it really sad that I am now dreaming about felt?

This was the piece made with the separate resists. It was very slow work making these 7 little cups and I’m not sure I will use this method a lot but it was interesting to try and I’m happy with the result.

IMG_7548

IMG_7551

IMG_7549

This box is quite large, just shy of a foot square and 5 inches tall.

I wanted to make a small bowl inspired by this pine cone, it started out as a bowl but I clearly wasn’t concentrating while laying out the flaps and spikes so it became a pod instead… 🙂

IMG_7567

IMG_7650

IMG_7649

Finally, I started working on a new vest top that I have been thinking about since attending a dress-making course with Cristina Pacciani at the beginning of July, it still needs some shaping in the back and around the collar but you can already see all the texture from the silk and felt ropes laid under the silk. Originally I was going to make this in royal blue chiffon but then decided white habouti would better showcase the different textures.

IMG_7664

IMG_7656

IMG_7655


What are you planning for the 3rd quarter challenge?

Cell Morphology

Last week I started exploring binding techniques for a new wall hanging I have in mind, my idea is to create a confluent layer of cells, organically spreading across the wall, this was my first experiment, the pods were made individually and attached to thin layer of felt to join them together:

IMG_6504

IMG_6502

In this version all the resists were covered in a single layer of wool on each side, as predicted, serveral of the “pods” have merged into one mega pod with several holes:

IMG_6511

This layout was much quicker and the resulting effect is much more amorphous – the individual pods blend almost seamlessly into each other.

My final experiment was a blend of the 2 methods above, the resists were individually covered with black wool before covering all of them in a continuous layer of green wool.

IMG_6528

IMG_6529


While the pods are less discrete than in the first experiment, the individual forms are more defined than in the second experiment.

I’m leaning towards the technique from first test sample for the final piece, simply because it lends itself towards using a different coloured base and it will be much easier to make “accent” cells of a different colour.

What do you think? Which version would you prefer to see?

Easter Weekend

I love the long holiday weekends and Easter, with both the Friday and the Monday off is the best of all, a whole 4 days to do with as I please, and invariably that means textiles!

I’ve had my fingers in lots of different textile pies this week:

A new nuno dress (photos of that later – it is nearly finished so won’t be too long to wait).

My first attempt at a tailored jacket, I love everything about it except for the collar reveal, it’s all lumpy and misshapen and I can’t figure out why… it will be accompanying me to my dress-making class, hopefully the tutor can explain what I have done wrong and, more importantly, how to put it right.

IMG_6506

Back in the felt world, I made a new lacy scarf and, while I was dyeing this, I put in a few pieces of prefelt, I’m debating on cutting up the prefelt to make nuno scarves with geometric designs.

IMG_6433

IMG_6451

IMG_6452

IMG_6453

I am finding myself drawn back into the beauty of the microscopic world (in part thanks to pinterest) and have been developing an idea for a 3D representation of a carpet of cells. I am thinking a series of small pods, the interiors will be black so that when I cut an opening they will appear to have nuclei. The question is, how to join them together? I have 3 or 4 ideas on how I might achieve this. This is my first test piece…

IMG_6502

IMG_6505

I’m ashamed to say I have been procrastinating terribly over posting my work on Etsy for the last few of months to the point where I have a box full of work now waiting to be listed. However, I have been making amends this weekend and photographed 80% of it, now I  just need to make myself sit down and write the descriptions and titles. Definitely a job to be done in front of the TV with a glass of wine in hand! 🙂

What have you been up to this weekend?

Parrot-Eating Sea Monster

This week I have been working on a commission piece for this very handsome young man. His name is Ki and he is a Senegal parrot.

His mommy (Ceci) wants to treat him to a new bed / hidey-hole and was taken with the idea of my cat / parrot eating fishes:

But being an artist herself (link here), Ceci and I have been having lots of fun creating a sea monster loosely based on Ki’s beautiful colours, this is a sketch detailing some of the ideas we came up with.

IMG_6099

The sea monster will have marble eyes on stalks, pectoral fins for Ki to snuggle under, a perch inside and a tongue “ramp”. This is proving to be a very unusual project! 🙂

I cut a resist based on the original cat-eating fish resist and adjusted the size to better fit Ki

IMG_6100

Then started with laying out the mouth / lips – Ceci said she would like the mouth to be green inside, once the “mouth flap” is folded back to give it strength to support Ki, the lips will be orange on the outside and green on the inside.

IMG_6101

Then I started laying out the internal layers of wool, Ceci expressed an liking for blue-green colours over the top, by using some hand dyed green wool for the inner layers I hope the green will migrate and blend with the very vivid blue I have for the top layers, giving a subtle, mottled green tinge to the finished cave.

IMG_6103

Then adding a darker layer of green and a brighter orange – this will form one of the middle layers.Notice how the mouth / opening is angled downwards to make it easier for Ki to climb inside.

IMG_6106

Then finally a couple of layers of sapphire blue and some more orange. I love this shade of blue and think it really “sings”next to the orange 🙂

IMG_6107

Then adding some pectoral fins on each side and the middle layer for the tail fin

IMG_6111

Then I made a series of felt balls in marbled yellow-orange colour and laid out the darker green for the tail fin.

IMG_6113

The felt balls were covered with blue wool to secure them (some of the blue wool will be cut away later to reveal the yellow underneath) and added some blue stripes to the tail fin.

IMG_6114

Tomorrow I start making lots of spikes and of course the eyes on stalks!

For those of you reading by email, this is the link to the web page: blog post

Boxy Hat and Some Dressmaking

Over on the Felting and Fiber Forum, Judith (AKA Koffipot) very kindly compared my chain and flame hats to David Schilling’s creations. I confess I had never heard of him before this discussion, although I did recognise some of his Royal hats, I thought one of them might have been princess Beatrice’s “toilet seat hat” as Ann so aptly described it 🙂 but it turns out that this is a Philip Treacy hat.

Looking through a gallery of his work I started to wonder if some of the shapes could be realised in seamless felt….? Looking at his hats has sparked a few ideas that I hope to realise in felt.

One of them looked like a gift-wrapped box and I wondered if I could make a small stack of felt boxes set at jaunty angles. This is the block for the base of the stack and a test run to see if I could make a felt box stiff enough to keep its shape when worn:

IMG_5882

Keeping with the resist theme, this hat used the book style resist I wrote about last week.

IMG_5867

Adding some hand-dyed cotton:

IMG_5868

IMG_5879

I have also been doing some home work for the dressmaking course I started a couple of weeks ago, but I’m afraid I made a boob… cutting the last panel for my dress I forgot to flip the pattern piece to get a mirror image and didn’t realise until I had cut the piece out. Now I don’t have enough fabric to complete the dress so I will have to make some more 🙁 But I need to make some felt for Ruth’s screen printing course so I will just make a job lot 🙂

This is the dress I will be making (no changing my mind now if it doesn’t work!):

IMG_5875

IMG_5876


IMG_5874


The white will create the centre panels with the blue forming the panels down the sides.

I also made a start on the prep work for Ruth’s experimental screen printing class that started yesterday, I have made 2 screens, 1 large and a smaller square one.

IMG_5871 IMG_5883


Pickle inpsecting my handiwork, he has been told in no uncertain terms these are NOT scratching posts!

IMG_5872

More on the screen printing course later…

For those of you reading by email, this is the link to the web page: blog post

Sorry, I still haven’t found a plug in that will automatically include a link 🙁

Q1 Challenge for 2016 – Part 2

The Chain Hat is progressing although it has been a little bit argumentative; I have had to resort to stitching more of the links together than I had initially planned.

IMG_5782

IMG_5783

I started a new hat yesterday that also fits into the resist theme, this one was inspired by the phrase “fiery red-head” and will hopefully look like an inferno on the wearer’s head when it is finished. It is still a work in progress but here it is before cutting in the flame shapes.

IMG_5844

IMG_5845

IMG_5851


Book Resist Tutorial

Following on from the Q1 Challenge posted by Ruth from the Felting and Fiber Studio, there was some discussion on the forum about what a “book resist” is, I’m sure these resists go by a variety of names but I think “book resist” is a pretty apt description as the “pages” of the resist do look a lot like a strangely shaped book. This post is a description of how I like to work with this style of resist but if you have any tips or alternative ways of working please leave a comment below, I’d love to hear from you.

Getting Started

You will need some flexible plastic sheeting, stiff enough that it will stand up on its own if you hold it by the edge but flexible enough that it will fold in half without breaking.

IMG_5786

I like the plastic that carpets come wrapped in but this isn’t very easy to come by, an alternative are the plasticised (wipe clean) table cloths. As much as I love foam underlay for resists, I find it a little bit thick for this technique, especially if you want to use more than 2 layers, but it will do if you have nothing else.

IMG_5785

Take a sheet of plastic and draw a line down the middle (this is where you will join your layers) then let your imagination go wild and draw out the template on one side of your line. I have added some photos of the resists and corresponding felt structures at the end of the post if you need some ideas to get you started.

IMG_5791

IMG_5792

Tip – make sure any pointy tips are rounded, if you don’t, they will poke through the felt and create a hole.

Tip – try to avoid putting wide sections on the end of narrow stalks, its not impossible, but it will make it harder to get your resist out.

Tip – remember the felt around the middle of your resist will open out to form a space. This can be needle-felted together at the firm prefelt stage if desired.

If you want a radial sculpture where all the arms are the same, fold your plastic in half along the straight line and trace your design onto the other side.

IMG_5793

IMG_5794

Stack additional sheets of plastic under your design, if you want your sculpture to have 7 or 8 arms you will need 4 sheets of plastic, if you want 9 or 10 arms you will need 5 sheets.  Pin them altogether then sew along the line down the middle. You can use a sewing machine if you wish, but set your straight stitch to long so as not to perforate the plastic too much, as this could make it easy to tear when you come to remove the resist.

IMG_5795

IMG_5796

Tip – if you find it hard to push the needle through the plastic, gripping the needle with a pair of pliers might help.

Tip – if you want an odd number of arms in your sculpture keep two of the felt leaves together while you felt over them. Similarly, if you think you would like to use the same resist shape for making several sculptures but with different numbers of arms, use enough sheets for the largest sculpture and then reuse the same resist but encase 2 or more pages of the resist in wool to reduce the number of arms in your final sculpture.

Cut around your design, through all the layers of plastic.

IMG_5798

IMG_5797

Getting Wet and Woolly!

Start laying out your wool, at least 2 fine layers will be needed, more if you want don’t want your structure to shrink very much or if you want it to be sturdy / functional. I typically use 2 layers for lampshades and 4 -6 layers for more structural sculptures. I like Blue Faced Leicester wool for this type of work but wrote a post on how several different wools behave for small sculptural pieces here if you are interested.

Once you have laid out at least 2 layers (in opposite directions) wet it out.

IMG_5807

IMG_5809

IMG_5810

Then lay a piece of painters plastic (or a strip of plastic bin liner) over at least half the wool then flip over one of your pages.

IMG_5814

IMG_5815

Fold the wool over the edges as you would when working with any resist, being careful to smooth out any folds of wool where you are working on the outside of a curve.

If you need to cut the wool to fold it around an indentation in the resist, avoid cutting the last 1cm / 0.5″, to avoid creating a hole in your wool.

IMG_5816

Then continue laying out your wool over the next 2 “pages” open in front of you (one page will be partially covered by the wool folded over from the previous page). Cover with some decorator’s plastic but before you flip to the next page, go back a page and fold the wool ends over so it is all nice and neat.

IMG_5817 IMG_5818 IMG_5819

Continue laying out wool and flipping pages as you work your way around the resist.

Note: where you have folded the wool over from the previous page of the resist, if the wool is already quite thick, there is no need to add more on the reverse of the page, this usually happens where you have a narrow projection, as on the top of this resist.

Tip – if you are finding your resist is becoming a little lop-sided with a big pile of wool covered pages on one side, flip the first 2 or 3 pages (on the bottom of the pile) over to the other side from underneath. That should even it up and make it easier to lay wool on the remaining pages.

Tip: laying a few strands of wool across the top and bottom joints (where the pages are stitched together) will help prevent holes like this one from opening up when the resist is removed:

IMG_5831

You are now ready to start felting…

Use  a piece of painters plastic to gently rub the surface of each page in small circles, paying particular attention to the edges of the resist. I find going over the entire surface of each page 50 times is enough. The plastic should glide easily over the surface, if it doesn’t add some more soapy water.

Tip – If you are working with lots of pages you might find it helpful to remove the painter’s plastic as you complete each page so you know when you have reached where you started.

Tip – don’t forget to felt the pages at the back, the ones lying face down on the table.

Tip – work your circular motions from the edge of the resist towards the centre, this will help prevent wings / ridges of felt forming on the edge of the template (unless of course that is what you are trying to do!).

Do the “pinch test”, your fibres should be holding together well by now but if not, go through another cycle of rubbing (it may help to add some hot water too).

IMG_5826


Removing the Resist

Now we have to decide where to make a hole to remove the resist. For most templates, a hole near the line of stitching makes it easiest to remove the template but anything is possible! I make my hole just big enough for 2 fingers, the hole will stretch some more as you pull the resist out so don’t make it too big…

IMG_5827

Depending on the shape of your template, ones with long, spidery arms are the most fiddly, you may need to gently gather and work the felt over the resist in order to get it out without stretching or tearing the felt.

Once the resist has been removed hold the felt up to a light and look inside, through the hole where the resist came out, you are looking for any thin spots in the felt. Any holes should be repaired now , before fulling begins, by laying extra fibre over the wool and gently rubbing through some thin plastic until it is well attached. Now you are ready to knead and throw it, stopping every 30 seconds to check the arms of your sculpture aren’t felting together on the inside. This is also the time to start rubbing it in any directions where you want it to shrink and to start shaping it.

Once you are happy with the shape, folds etc. it can be stuffed while it dries.

Variations:

Try adding wings by laying wool off the edge of the resist.

What would happen if you stitch different shaped pages of resist together or stitched them at different positions (not just down the middle)?

How can you fold / shape / manipulate felt pods made from the same resist so that the final sculptures look very different?

Some example resists and their results:

IMG_5843

IMG_2826


IMG_5837

IMG_2895 IMG_3622 IMG_3612 IMG_3643


IMG_5842


IMG_5841

IMG_2872


IMG_5839

IMG_2847


IMG_5838IMG_4030

Productive Weekend

It’s not quite finished but now the sleeves are attached the hooded jacket looks a lot closer to finished.

IMG_5550 IMG_5547

It just needs a button and some top stitching down the front and it is finished

Yesterday I made another cat-eating fish, cat cave from some hand-dyed Corriedale.

IMG_5555 IMG_5557  

Feeling inspired by this pine cone:

IMG_5560
I made a bowl:


IMG_5570 IMG_5562 IMG_5561

And I finally finished these 2 scarves, originally I put a rolled hem on these but did not like the finish so removed the hems, reshaped the scarves and felted the edges to stop them from fraying.

IMG_5577 IMG_5580

The silk is still very shiny, the photos really don’t do it justice at all.

IMG_5579

What have you been up to?