Category Archives: shibori

Adding Dimension

This quarter, the FFS challenge is to add dimension to our felt, on the face of it I should find this challenge easy, almost everything I make is 3D in nature but that rather seems to defeat the purpose, after all, surely a challenge should be just that! 🙂

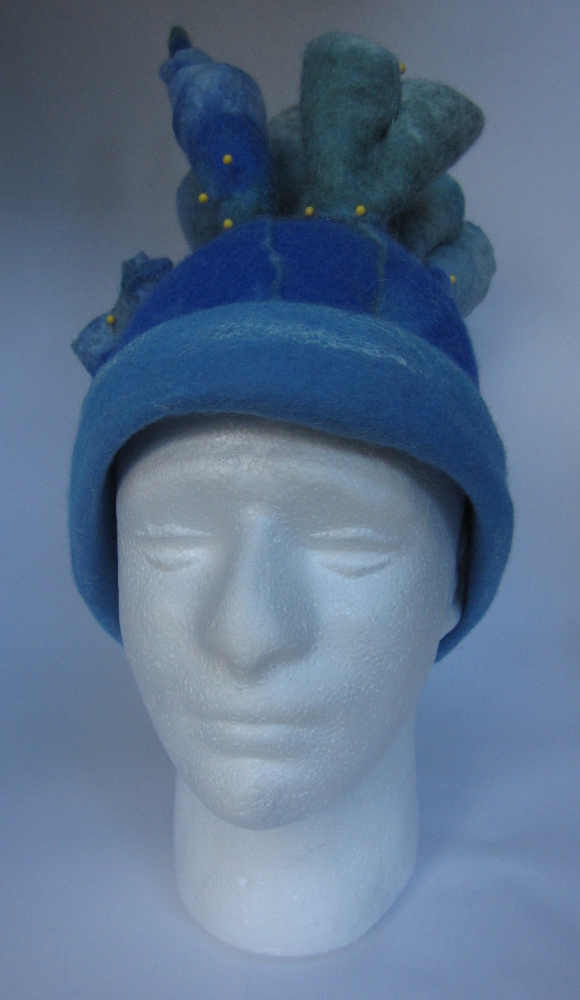
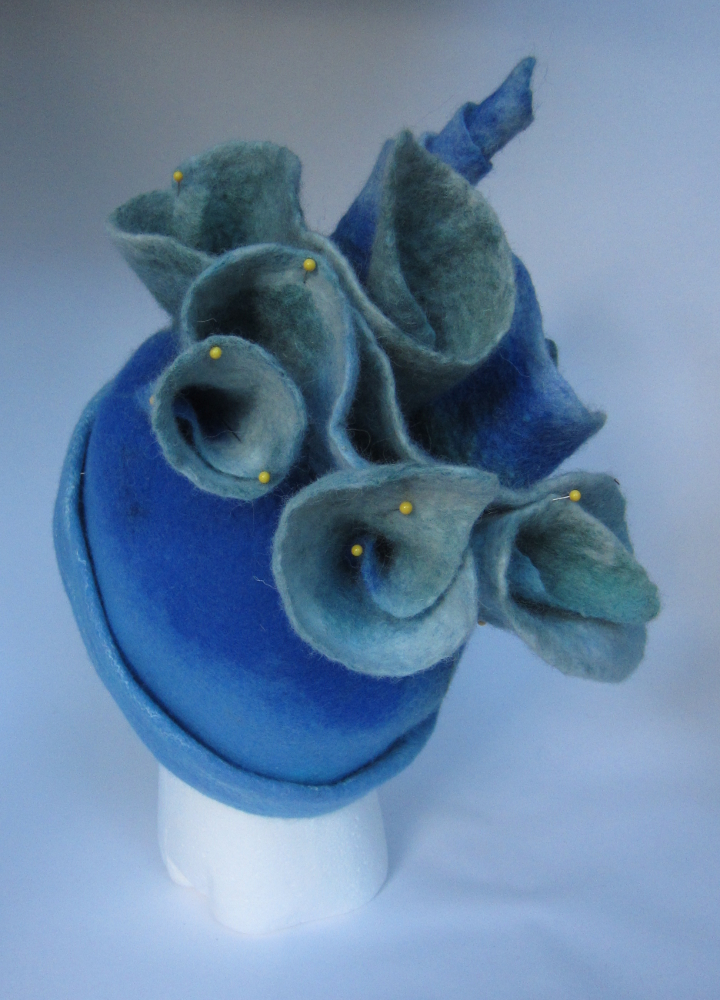
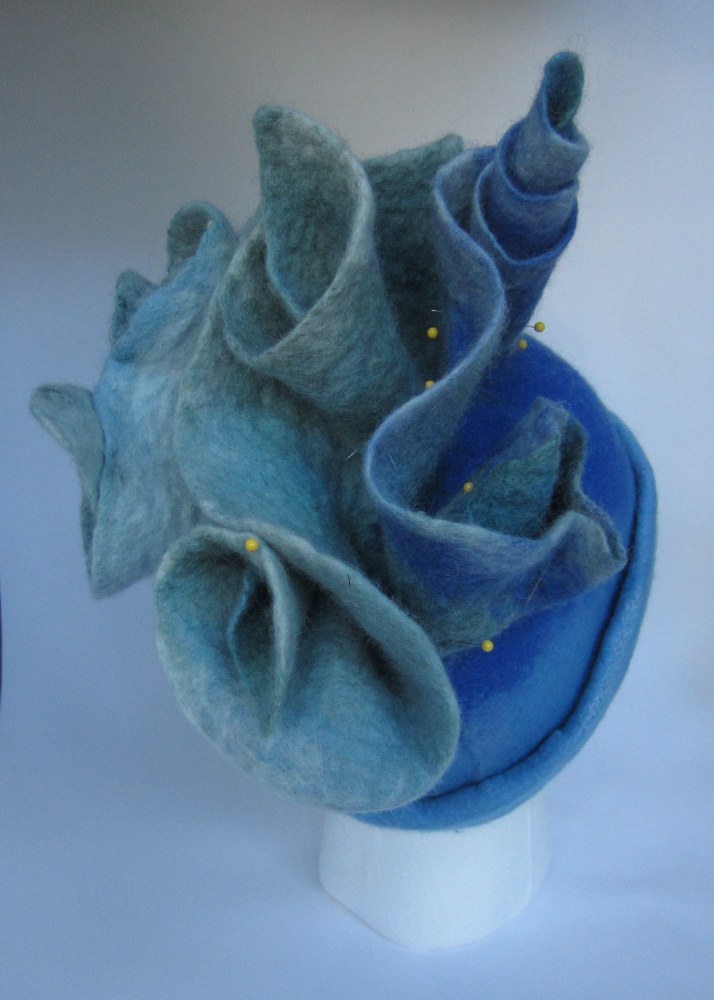
Last weekend I had a mini epiphany; I really like the effect of shibori felt like the brooch below but using the “tie in a stone/button/marble technique” is not very practical when you are creating a 3D object over a resist as you need extra felt to stretch over the inclusions and it invariably makes the surrounding felt uneven too. I woke up on Sunday morning and my first thought was to create these cup shapes separately and then attach them to the main piece of felt. Is it really sad that I am now dreaming about felt?

This was the piece made with the separate resists. It was very slow work making these 7 little cups and I’m not sure I will use this method a lot but it was interesting to try and I’m happy with the result.

IMG_7548

IMG_7551

IMG_7549

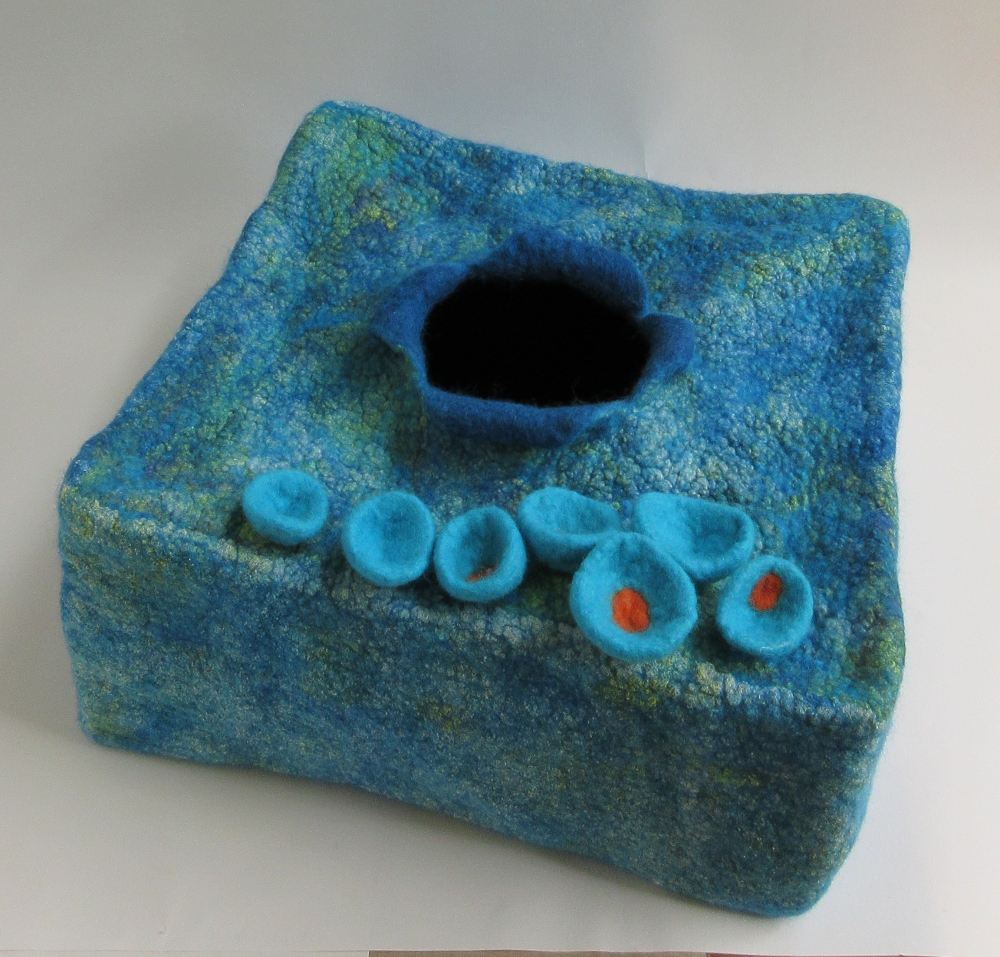
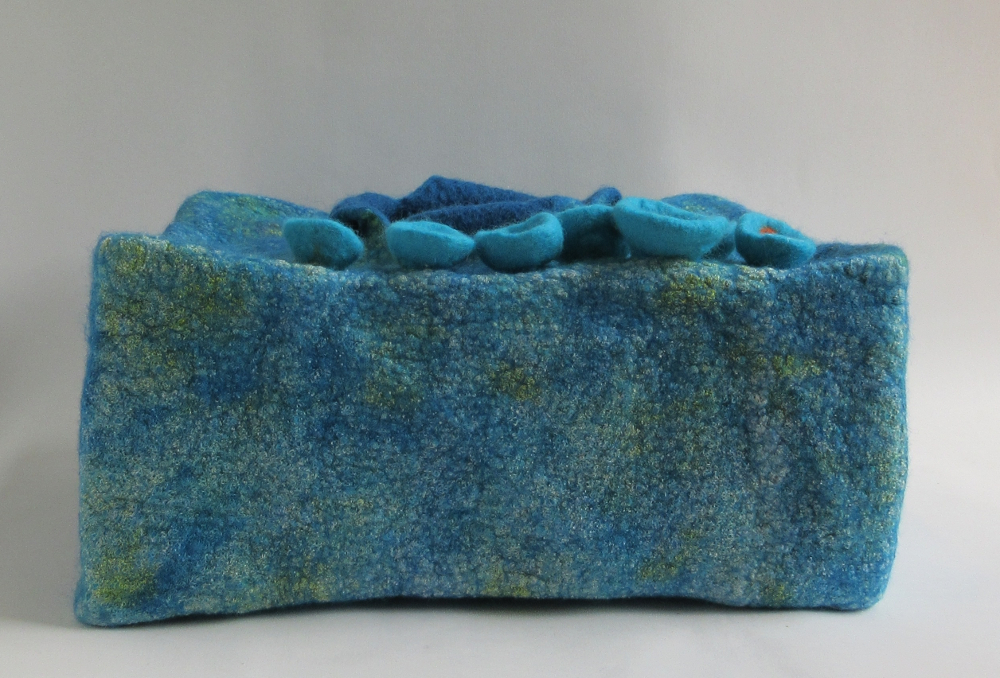
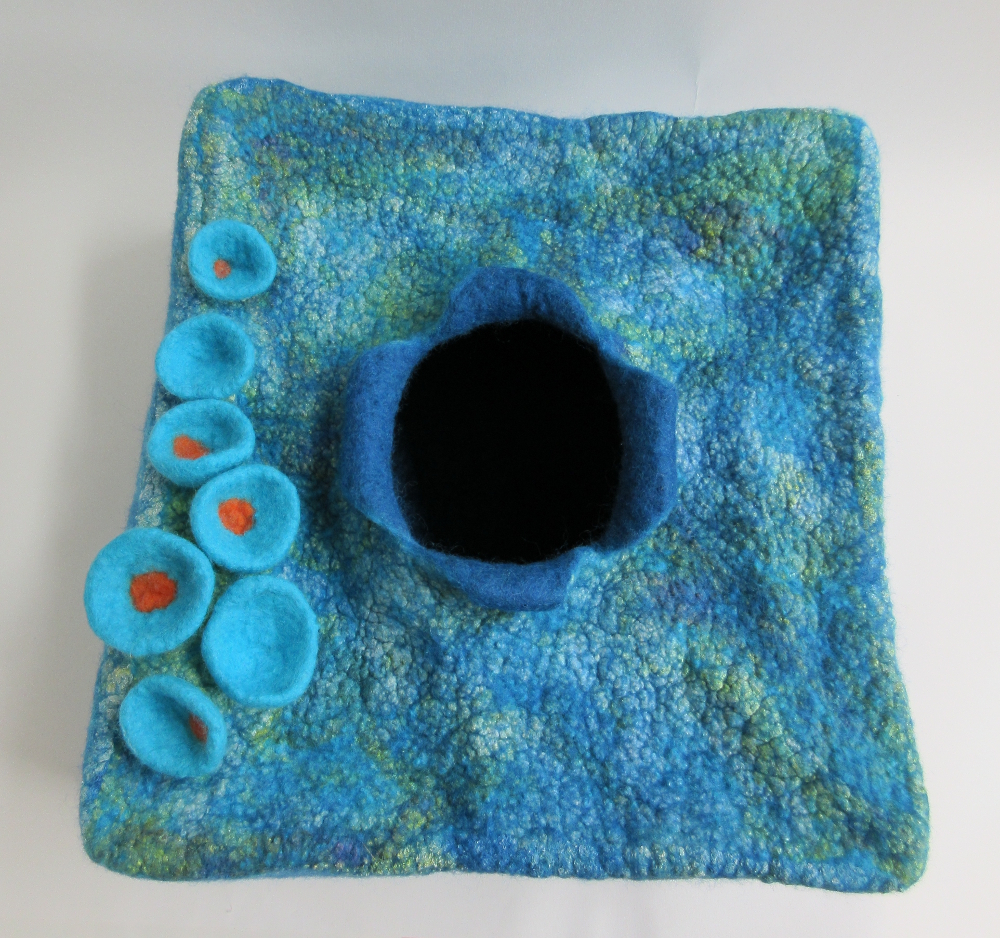
This box is quite large, just shy of a foot square and 5 inches tall.

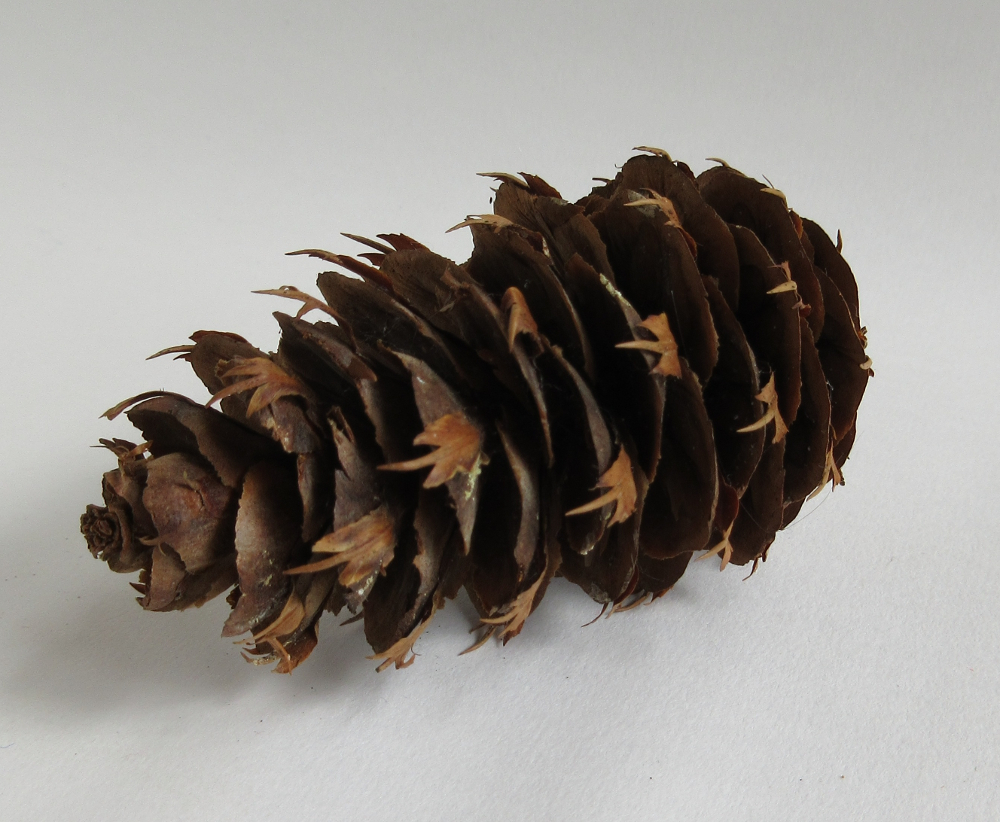
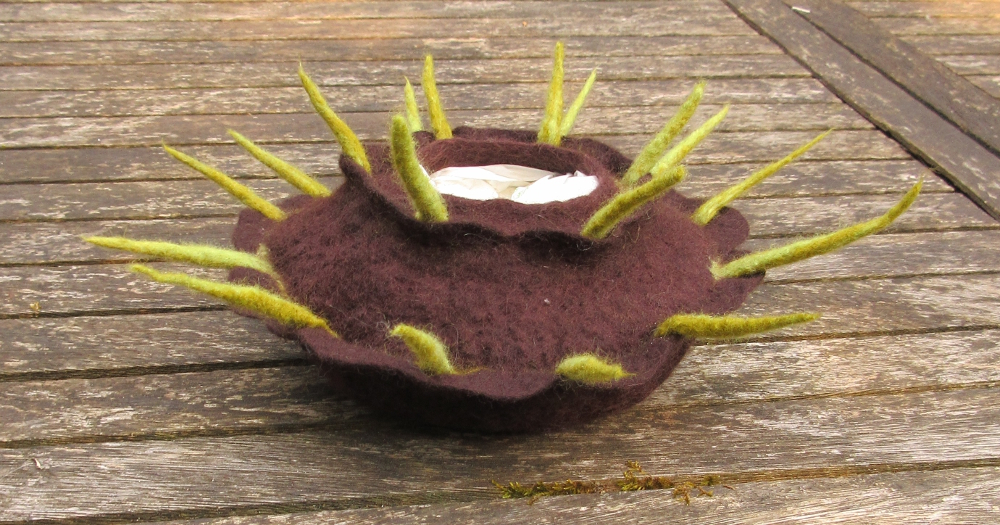
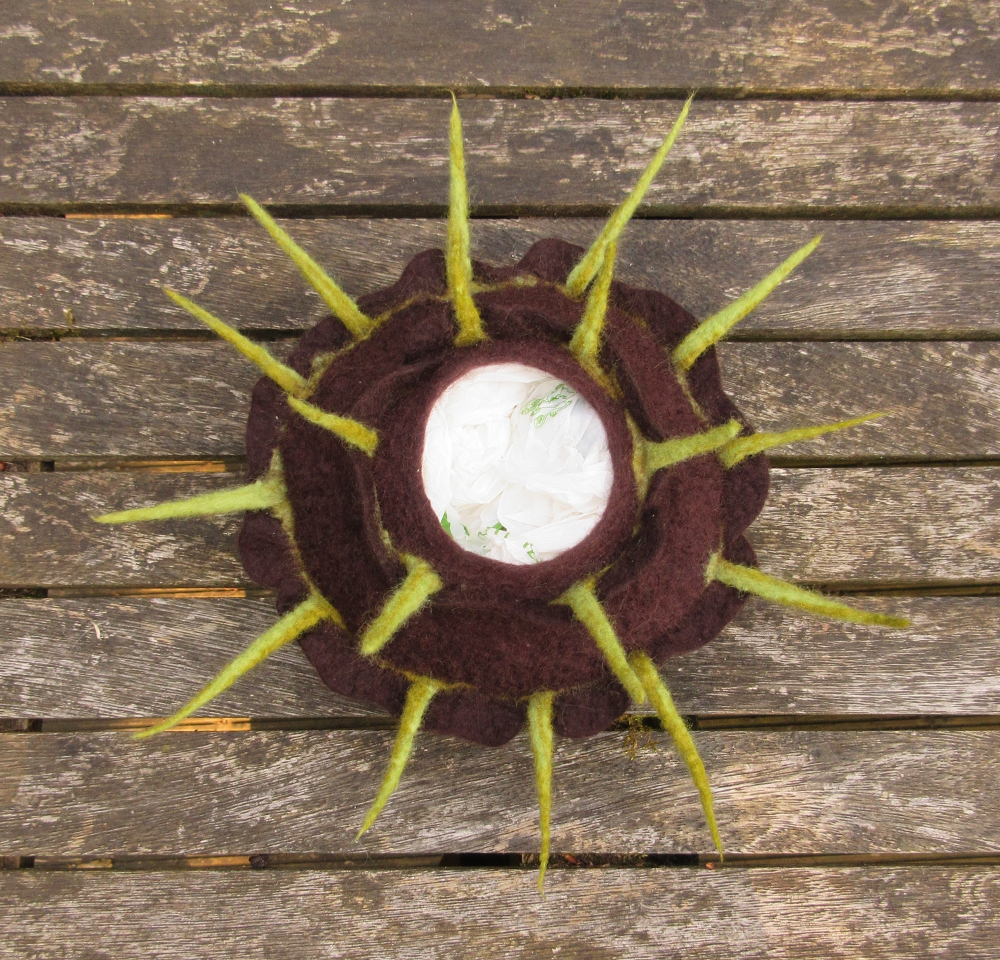
I wanted to make a small bowl inspired by this pine cone, it started out as a bowl but I clearly wasn’t concentrating while laying out the flaps and spikes so it became a pod instead… 🙂

IMG_7567

IMG_7650

IMG_7649

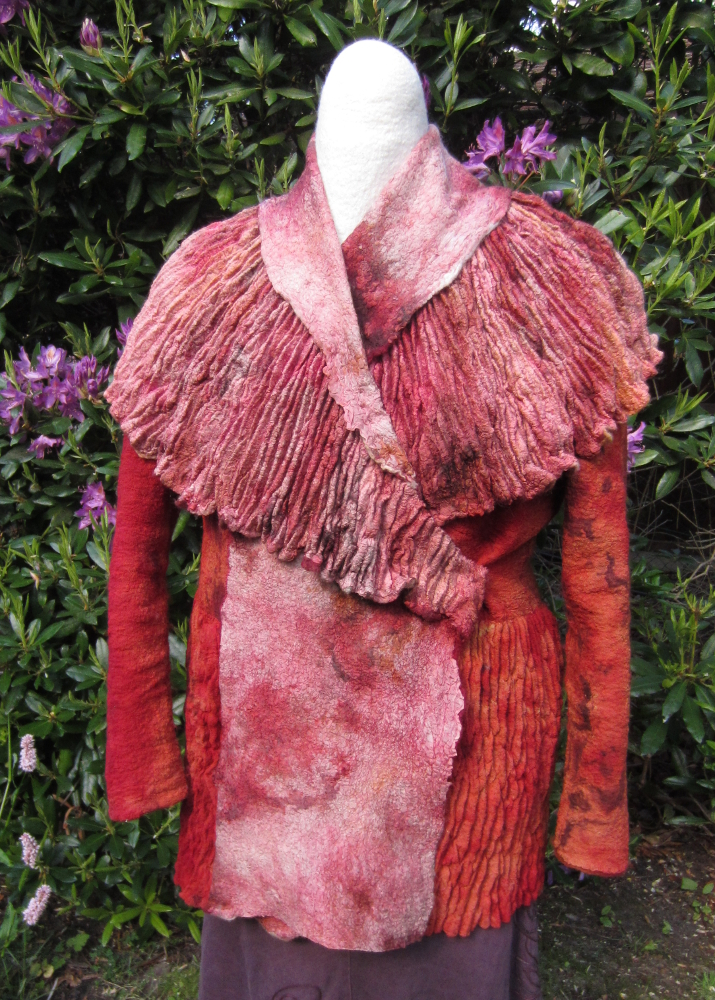
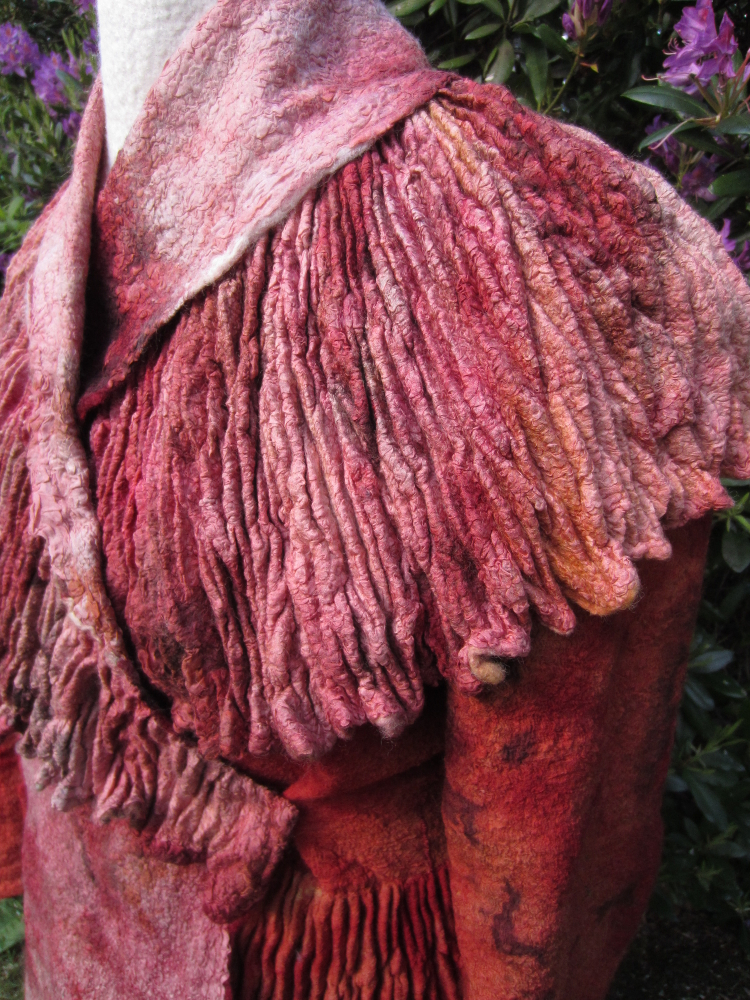
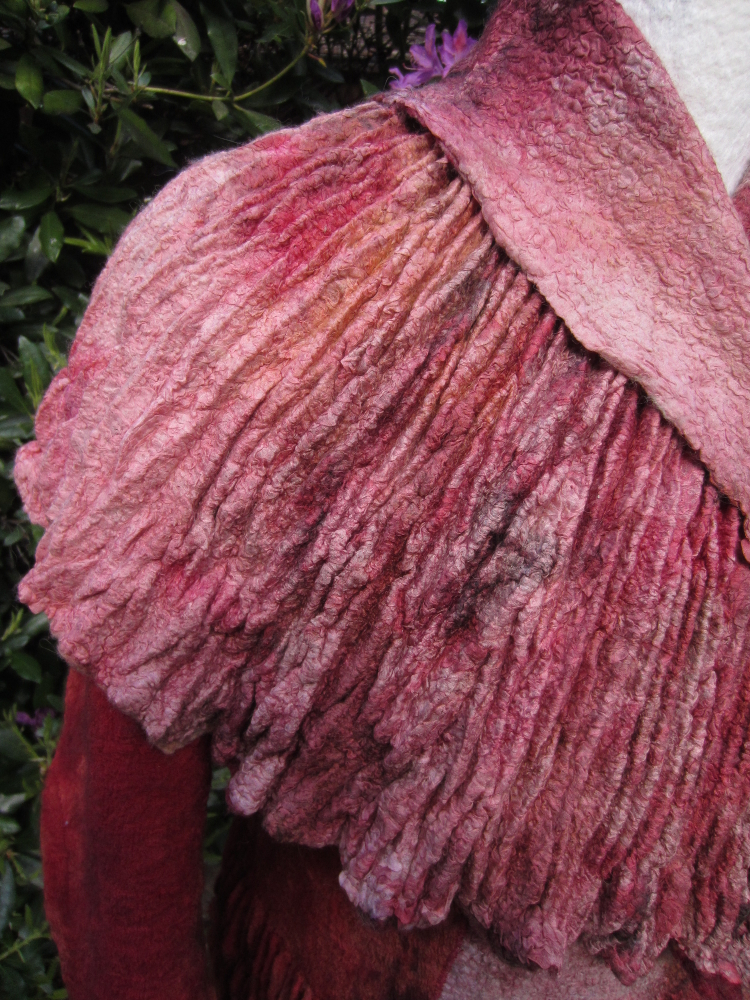
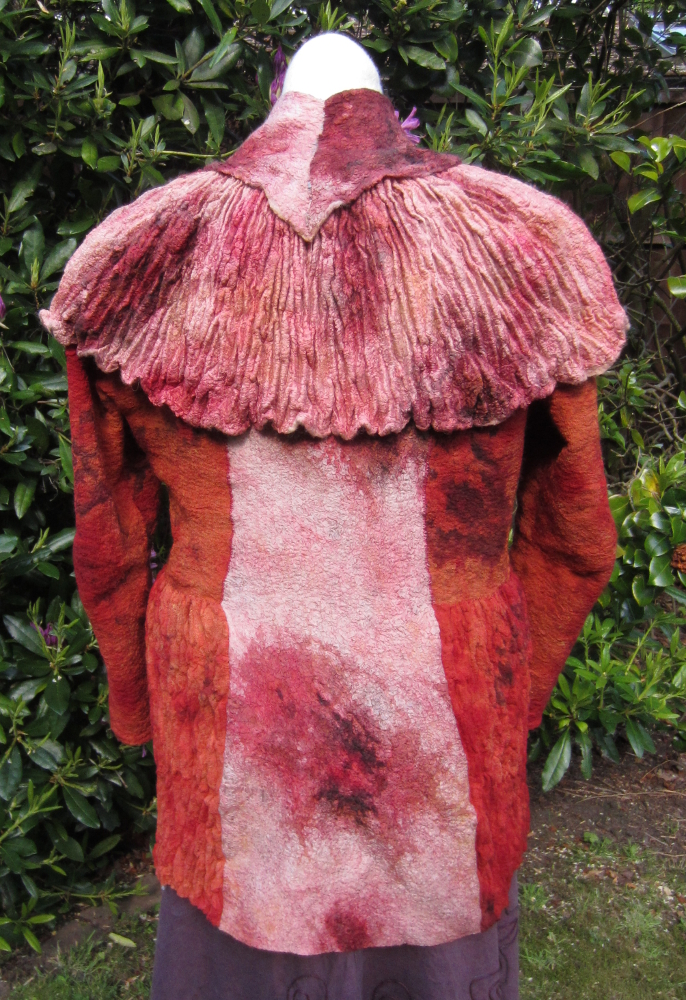
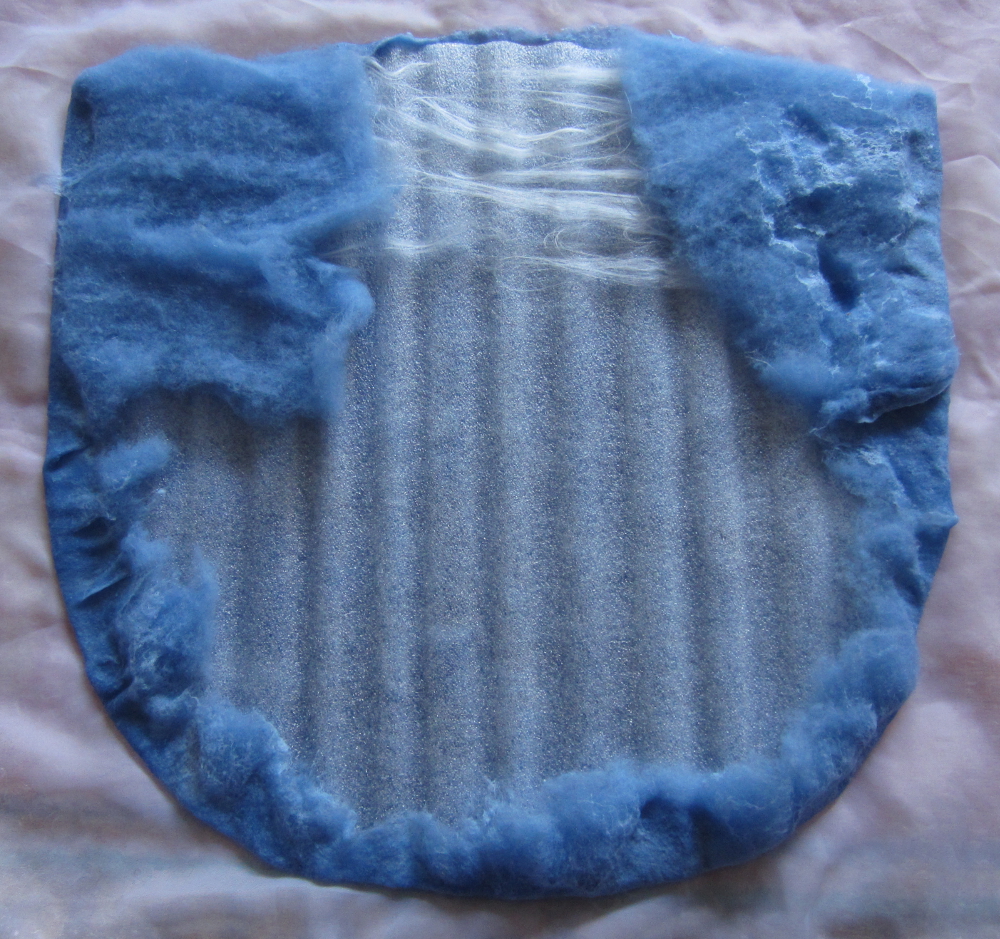
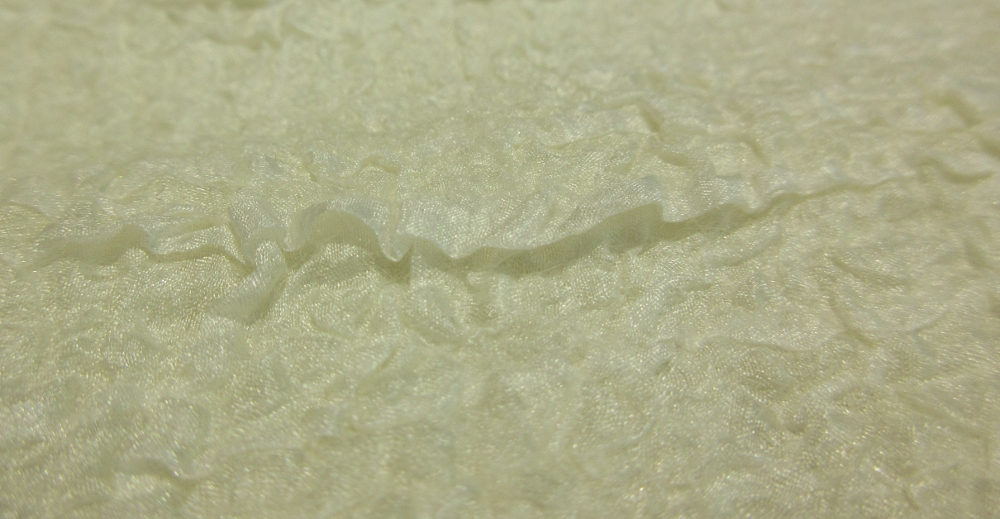
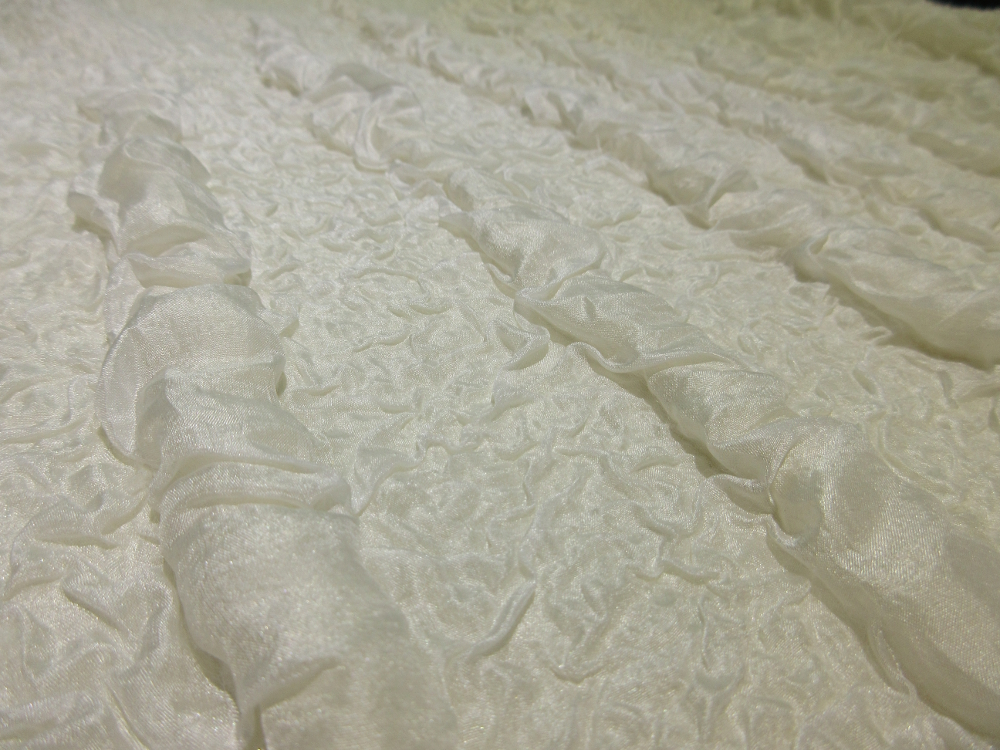
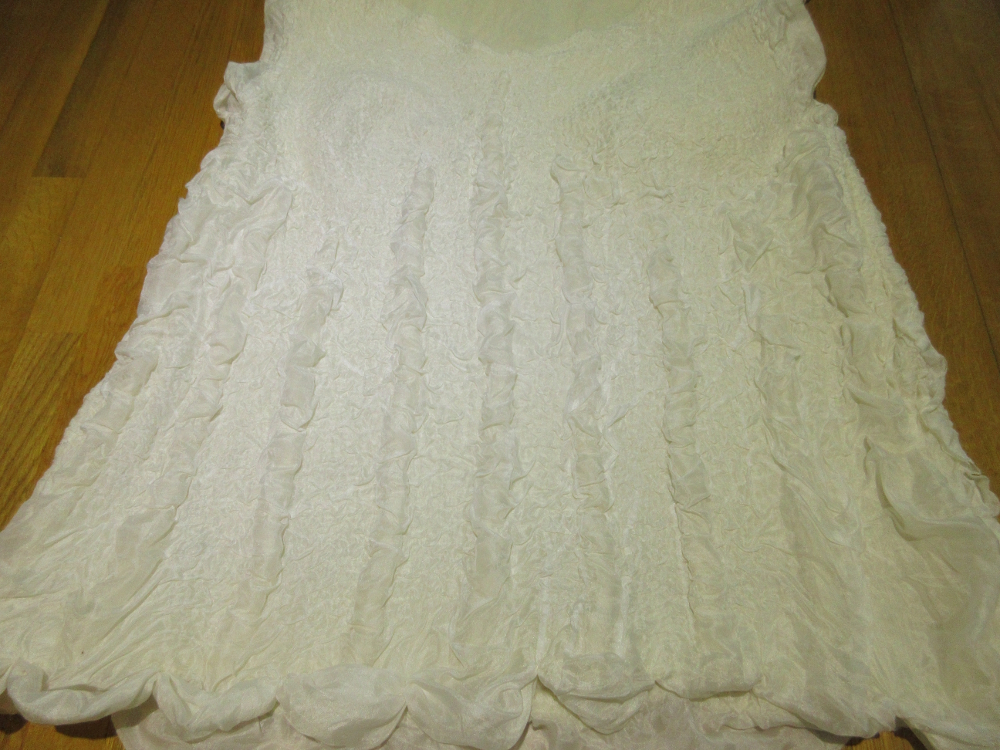
Finally, I started working on a new vest top that I have been thinking about since attending a dress-making course with Cristina Pacciani at the beginning of July, it still needs some shaping in the back and around the collar but you can already see all the texture from the silk and felt ropes laid under the silk. Originally I was going to make this in royal blue chiffon but then decided white habouti would better showcase the different textures.

IMG_7664

IMG_7656

IMG_7655


What are you planning for the 3rd quarter challenge?

Felt Shibori and Some Hats

As promised here are some photos of the jacket I made on Tatiana Sherverda’s workshop at the end of April. The workshop was intended to be focussed on tailoring and pattern making but as you can see we went off on a bit of a shibori tangent! 🙂

Of course that did mean very few of us managed to finish our jackets during the workshop (I was still working on mine 3 weeks later…). I’m afraid I don’t have any “during” photos but Terriea posted one on her blog, it’s near the bottom of the page.

While making this I wasn’t 100% sure I would feel comfortable wearing it (it is very OTT compared to what I would normally wear) but now I love it and can’t imagine parting with it. I’m not sure why but something about it reminds me of Game of Thrones, there is something theatrical about the silhouette I think…?

Another long-promised offering (sorry I have been really rubbish at finishing projects this year), the brain hat that you all very kindly provided ideas on how to finish it. The brim won out in the end (although I really didn’t expect it to) and I am rather pleased with how it turned out:
 

This is rather naughty, I know I should be making more of an effort to empty my UFO box but you know how it is when you get an idea for a new project….

This is my wooly prize from the IFA conference a few weeks ago, all along it has been crying out to be turned into an ocean / something watery.

When I started, I had ideas of waves of felt with white foam “crashing” over the surface of a hat, here it is at the layout stage.

The wool is English 56’s, not a breed (I suspect it is a blend of wools) I am familiar with, but it feels quite course to the touch so I used a couple of layers of merino batts on the inside for comfort.

I have to confess the waves are looking more and more like whirlpools as this hat has developed but I think it still works, it’s still drying, hence all the pins….

Just a few stitches and hopefully this one will never get to see the inside of my UFO box 🙂

The Finished Cuff

Do you recall this piece?
It was a piece of shibori dyed silk that kept all the lovely pleats after removing the stitching. I was going to felt it but couldn’t bear to lose all the beautiful creases so it became an experiment in trying to maintain shibori folds while felting…

This is what it looked like after felting:

Too narrow to be used as a book cover but just about the right length for a cuff / bracelet. After some cutting, stitching, addition of beads and a bit more felting it is finished:

This piece will be on sale at Unravel  in Farmham this weekend, if you are planning on attending this festival a few of my pieces will be on the West Surrey Spinners Weavers and Dyers stand, do come and say hello! Click here if you have no idea what I am talking about….

Shibori Experiments

Following some very helpful suggestions from the ladies at the Felting and Fibre Studio Forum I have felted the original piece of shibori dyed silk and created a couple more samples, trying out alternative methods in an effort to maintain the beautiful folds of the bound fabric.

Felting the original shibori piece
I laid a very fine layer of merino all over the silk and lightly sprayed it with soapy water. Then folded the fabric concertina style from one end, trapping the wool between the layers of fabric.

 Once folded up, it was secured with elastic bands every 4 or 5 cm and felted with warm soapy water.

This was the result once the bands had been removed and the piece stretched at little. It is a similar width to the original silk but the length is much shorter, it was 50 cm long and is now just 8 cm. I think it will make a nice cuff / bracelet with some beads nestling in the folds.

Creating a laminate for shibori

For this sample I felted a piece of silk to 2 fine layers of merino and fulled to achieve rippling of the silk. Then it was stitched and the threads pulled ready for shibori dyeing.

It was dyed with Procion MX midnight blue – as you can see the silk has accepted the dye much better than the wool.

It was allowed to dry before removing the stitches and stretching out. It has a springy nature; it can be pulled almost flat but always springs back to this position.

Adding wool fibre while drawing the threads tight
On a third sample, I stitched the silk as normal but while I was drawing the threads tight I poked wisps of merino into the folds and felted the piece before dyeing with the piece above. This is what it looked like after it had dried and the stitches were removed. It looks remarkably similar to the first piece with very sharp folds in the silk.

Shibori Conundrum

Last weekend I dyed a piece of stitched shibori silk from my craft group, to be honest I am more enamoured with the texture of the silk than the dye effect. I would really like to felt this piece so I can use it as a book cover but I am sure the texture will disappear as soon as I wet it out.

Do any of you clever people have any ideas how I might laminate this fabric without losing the texture?

I am also open to other uses for this piece of silk, it doesn’t have to be book cover….?

Linked to nina-marie

Feeling chuffed

Part of my New Year’s non-resolution was to spend more time being creative and to that end I bought some extra annual leave from work (not cheap but I think it was worth it), so I took today as annual leave to be crafty ;o) I’ve had quite a productive day, finishing a low relief sample from a monoprint for my C&G course:

And started felting some rainbow dyed cotton scrim for a hooded scarf, still a way to go yet but I’m liking the colours. As usual I have wandered off brief and used a carded mix of colours instead of plain white merino tops. With some careful stitching I’m hoping I can make it reversible. This is the wooly side:

And the dyed cotton side:

I also started some samples exploring acrylic paints on prefelt, I am testing acrylic paint on their own, with an iridescent additive and both of these with and without a textile additive for acrylic paint. Then I repeated these samples on wet and dry felt. This is what they look like while I (im)patiently wait for them to dry. The bars in the middle are some commercial fabric paints. Next step is to iron fix them and see how well they stand up to felting.

Last week I had a lucky win on Ebay, I bid on 8 metres of blue silk chiffon and won it for just under £33. It’s pretty shade of royal blue, actually appears to be silk (I’ve lost track of the number of times I have bought things on Ebay that have turned out to be something different than described) and is in good condition.

Best of all, I conducted an experiment using discharge paste on it today and it worked!! Here are the results, the white grid is where I painted the paste on. It was so easy!

I feel the urge to do some shibori discharge dyeing….

And just in case you think I forgot about the Q1 challenge, here is a sneaky peek of what it currently looks like….

(linked to Off the Wall Fridays)

Fabric Dyeing

This has been another fun weekend, I always enjoy dyeing fabric and yesterday I did some more shibori exploration in preparation for a monthly craft group at the end of January. We will be playing with shibori techniques and as the only one who has practiced any shibori at all, I expect it will fall to me to “teach” everyone else. I feel like a bit of a fraud since I have only done it a handful of times before. These are the fruits of my efforts, they are all small samples but I am quite pleased with how they turned out.

Clamped with triangular shaped pieces of wood:

Clamped with square pieces of wood:

Twisted and wrapped around a ruler:

Pleated, twisted and bound with elastic bands:

I also did some rainbow dyeing on ponge silk:

Cotton muslin:

And cotton scrim:

More adventures in shibori

I also made another piece using stitching and gathering to provide a resist against the dye. This time I used a sewing machine to stitch parallel lines before tightly gathering the fabric. As with other piece, when I use this method again I will hand stitch, removing the machine stitching from gathered material was a real pain.

This piece was dyed at the same time as the “circles” shibori, again I removed the stitching while it was still wet. This is the result:

As you can see my stitching was less straight towards the bottom but I think the effect is still lovely.

This piece also became a book cover, first I stitched a couple of pleats into the fabric to add extra texture to the final fabric.

Then I laid out white merino top along the pale purple lines to maintain the contrast.

Before laying out 2 layers of merino top.

Here it is after felting, with the pleats giving added texture.

And the final product – an A4 book cover:

Shibori Dyeing

It is a bit of a stretch to call this a tutorial as I am still exploring this method of dyeing myself but I thought I would share the process so you can have a go too if interested. I think of shibori as being tie-dye for grown ups, the principal of what we are doing is the same, we are creating areas where the fabric is so tightly bound that the dye cannot penetrate and those areas retain the colour of the base fabric. There are many different shibori methods including folding, clamping, wrapping around pipes, using elastic bands and stitching. Here I have used stitches and gathering the fabric to form a resist.

I am using a pale pink / purple piece of cotton scrim (this was dyed in the left over dye after some rainbow dyeing, described in another post).

I hand-stitched semi-circles over a fold (I also tried machine stitching but found it difficult to get a smooth curve and it was far more difficult to remove the machine stitching afterwards). I started by folding my fabric at regular lengths and then pinned it into place before using a water soluble marker and some templates cut from card to mark out where I will stitch.

Drawing a semi-circle along each fold, first with the large template:

Then the medium sized circle…

And finally the small circle…

I used a very strong thread (if you can snap it with your bare hands it won’t be strong enough), and used a running stitch, leaving long tails of thread, at both ends of each circle. Don’t be tempted to gather your circles before you have finished stitching them, it will make it much harder to stitch the remaining circles… ask me how I know ;o)

Keep going until all of the circles have been stitched, then you are ready to start gathering.

Tie off one end of each line and pull the other end as tightly as you can to gather the fabric and tie off the other end. Repeat this for all the circles.

Now you are ready to dye, I used a packet of hand-dye Dylon but any fibre reactive dye (e.g. Procion MX) will do a good job, just follow the instructions on the packet.

After rinsing you can remove the stitching and dry flat or if you prefer a textured fabric you can remove the stitches once it is dry. I removed mine while it was still wet because I wanted to use this piece as a laminate in felt making. This is what it looked like once dry:

After felting I turned this piece into a large book cover:

Felt Ropes and Balls

I think I mentioned that I started a City and Guilds course in Feltmaking in August this year. It’s a distance learning course with ArtyBird, a textile school in Lancashire and so far it has been interesting, it has challenged me to work in ways that I probably would never have considered on my own, especially the design elements.

Part of this month’s assignment is to create ropes and balls, with a leaning towards making felt jewellery. So far I have created a necklace and cuff that I am proud of and a bracelet that I’m still feeling indifferent toward and a second necklace that was nothing short of a disaster. Here are the pieces I like and would be prepared to wear myself:

I still want to add some stitching (staggered blanket stitch) to the border of the cuff.

This is the bracelet I neither like or dislike:

And this is the disaster. It started out looking very promising with different coloured rope cores encased within a dark brown shell – it started life as a thick rope that was cut into discs and sewn together in a string. This is it before it became a mushy mess, all the colours are still clear and the discs haven’t turned into amorphous blobs yet:

I tried all sorts to get the discs to harden. Wet felting for over an hour, on and in the roller blind, rubbing on bubble wrap and the blind, felter’s rolling pin and finally the tumble drier. All that has happened is the colours have all blended together to shades of a dark brown, the discs have lost their shape and they still feel mushy!!

Not exactly jewellery (yet) but this is a multicoloured felt ball, perhaps with some beads and stitching it could make a nice pendant?