Category Archives: fabric lamination

The Finished Cuff

Do you recall this piece?
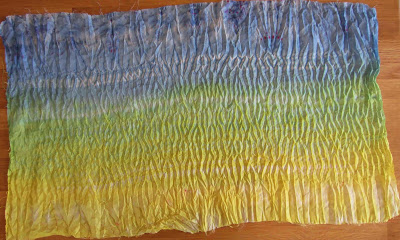
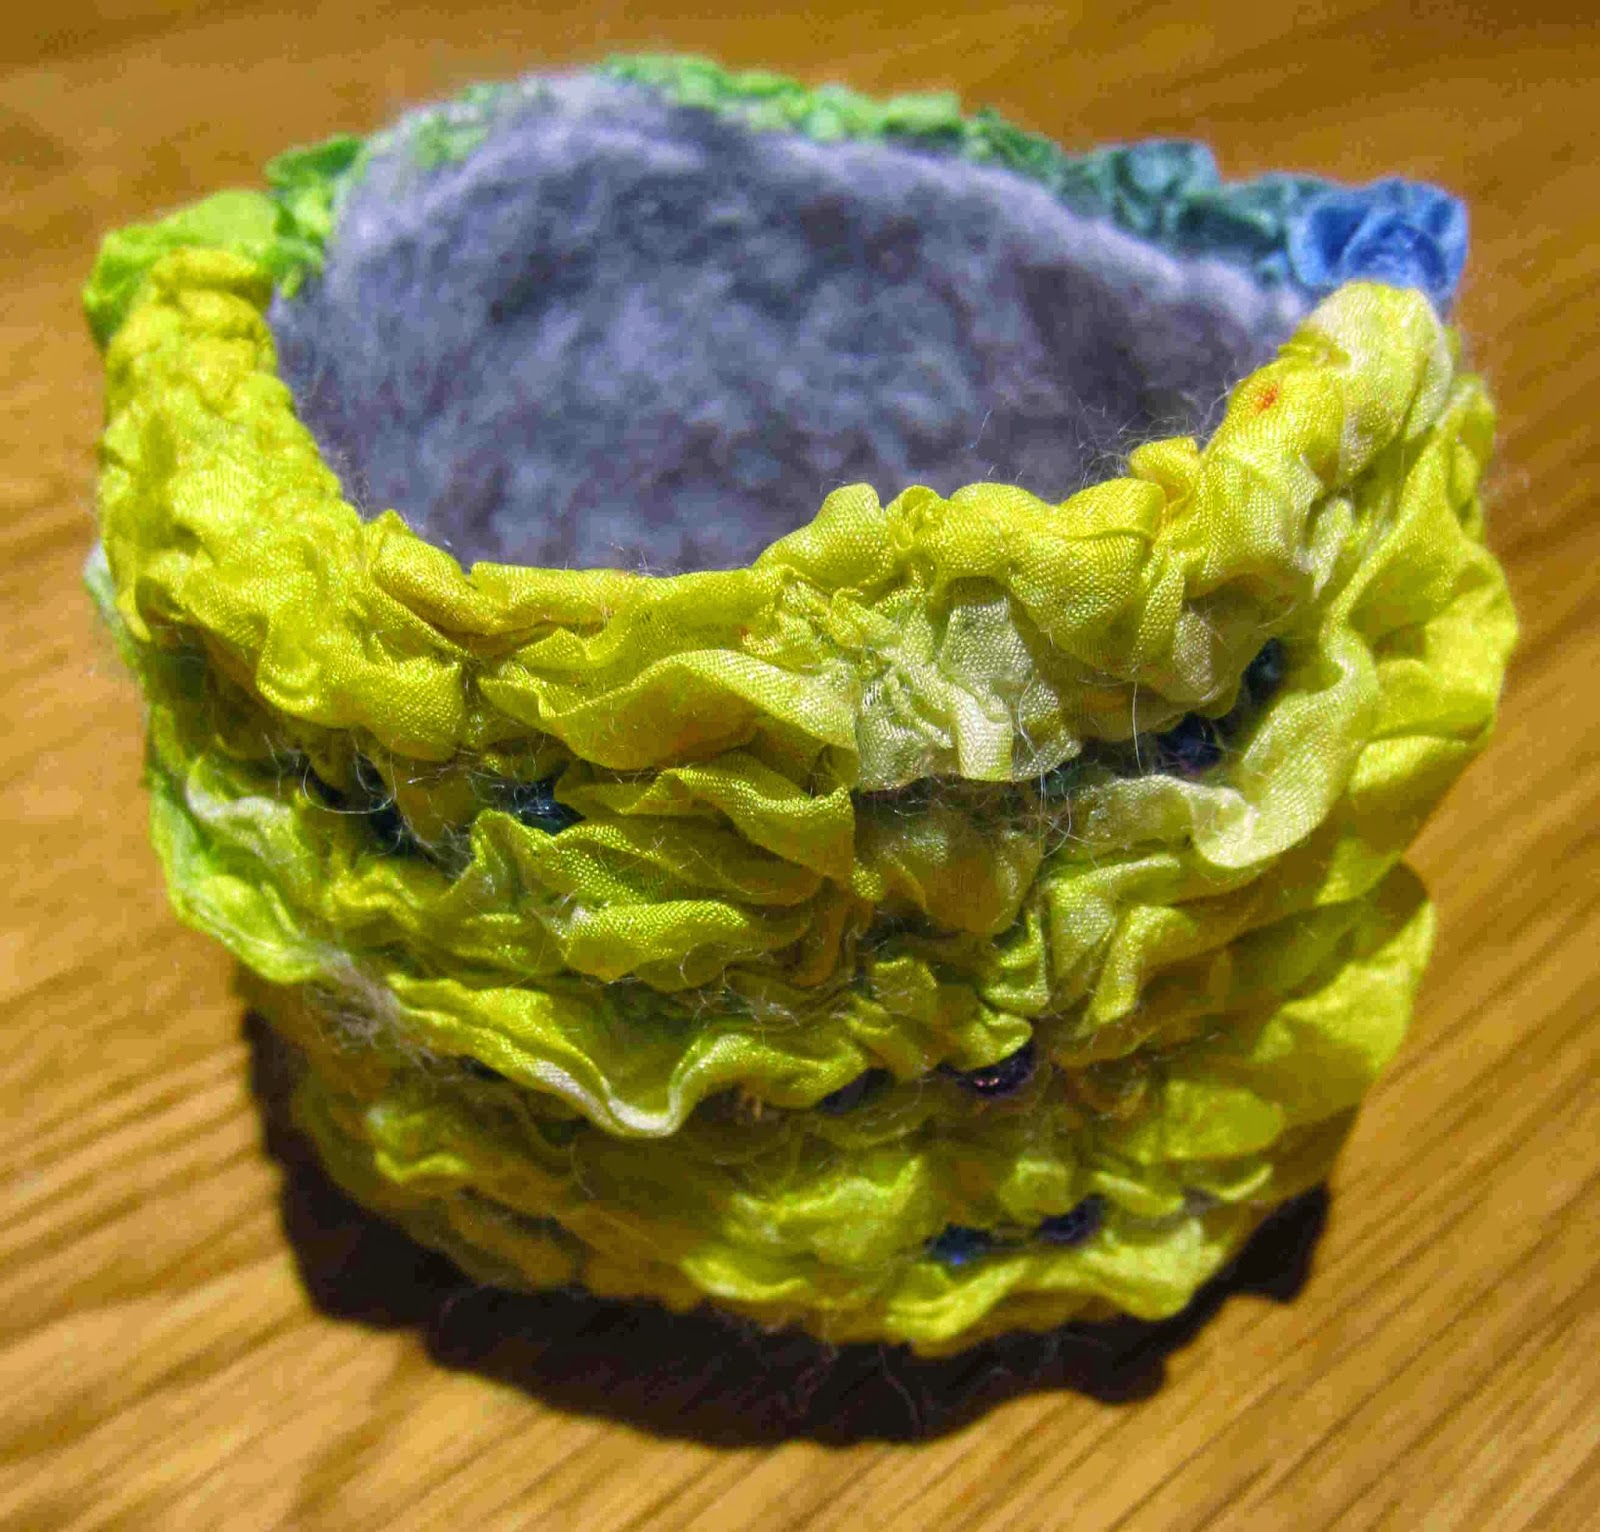
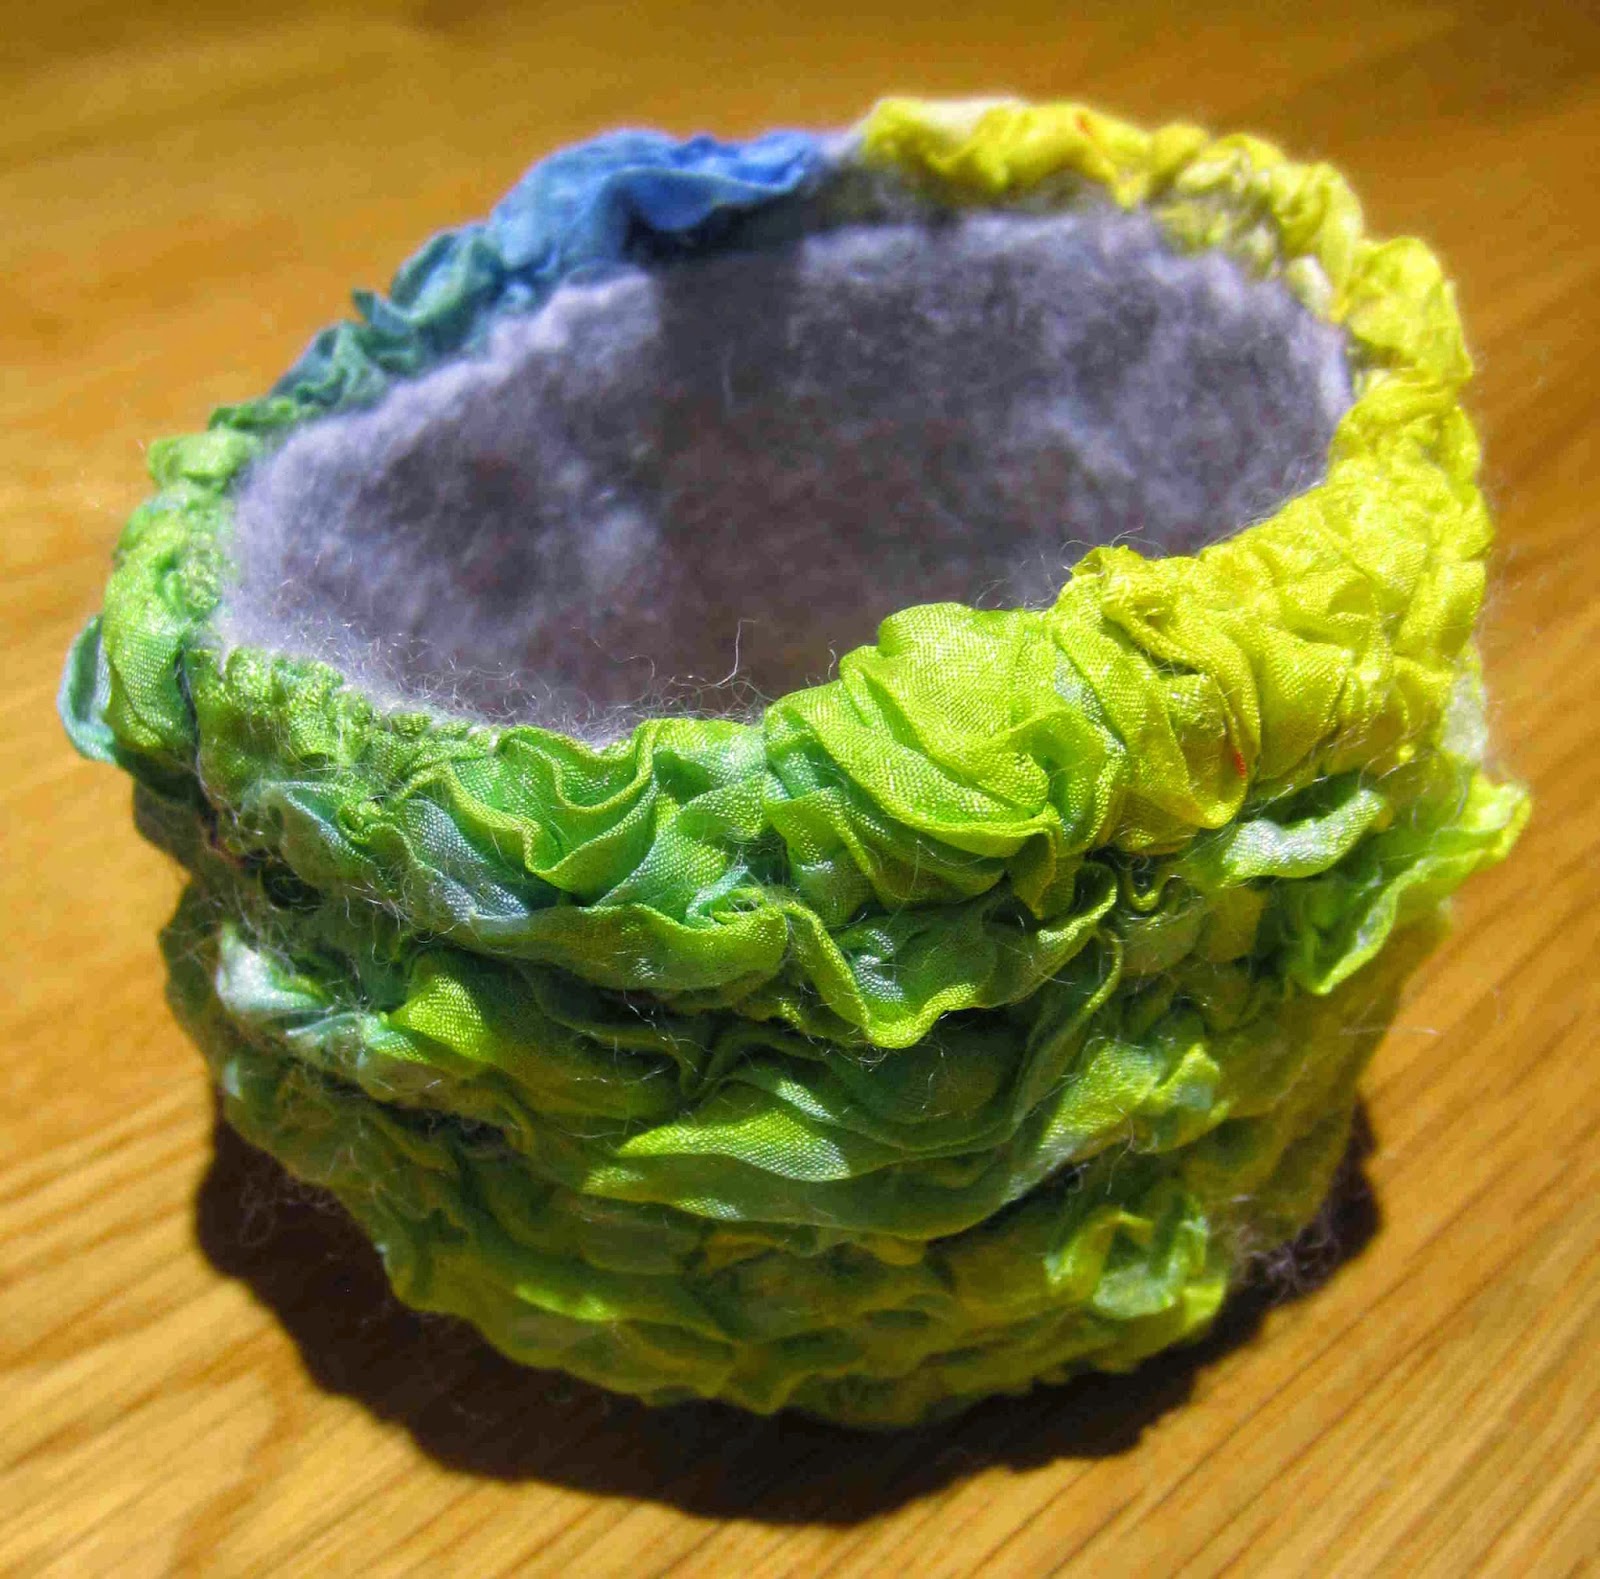
It was a piece of shibori dyed silk that kept all the lovely pleats after removing the stitching. I was going to felt it but couldn’t bear to lose all the beautiful creases so it became an experiment in trying to maintain shibori folds while felting…

This is what it looked like after felting:

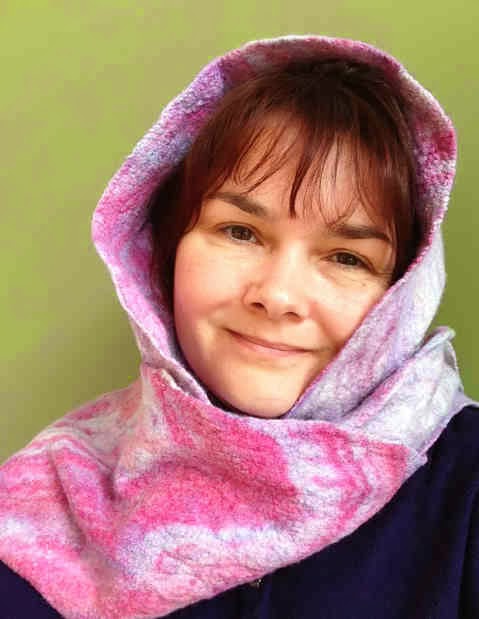
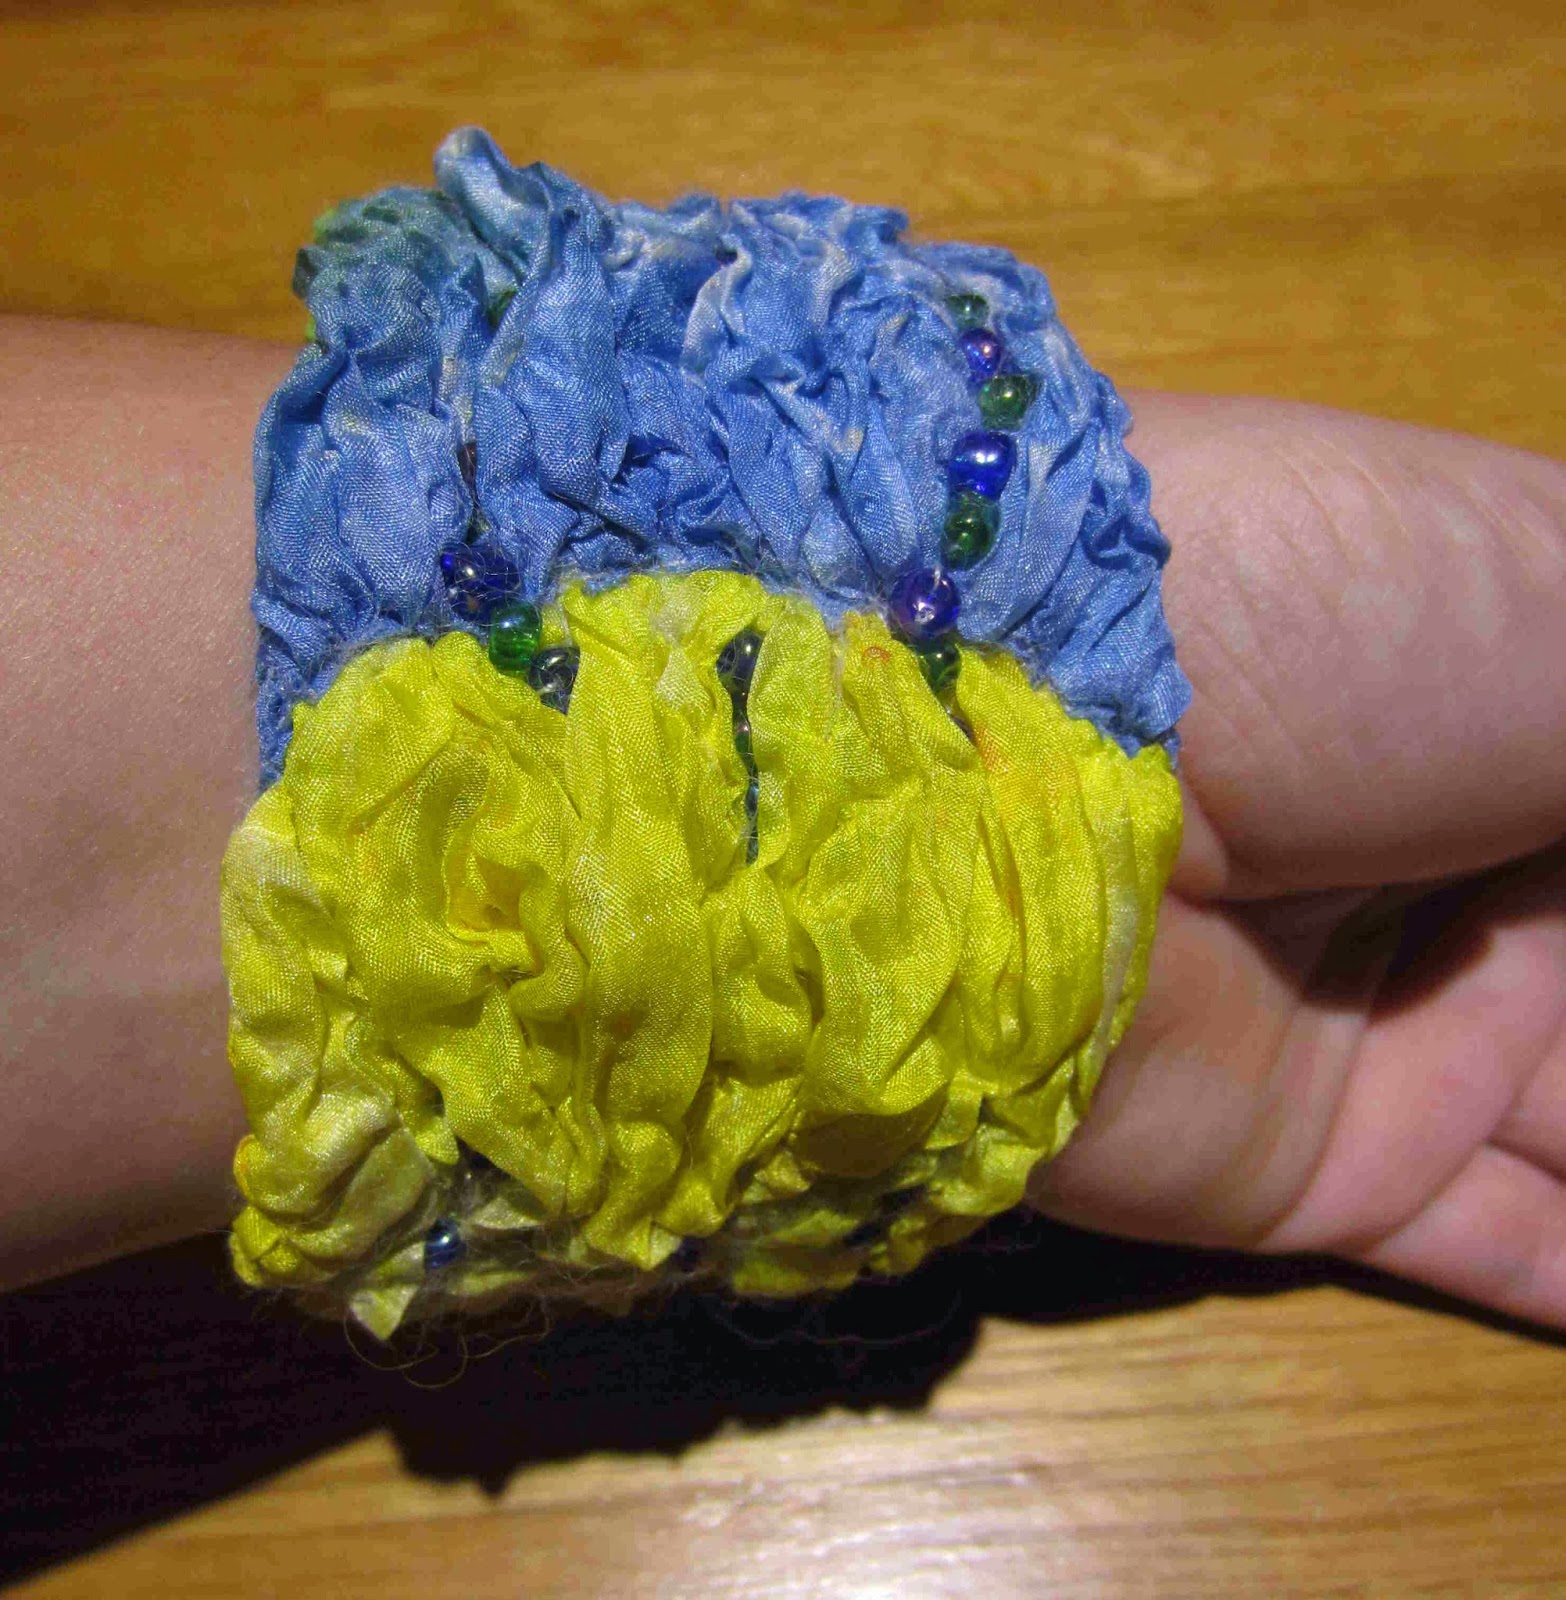
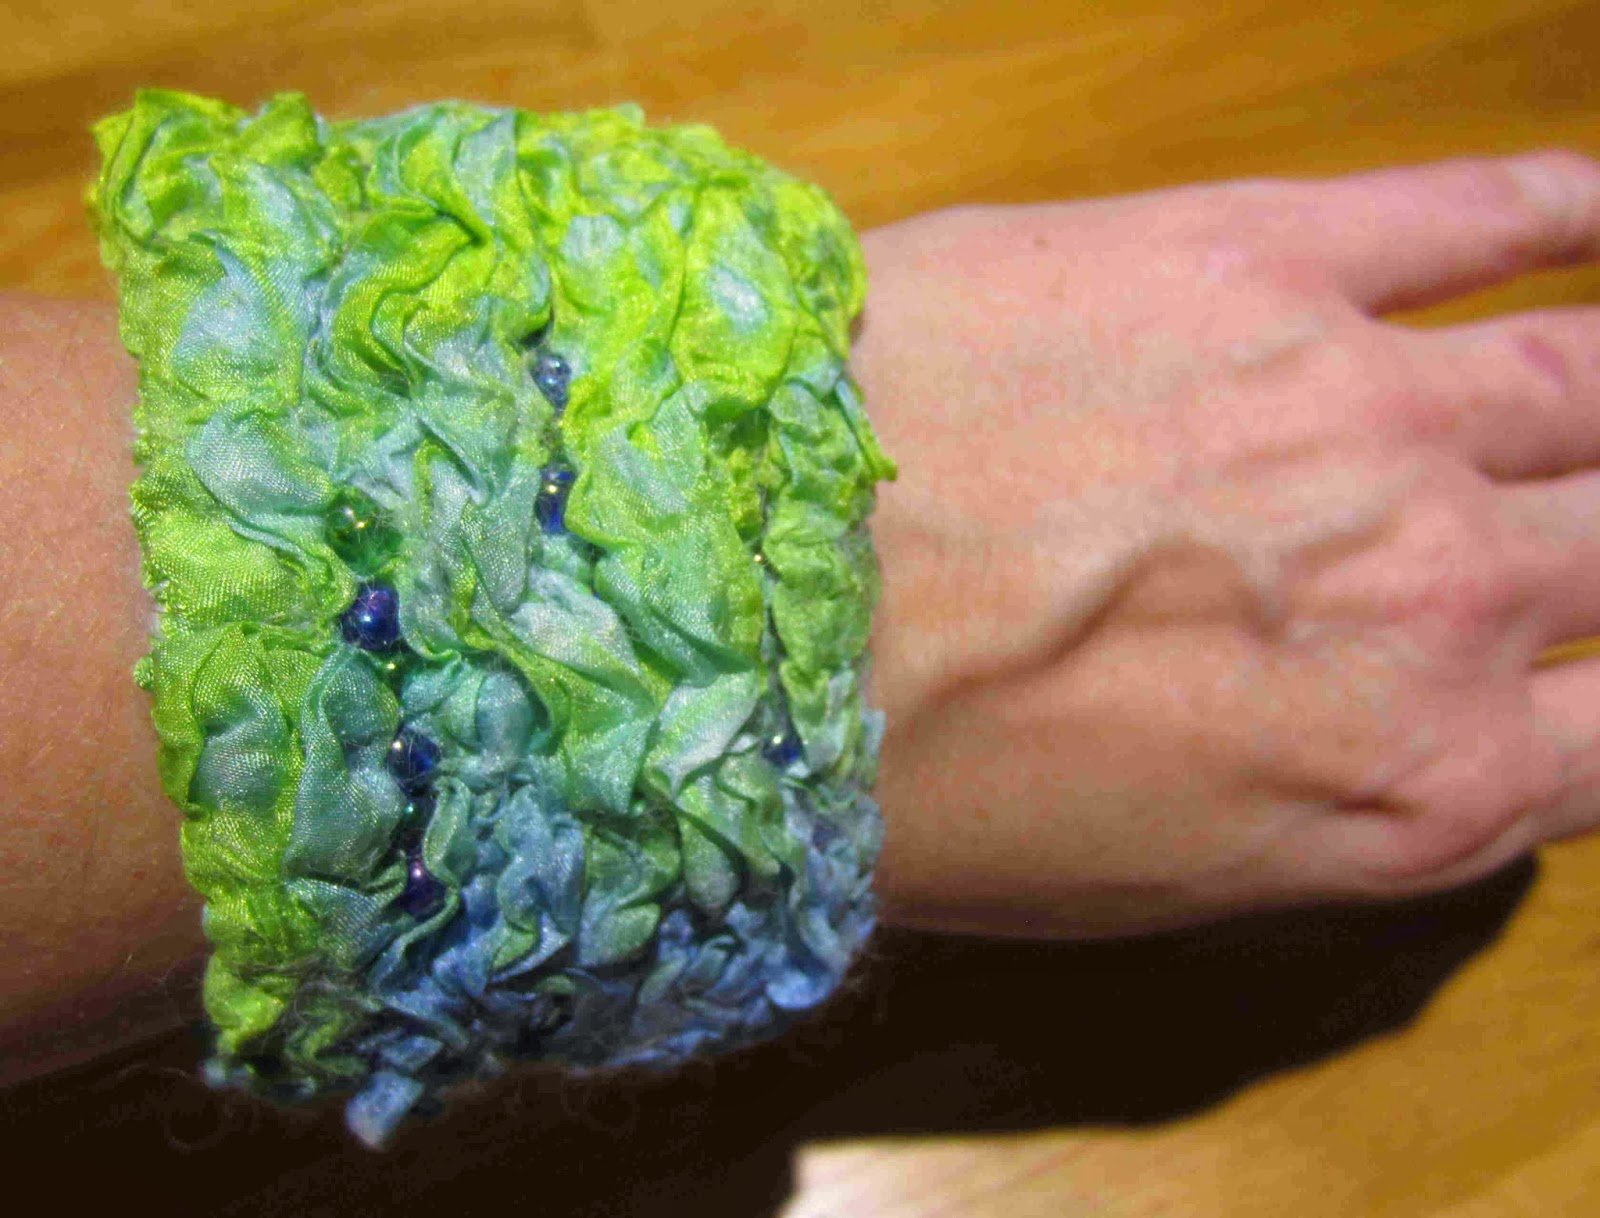
Too narrow to be used as a book cover but just about the right length for a cuff / bracelet. After some cutting, stitching, addition of beads and a bit more felting it is finished:

This piece will be on sale at Unravel  in Farmham this weekend, if you are planning on attending this festival a few of my pieces will be on the West Surrey Spinners Weavers and Dyers stand, do come and say hello! Click here if you have no idea what I am talking about….

Completer Finisher

Have you ever done one of those personality tests? Myers-Briggs, Insights and others? I have completed more of these things than I care to remember but one of the earliest ones labelled me a “completer-finisher”, apparently I am driven to complete tasks which is probably fairly accurate. I get anxious if there’s a deadline I can’t comfortably reach ahead of schedule. This is probably why I am feeling a sense of accomplishment and inner calm today. I have finished 3 projects in the last few of days…

Reversible hooded scarf, this has been a lot of fun to make and now I have worked out an improved pattern I will definitely be making more of these.

A textured laminate piece for my C&G course. This piece I have titled, “Eye of the Storm” as it was based on da Vinci’s “Deluge” drawings. I am still toying with the idea of using fibre etch to reveal some of the coloured cords and adding some embroidery so maybe this one isn’t quite finished yet….?

And my Q1 challenge piece, which was inspired by this painting by Jackson Pollock.

I still can’t decide which way is “up” for this piece…

Samples Galore!

I like making samples, small swatches of felt where I can let my creativity and curiosity run wild safe in the knowledge that if it doesn’t work I haven’t wasted a heap of money and time on something that is only fit for being deconstructed into something else or worse, the bin.

Most of these samples were made for a C&G course module where I have to make a scarf to meet someone else’s requirements, but I confess, some I made just out of curiosity and don’t really have anything to do with the design brief ;o)

Rainbow dyed ponge 5 silk laminated to merino 

Strips of rainbow dyed ponge 5 silk laid in a grid pattern on merino.

Rainbow dyed ponge 5 silk laminated to merino with a grid of rainbow dyed prefelt laid over the top.

Reverse of the piece above – the grid of prefelt on the front has created a relief effect on the back.
Using wool yarns and pencil roving for decoration. I love how straight lines become wiggly when you felt them!

Rainbow dyed muslin laminated to merino.
Rainbow dyed muslin laminated to merino with pencil roving for decoration.

Rainbow dyed silk chiffon laminated to merino. 

Using rainbow dyed cotton scrim as decoration.

White tussah silk top carded with 2 shades of blue merino

Rainbow dyed silk hanky used as decoration. This one was my favourite, it’s not very clear from this photo but the pale green silk has a beautiful sheen and slightly bumpy texture.
Strip of sari silk used as decoration.

Rainbow dyed Wensleydale locks felted into a merino base.

That was quite a productive afternoon :o)

In case you are wondering my friend chose the green silk hanky on a dark purple felt with red/purple dyed ponge 5 silk on the reverse. I hope to share photos of the completed snood next week…

Shibori Experiments

Following some very helpful suggestions from the ladies at the Felting and Fibre Studio Forum I have felted the original piece of shibori dyed silk and created a couple more samples, trying out alternative methods in an effort to maintain the beautiful folds of the bound fabric.

Felting the original shibori piece
I laid a very fine layer of merino all over the silk and lightly sprayed it with soapy water. Then folded the fabric concertina style from one end, trapping the wool between the layers of fabric.

 Once folded up, it was secured with elastic bands every 4 or 5 cm and felted with warm soapy water.

This was the result once the bands had been removed and the piece stretched at little. It is a similar width to the original silk but the length is much shorter, it was 50 cm long and is now just 8 cm. I think it will make a nice cuff / bracelet with some beads nestling in the folds.

Creating a laminate for shibori

For this sample I felted a piece of silk to 2 fine layers of merino and fulled to achieve rippling of the silk. Then it was stitched and the threads pulled ready for shibori dyeing.

It was dyed with Procion MX midnight blue – as you can see the silk has accepted the dye much better than the wool.

It was allowed to dry before removing the stitches and stretching out. It has a springy nature; it can be pulled almost flat but always springs back to this position.

Adding wool fibre while drawing the threads tight
On a third sample, I stitched the silk as normal but while I was drawing the threads tight I poked wisps of merino into the folds and felted the piece before dyeing with the piece above. This is what it looked like after it had dried and the stitches were removed. It looks remarkably similar to the first piece with very sharp folds in the silk.

Shibori Conundrum

Last weekend I dyed a piece of stitched shibori silk from my craft group, to be honest I am more enamoured with the texture of the silk than the dye effect. I would really like to felt this piece so I can use it as a book cover but I am sure the texture will disappear as soon as I wet it out.

Do any of you clever people have any ideas how I might laminate this fabric without losing the texture?

I am also open to other uses for this piece of silk, it doesn’t have to be book cover….?

Linked to nina-marie

Fiber Etch in felt work

Fiber Etch has been around for at least 15 years but I only discovered it a few weeks ago when I came across a second hand copy of this book:

The book was published in 2000 but a lot of the garments look like they were made in the 80’s, big square jackets and more geometric shapes thank I could shake a stick at. It was quite entertaining just to look at the photos but I found the book quite predictable in the ideas it presented. Almost none of it could easily be translated to felt or nuno/laminates which is where I thought I would try to use it. The most useful part of this book is a table listing which threads would or would not dissolve when Fiber Etch is applied. Almost everything else you could find in the instructions that come with the Fiber Etch product.

Anyway, enough with the book bashing….

For those not familiar with this product the principle of Fibre Etch is that it is a gel that will degrade any plant based fabrics (i.e. cottons, rayon, linens etc.) but will not etch animal based fabrics such as wool and silk. I had ideas of using this with cotton muslin / scrim – felt laminates; using the Fiber Etch to erode areas of the cotton to reveal the differently coloured wool beneath.

My initial attempt was on some pieces that had already been laminated, this is what they looked like before applying the fibre etch, the top one is muslin, the bottom one scrim:

And after the fibre etch had been washed out, it’s not easy to see where it was applied!

Here is a close up of the scrim:

It’s a little easier to see the etched areas on the muslin:

And some more close-ups, you can see how the edges of the cotton are fraying but I expect they will not fray much further as the wools is gripping it well. I think the frayed edges are attractive in a rustic sort of way but I’m not sure what buyers would make of garments that looked like this?

These aren’t exactly the mind-blowing, artistic revelation I had envisioned but it did what it said it would and removed (most of) the cotton where I had applied it:

Next I tried using the Fiber Etch before laying out the wool, once the eroded areas has been washed away the fabric was tricky to handle, this is what it looked like after applying the Fiber Etch and ironing. It is peculiar stuff as the fabric becomes brittle bits start breaking off before you can get to the sink…

And after rinsing under running water:

After felting:

Although the edges of the cotton were starting to fray after the Fiber Etch had been washed out, they became neatly buried in the wool during felting.

I used cotton muslin for this and found it difficult to handle when wet and full of holes, I expect cotton scrim would be even harder to handle.

I think applying the Fibre Etch to the laminated fabrics was the most practical and would allow for shapes entire shapes such as squares and circles to be drawn with out the centre falling out.

Have you used Fiber Etch with feling? I would love to hear about what you did and how you used it.

new organza laminates

I was mooching aimlessly in Ebay after my win on the blue chiffon (always a dangerous and expensive thing to do) and came across some interesting looking organzas.

It’s not easy to see in these photos but the piece on the left has a shimmery green lustre to it and the piece on the right is a very shiny metallic silver.

I made a couple of samples to see how well they would felt. While they both felted successfully I think the silver one resulted in the prettiest finish, it has the most potential as a laminate for a small clutch bag or as nuno accents in a larger piece.

Since I was felting small samples I included the piece of blue chiffon that I painted with discharge paste last week, as expected, this felted very easily. I’m still feeling good about that purchase 🙂

I am itching to turn it into a dozen different bags and maybe a tunic top but there are sooo many other things I must finish first, including a piece I want to submit to the Guild of Weavers Spinners and Dyers national exhibition, the deadline in only 4 weeks away and I have barely started on it…. I can’t really say too much about that yet but here is another textured piece I have just started assembling….

Laminating painted fabrics

I have been laminating the fabric painted and printed for my City and Guilds course. Most have been successful, the only one that really gave me trouble was the polyester, despite rolling for 30 min it still only attached in a few small areas. I’m not sure whether this will be seen as cheating or being innovative but after the third attempt I decided to try another tack; stitching to prefelt before felting.

This is what it looked like before felting:

And after:

These are the other printed and painted fabrics I laminated:
The organza was much more successful and I think the sheen on it is much prettier

Silk chiffon, this one resulted in the least puckering and the truest representation of the original design

Cotton muslin with carded top behind, this one has some lovely puckering that compliments the painted design:

Cotton scrim – I think the green merino has worked much better than the white as a backdrop for the monoprint.

This was the piece of cotton muslin with the glitter and 3D paints, the bronze 3D paint worked remarkably well but the glitter has lost some of its intensity during felting.

Experiments in fabric lamination – some finished pieces

Inspired by Ruth Lane’s stitching on her ammonites shells, I put the free motion embroidery foot on my machine and started stitching, these are the results…

I turned this piece into a tablet case with some silver and blue embroidery.

This is the back, I can’t decide how to hold the flap closed, I’m not keen on velcro and don’t want to use press studs or magnetic clasps for fear of damaging the tablet. I’m leaning towards an elastic strap over the top that the flap will slide under but I’m open to suggestions?

 The foil flowers became an iphone case with a cute little flower-shaped button to hold it closed on the back.

I also got around to sewing up some flexi-frame pouches.

This is a really interesting technique I learned from the Sew Sister stand at Woolfest this year. They recommend machine embroidery but I mostly used hand embroidery (chain stitch) and needle felting for these cases. The method involves stitching a piece of fabric to a prefelt base and then felting it in the washing machine. As the prefelt shrinks the areas that have been stitched remain flat but the areas in between become rippled, resulting in a very thick, padded fabric.

Experiments in fabric lamination – take 2

Feeling a bit disappointed with the results from various metallic and hollographic papers I thought I would give fusible film a try. This will require a slightly different approach, the shapes will need to be cut out of the film before applying to the organza. I had expected to be able to fuse the film directly to the organza without the need for acrylic medium but that did not work. The film only limply attached to the organza, peeling away as soon as the organza was moved.

Acrylic medium to the rescue! Painting a thin layer of medium onto the fusible film and the pressing to the organza was successful. The fusible film was firmly attached, I gave it a quick iron before felting (literally less than 10 seconds on a medium heat).

As this had worked so well I thought I would give the aluminium foil another try, cutting out shapes, painting on the medium and pressing the shapes onto the organza. So far so good…. I’m afraid I did not think to take any pictures at this stage – sorry, but here are some after felting each piece.

This is fusible film, I laid out 2 colours, green and purple in a grid, some folds have appeared in the film where the wool has shrunk dragging the organza and film with it. As you would probably expect the felt has not attached where the film lies between the wool and the organza.


I love the metallic, multicoloured effect of the film. It is almost holographic in the way it changes colour as the direction of light changes.

I also had a play with aluminium foil.

The foil has rippled where the wool shrank. Laying the laminate with foil beneath the organza means the foil takes on the hue of the organza, in this case a pale blue.

I also experimented with using my die-cutter to produce more elaborate shapes, this sort of worked but the shapes are a little distorted from felting.

In this picture you can see how the foil prevents the felt from attaching to the organza where the foil has lifted in the lower right corner.

Finally, I tried one piece with the foil uppermost. This worked surprisingly well but I don’t expect it will be as durable, although the foil feels well attached now I can easily see it being torn in the bottom of a handbag if I made this felt into a gadget case.


I plan to follow Ruth Lane’s lead and embroider some of these pieces. Her machine embroidery of the laminated fossil shells really lifted the shapes and made them very special.